
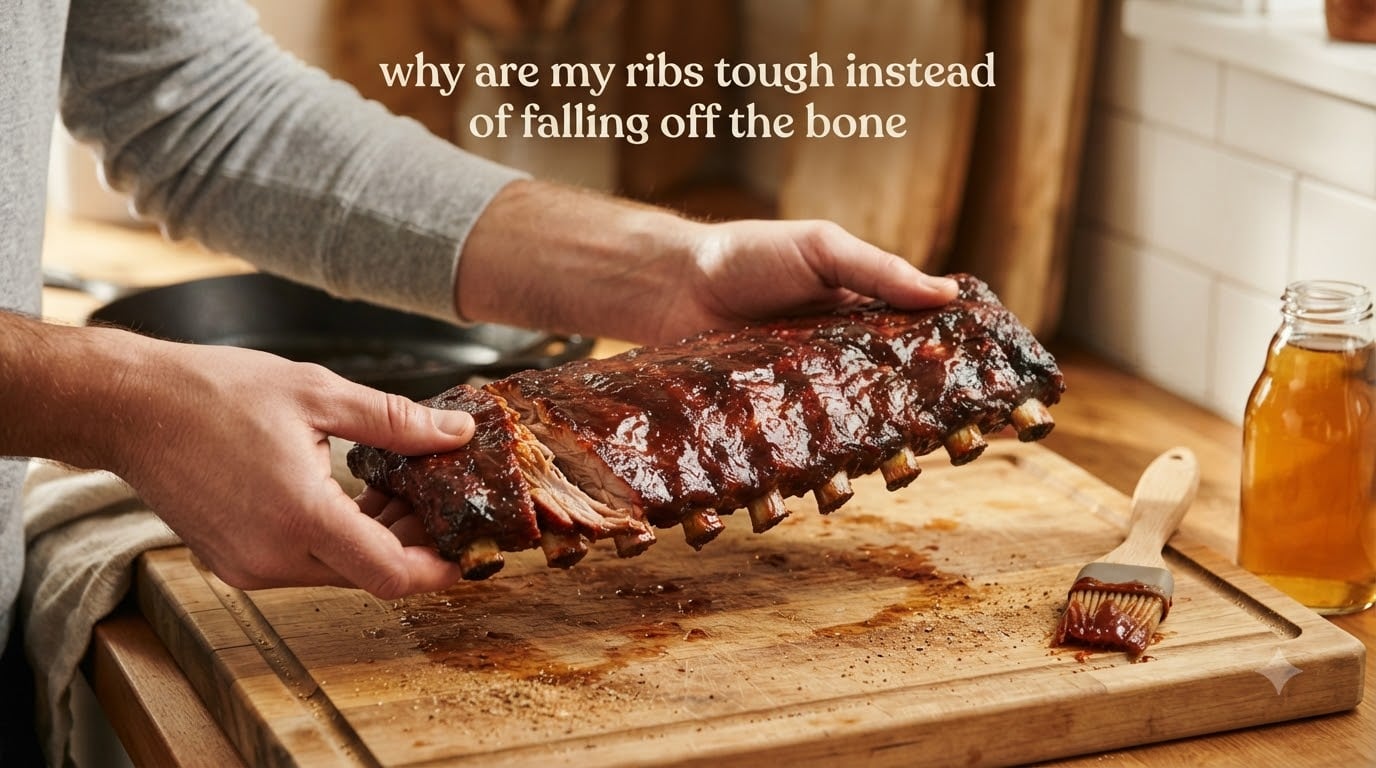
Your ribs are tough instead of falling off the bone because the collagen in the connective tissue did not have enough time or low enough heat to convert into gelatin. Rib meat is loaded with tough collagen fibers, and those fibers only soften when the internal temperature sits between 195 and 205°F for an extended period. If your ribs came out chewy, dry, or rubbery, the cook was either too short, too hot, or both.
I have ruined more racks of ribs than I want to admit over the last decade, and every single failure taught me something about how ribs actually become tender. In this guide, I will walk you through the science behind tough ribs, the seven most common mistakes that cause them, the exact temperatures and times that work, and how to rescue a rack that is already tough. By the end, you will know exactly how to cook ribs that pull apart cleanly with a gentle tug.
This is the article I wish I had when I first started smoking ribs on a backyard offset. Let us save you a few racks.
Table of Contents
Why Ribs Become Tough: The Collagen Science
Tough ribs are a collagen problem, not a seasoning problem. Ribs contain a thick band of connective tissue running between the meat and the bone, and that tissue is mostly collagen. When you apply heat, three things have to happen for ribs to become tender: collagen must convert to gelatin, fat must render, and muscle fibers must relax without squeezing out all the moisture.
Collagen starts breaking down at around 160°F, but the conversion accelerates between 195°F and 205°F. This range is the sweet spot for tender ribs, and it is why every pitmaster on earth tells you to cook low and slow. At 225°F smoker temperature, it takes roughly five to seven hours for the internal temperature of a full rack to climb from 40°F (fridge temp) to 205°F. That is a long time, and it is the reason rushed ribs always come out chewy.
The second piece of the puzzle is moisture. Collagen is hydrophilic, meaning it holds water. When collagen breaks down into gelatin, that water stays trapped in the structure. If you cook too hot or too fast, the muscle fibers contract and squeeze that water out before the collagen has time to melt. The result is dry, tough meat that pulls away from the bone in leathery strips rather than soft shreds.
Elastin is the other troublemaker. Elastin is a separate connective tissue that does not break down no matter how long you cook. Some cuts, especially tougher spare ribs, contain more elastin than baby backs. You can tenderize elastin mechanically (by breaking it up with a marinade or by scoring the surface), but you cannot melt it with heat. This is why some ribs will always be a little chewier than others regardless of technique.
7 Common Mistakes That Cause Tough Ribs
After a decade of cooking and reading forum threads on smokingmeatforums.com, I have narrowed tough ribs down to seven recurring mistakes. If your last rack was a disaster, at least one of these is probably the culprit.
Mistake 1: Cooking at the wrong temperature. Cranking the grill or smoker to 300°F or higher might speed things up, but it also tightens the muscle fibers before collagen can render. Stick to 225 to 250°F for the entire cook. Anything above 275°F is asking for tough meat.
Mistake 2: Not cooking long enough. Time is the secret ingredient in ribs. A three-hour smoke will give you bark and smoke flavor, but the inside will be raw and chewy. Plan on a minimum of five hours for baby backs and six hours for spare ribs at 225°F.
Mistake 3: Skipping the wrap. The Texas crutch (wrapping in foil or butcher paper partway through the cook) is what most competition teams rely on to push ribs past the stall and through the final tenderizing phase. If you never wrap, you are forcing collagen to break down only with smoke and dry heat, which takes far longer and produces inconsistent results.
Mistake 4: Pulling at the wrong internal temperature. Many beginners pull ribs at 165°F because that is when pork is “safe.” Pork is safe at 145°F, but ribs are not done until the internal temperature reaches 195 to 205°F. Anything below 195°F means the collagen has not finished converting to gelatin.
Mistake 5: Leaving the membrane on. The membrane on the bone side of ribs is tough, papery, and does not break down during cooking. It acts like a shield that prevents smoke and rub from reaching the meat underneath. Remove it before you season, or you are cooking in a casing.
Mistake 6: Not resting the ribs. Cutting into ribs straight off the heat is a fast track to dry meat. Carryover cooking raises the internal temperature another 5 to 10°F during rest, and the juices need time to redistribute. Rest for 10 to 15 minutes minimum, loosely tented with foil.
Mistake 7: Using the wrong wood or too much smoke. Heavy, resinous woods like pine or untreated softwoods will make ribs taste like a campfire. Sticking to fruit woods (apple, cherry), oak, or hickory in moderation gives you smoke flavor without bitterness. Over-smoking can also leave a creosote coating that tastes harsh and can mask the natural pork flavor.
Temperature and Time Guidelines for Tender Ribs
The two variables you control are pit temperature and total cook time. Here is the cheat sheet I use for every rack, regardless of whether I am smoking, oven-baking, or grilling indirectly.
Baby back ribs at 225°F: 5 to 6 hours total, pulling at 195 to 203°F internal. Baby backs are leaner and smaller, so they cook faster but dry out quicker if you overshoot the window.
Spare ribs at 225°F: 6 to 7 hours total, pulling at 200 to 205°F internal. Spare ribs have more fat and connective tissue, which means more flavor and more forgiveness on timing, but they need extra time to render fully.
St. Louis-style ribs at 250°F: 5 to 6 hours total, pulling at 200 to 205°F internal. Trimming the spare rib into a St. Louis cut gives you a more uniform rack that absorbs heat evenly, so you can run a slightly hotter pit.
Beef back ribs at 250 to 275°F: 6 to 8 hours total, pulling at 203 to 210°F internal. Beef ribs have more connective tissue than pork, so they need higher heat and longer time to break down.
The single biggest rule: pull by internal temperature, not by the clock. Every smoker runs different, and ambient temperature, wind, humidity, and the starting temp of the meat all affect the cook. A leave-in probe thermometer is the only reliable way to know when collagen has finished converting.
The 3-2-1 Method Explained
The 3-2-1 method is the most popular ribs framework on the internet, and for good reason. It is reliable, repeatable, and produces fall-off-the-bone results every single time. The numbers refer to hours, not temperature.
Step 1: Smoke unwrapped for 3 hours. Season the ribs with rub, place them on the grate at 225°F, and let them smoke with no wrap. During this phase, the bark forms, fat renders on the surface, and the meat absorbs smoke flavor. Keep the smoke thin and blue rather than thick and white.
Step 2: Wrap tightly for 2 hours. After 3 hours, pull the ribs and wrap each rack individually in heavy-duty foil with a splash of apple juice, butter, brown sugar, or honey. The wrap traps steam and braises the meat in its own juices. This is when most of the collagen conversion happens.
Step 3: Unwrap and sauce for 1 hour. After 2 hours in the wrap, open the foil, brush on sauce if you want it, and return the rack to the grate for one final hour to set the sauce and firm up the bark. Internal temperature should hit 200 to 205°F during this phase.
The total cook is 6 hours, which lines up perfectly with spare ribs at 225°F. For baby backs, I usually shorten the third phase to 30 to 45 minutes since the meat is naturally smaller and more delicate.
Cut-Specific Troubleshooting
Not all ribs behave the same way in the cooker. If your last batch was tough, the cut might be part of the problem.
Baby back ribs come from the top of the ribcage near the loin. They are lean, tender, and curved, with meat that sits on top of the bones rather than between them. Because they have less connective tissue, baby backs cook faster and tolerate higher heat more gracefully. If your baby backs were tough, you probably undercooked them rather than overcooked them.
Spare ribs come from the belly side of the ribcage and include the rib tips, sternum bone, and a flap of meat called the skirt. They are fattier, meatier, and tougher than baby backs. Spare ribs need lower temperatures and longer times to break down. If your spares were tough, you almost certainly pulled them too early.
St. Louis-style ribs are spare ribs trimmed into a rectangular shape by removing the rib tips and skirt. They cook more evenly than untrimmed spares and look better on a platter. Treat them like spares but expect slightly shorter cook times because the extra bits are gone.
Beef back ribs are huge, meaty, and packed with connective tissue. They behave more like a brisket than a pork rib. If you cooked them at pork-rib temperatures for pork-rib times, they will be inedible. Push the heat to 250 to 275°F and plan on 6 to 8 hours minimum.
How to Test for Doneness (3 Methods)
Doneness is about feel, not time. Here are three reliable ways to tell when ribs are ready to come off the heat.
Test 1: The bend test. Pick up the rack with tongs at the center and let the ends droop. If the rack bends almost 90 degrees and the surface of the meat cracks slightly, the ribs are done. If the rack stays stiff and flat, give it more time.
Test 2: The bone pull test. Grab the topmost bone and twist gently. If the bone wiggles freely in the meat and starts to come loose, the ribs are ready. If the bone feels locked in place, the connective tissue has not finished breaking down.
Test 3: The thermometer check. Insert an instant-read thermometer into the thickest part of the meat between two bones. You are looking for 195 to 205°F. Anything below 195°F means collagen has not fully rendered.
The probe tender test is a fourth option used by competition pitmasters: the probe should slide into the meat with almost no resistance, like pushing a toothpick into room-temperature butter. If you feel significant resistance, keep cooking.
Quick Rescue Methods for Already-Tough Ribs
If you already pulled your ribs and they came out tough, do not throw them away. There are two reliable rescue methods that will salvage most racks.
Method 1: The rewrap. Wrap each rack back up in heavy-duty foil with a half cup of apple juice or beef broth, then return to a 250°F smoker or oven for another 60 to 90 minutes. The added liquid creates steam that helps the remaining collagen convert. Check every 30 minutes until they probe tender.
Method 2: The braise. Place the ribs in a deep oven-safe pan, add a cup of liquid (broth, beer, or apple juice), cover tightly with foil, and cook at 275°F for 1 to 2 hours. This works especially well for ribs that were overcooked and dry, since the braising liquid reintroduces moisture.
Method 3: Chop and sauce. If you cannot save the texture, save the flavor. Chop the ribs into bite-sized pieces, simmer them in barbecue sauce on the stovetop for 20 minutes, and serve them as rib bites or sliders. The sauce masks the chewiness and nobody will know they were a rescue.
One thing to avoid: do not just cook tougher ribs for another hour on the smoker without wrapping. You will dry them out further. Moisture is the missing ingredient, and you have to add it back somehow.
Altitude matters too, and most forums skip this entirely. If you live above 3,000 feet, water boils at a lower temperature, which means your smoker runs cooler than the dial says and ribs take longer to tenderize. Add 30 to 60 minutes to your expected cook time and consider bumping pit temperature to 250°F to maintain heat transfer.
Frequently Asked Questions
Why are my ribs tough and chewy?
Ribs turn out tough and chewy when the collagen in the connective tissue has not fully broken down into gelatin. This happens when the cook is too short, the temperature is too high, or you skip the wrapping phase. Aim for an internal temperature of 195 to 205°F for tender ribs.
How do you fix tough ribs after cooking?
Wrap the ribs back in foil with a splash of apple juice or broth and return them to a 250F smoker or oven for 60 to 90 minutes. The steam and moisture help finish the collagen breakdown. You can also chop the ribs and simmer them in barbecue sauce for rib bites or sliders.
What temperature should ribs be cooked to internally?
Pull ribs when the internal temperature reaches 195 to 205F. This is the range where collagen fully converts to gelatin and the meat becomes tender. Pulling at 165F leaves the ribs undercooked and chewy.
How long does it take for ribs to become tender?
Baby back ribs take 5 to 6 hours at 225F, spare ribs take 6 to 7 hours, and St. Louis-style ribs take 5 to 6 hours at 250F. Beef ribs need 6 to 8 hours at 250 to 275F. Always cook by internal temperature rather than the clock.
Should ribs be wrapped in foil during cooking?
Yes, wrapping ribs in foil or butcher paper partway through the cook speeds up tenderizing and prevents drying out. The wrap traps steam and braises the meat, which is when most of the collagen conversion happens. The 3-2-1 method wraps ribs during the middle 2 hours.
Can you overcook ribs?
Yes, ribs can be overcooked if held at 205F for too long. Overcooked ribs fall apart into mush with no texture, and the meat dries out despite the high fat content. Pull ribs as soon as they probe tender between 195 and 205F.
Conclusion
Tough ribs are almost always a timing or temperature problem, not a recipe problem. The collagen in your ribs needs low, steady heat and enough time to convert into gelatin, which is what gives you that signature fall-off-the-bone texture. Cook at 225 to 250°F, wrap partway through, and pull at 195 to 205°F internal. If your last rack came out chewy, those three changes alone will fix it next time.
Grab a leave-in probe thermometer, plan for a six-hour cook, and trust the process. The first rack of tender ribs you pull off your smoker will make every ruined batch worth it. If you want a deeper dive into the science, AmazingRibs.com has excellent breakdowns of collagen conversion, and the smokingmeatforums.com community is full of pitmasters happy to troubleshoot specific setups.