
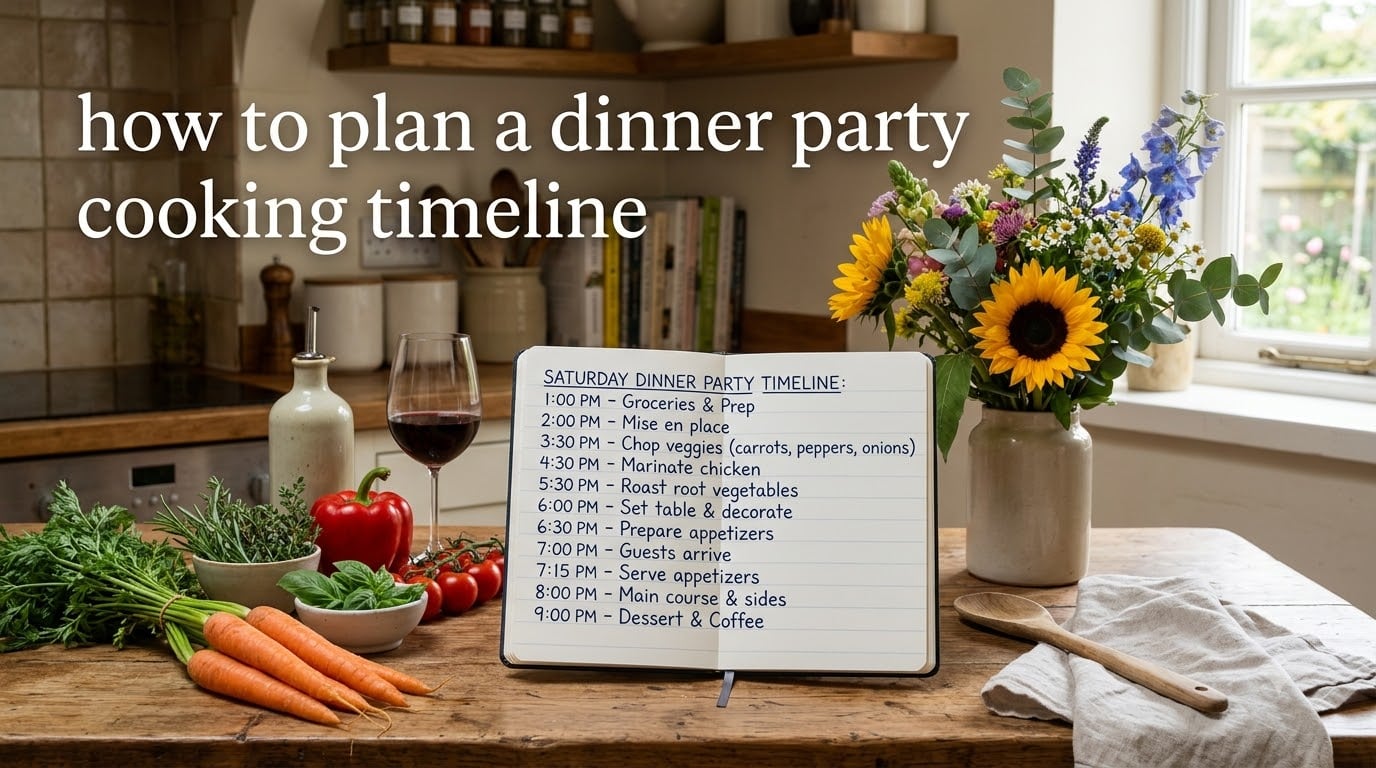
You want to host people you love, in a kitchen that is honestly not that big, and feed them something that tastes like you meant it. The trouble is that the difference between a relaxed dinner party and a frazzled one almost always comes down to the same thing: a written plan for what to cook and when. That plan is your dinner party cooking timeline, and this guide will teach you how to build one from scratch.
After running the pass at home for a decade and watching hundreds of first-time hosts panic about the same things, our team has compressed the whole process into a single page. By the end you will have a copy-paste-ready hour-by-hour dinner party cooking schedule, a day-before prep checklist, and a rescue plan for when something slips.
Table of Contents
The 6-Step Dinner Party Cooking Timeline (Quick Summary)
If you only have a minute, here is the entire dinner party cooking timeline in six steps. Read this, save it, and you can write your own schedule in under an hour.
- Lock in your serving time and write it at the top of a blank page. Everything else hangs off this number.
- Pick recipes that fit your kitchen, not just your taste. One oven means no two roast dishes at the same temperature.
- Read every recipe end to end. Mark the total time, the active time, and the rest time in the margin.
- Work backwards from serving time. Plot each dish, its cook, and its rest in reverse so everything lands on the plate together.
- Build in host time. Reserve at least 45 minutes for a shower, set-up, and reset before guests arrive.
- Stress-test it once. Mentally walk the timeline from start to finish, then add 30 minutes of buffer for the unexpected.
What Is a Dinner Party Cooking Timeline (and Why It Works)
A dinner party cooking timeline is a written schedule that lists every cooking task with its start and end time, working backwards from the moment you want to serve dinner, so every dish hits the table hot, rested, or properly chilled at the same moment.
Think of it as choreography for the kitchen. Without one, you end up doing what most first-timers do: scrambling between the stove and the oven while guests sip drinks in the next room, hoping everything finishes within ten minutes of each other. With one, the timeline becomes a checklist you tick off, and you get to actually be at your own party.
The reason timelines work is simple. Most kitchen disasters are timing disasters. A chicken that should rest is cut too soon. A sauce that should reduce is still thin. A dessert that should chill is still warm. A written schedule removes those decisions in advance, when you are calm, instead of mid-service when you are not.
How to Build Your Dinner Party Cooking Timeline Step by Step
The best way to plan a dinner party cooking timeline is in six deliberate steps, done the day before you start cooking and ideally three to seven days before the party itself. Take 30 minutes, grab a notebook, and walk through each step.
Step 1: Lock in your serving time and write it down
Decide what time you want plates on the table and write it at the top of a blank page in big letters. Most home cooks aim to start serving 30 to 45 minutes after the stated arrival time, so guests can have a drink and chat first.
A 7:00 PM serving time is the most common, but choose what suits your crowd. A 6:00 PM winter meal lets grandparents head home early. An 8:00 PM summer dinner works around the heat. The exact time matters less than committing to one and letting everything else flow backwards from it.
Step 2: Choose recipes that fit your kitchen
Pick one anchor dish you genuinely love to cook, then build around it with contrast: a hot main, a cool starter, a bright salad, a creamy or crisp element. The “one new dish” rule is gold for nervous hosts. If four of your five dishes are familiar and one is a stretch, you have built-in confidence.
Most importantly, match the menu to your equipment. One oven means no two dishes at different temperatures unless one can be held warm. Two stovetop burners means two active pans at once. A slow cooker, Instant Pot, or grill effectively gives you a third or fifth cooking surface for free. Use them.
Step 3: Read every recipe and note the total time, active time, and rest time
Sit down with each recipe and a pencil. In the margin, write three numbers: the total time from start to plate, the active time when you actually have to do something, and any rest or carryover time the dish needs before serving.
These three numbers are the building blocks of your timeline. Most beginners forget rest time, then panic when a roast needs to sit for 15 minutes before carving. Carryover cooking matters too: a steak pulled at 130 degrees Fahrenheit will coast to about 138 degrees as it rests, so plan to pull it earlier than the target.
Step 4: Work backwards from serving time
Take your serving time and start plotting in reverse. If the main needs 20 minutes of rest and 35 minutes of cook, it has to come out of the oven at 6:05 PM for a 7:00 PM service. If the side needs 10 minutes of cook and goes in at the same temperature as the main, it goes in 10 minutes after the main.
Write each dish on its own row. Include the start, the active minutes, the passive minutes, and the “ready to plate” time. You will see gaps, overlaps, and conflicts immediately, and that is the whole point.
Step 5: Build in host time and buffer
No dinner party cooking timeline is complete without host time. Reserve at least 45 minutes before the stated arrival time to shower, set the table, light the candles, and pour yourself a drink. Another 30 minutes of buffer scattered across the afternoon covers the unexpected: a longer preheat, a slower reduction, a guest arriving early.
If something has to be done at the exact moment a guest walks in, redesign the menu. The cook should be plated and resting when the doorbell rings, not mid-sauté.
Step 6: Test it once mentally before you commit
Read the entire timeline from top to bottom as if it were a script. Picture yourself at each time stamp. If any moment feels frantic or impossible, simplify the menu. There is no shame in scaling back. A three-course dinner of dishes you love will always beat a six-course dinner of stress.
What to Cook in Advance (Make-Ahead Strategy)
The single biggest stress reliever in any dinner party cooking timeline is doing less on the day itself. Here is what you can confidently make one to three days ahead without any loss of quality.
- Desserts: most cakes, tarts, and panna cottas improve overnight as flavors meld. Bake them 24 to 48 hours ahead and store covered.
- Vinaigrettes, marinades, and sauces: these almost always taste better the next day. Whisk them into a jar up to three days ahead.
- Stocks, braises, and stews: braised short ribs, coq au vin, and ragùs are famously better on day two as the flavors deepen.
- Chopped aromatics: dice onions, mince garlic, and slice shallots into airtight containers up to 24 hours ahead.
- Cocktail mixers: pitchers of sangria, negronis, or spritzes can be pre-mixed and chilled hours ahead. Just pour over ice when guests arrive.
- Charcuterie and cheese boards: assemble the platter, cover with plastic wrap, and refrigerate. Pull it out 20 minutes before serving so the cheese comes to room temperature.
- Roasted vegetables: most roasted roots and brassicas are fine at room temperature for 30 minutes and reheat beautifully in a hot oven for five minutes.
- Dessert sauces and compotes: caramel, chocolate sauce, and berry compote keep in the fridge for a week and actually improve with age.
A simple rule from restaurant kitchens: if a dish can be served at room temperature or rewarmed in under 10 minutes, it is a make-ahead candidate. Anything that must be served piping hot and freshly cooked (like a seared steak or a soufflé) belongs on the day-of schedule.
Day-Before Dinner Party Prep Checklist
The day before the party is where the cooking timeline pays off. Here is a checklist that covers 90% of what a successful host gets done in the 24 hours before service.
- Defrost anything frozen in the fridge overnight, not on the counter. This is the safest and most overlooked prep task.
- Marinate proteins for the next day, especially if a recipe calls for 4 hours or more.
- Chop all vegetables and aromatics, store them in labeled containers.
- Bake or assemble dessert, and let it cool completely before covering.
- Braise or slow-cook any long-cook proteins and refrigerate them in their sauce.
- Whisk together dressings, marinades, and cocktail mixers.
- Set the table completely, including napkins, glasses, and place cards. Cover it with a clean cloth until guests arrive.
- Pre-portion ingredients for each dish into bowls or ramekins so day-of cooking is just assembly.
- Empty and clean the dishwasher so it is ready to receive dirty dishes mid-party.
- Run a fridge inventory: confirm everything fits, and pull out only what you need to come to room temperature.
- Confirm the timeline: read it once more and adjust any times that have shifted.
- Charge your phone, set out your outfit, and write yourself a calm morning note. Hosting starts with the host.
Sample Hour-by-Hour Dinner Party Cooking Timeline (Serving at 7:00 PM)
Below is a worked example of a real dinner party cooking timeline for a 6-person menu of roast chicken, green salad, roasted root vegetables, and a chocolate tart. Adapt the menu to yours and keep the structure.
| Time | Task | Active / Passive |
|---|---|---|
| 10:00 AM | Pull chicken from fridge to come to room temperature; preheat oven to 425 degrees Fahrenheit. | Passive |
| 10:15 AM | Prep vegetables, toss with oil and salt, set aside in a tray. | Active, 25 min |
| 10:45 AM | Truss and season the chicken. | Active, 10 min |
| 11:00 AM | Roast chicken and vegetables. Set timer for 60 minutes. | Passive |
| 11:45 AM | Whisk vinaigrette; assemble tart toppings if not pre-done. | Active, 15 min |
| 12:00 PM | Pull chicken at 160 degrees; tent with foil to rest 20 minutes. | Active, 5 min |
| 12:30 PM | Carve chicken loosely, leave on platter. Cover vegetables. | Active, 10 min |
| 1:00 PM | Lunch break, or run final errands. | Off |
| 3:00 PM | Reheat vegetables in the oven at 350 for 8 minutes. Re-warm chicken in sauce if needed. | Passive |
| 5:00 PM | Shower, change, light candles, set out appetizers. | Active, 45 min |
| 6:30 PM | Final toss of the salad; pour cocktails. | Active, 10 min |
| 7:00 PM | Serve. Everything should be plated or one step from plating. | Serve |
For shorter timelines, collapse the lunch break into a single cooking block. For longer ones, add a mid-afternoon refresher of any braised dishes.
4-hour vs 6-hour vs 8-hour dinner party timeline formats
Different menus demand different lengths of active cooking. A charcuterie-and-pizza night needs only four hours from start to plate. A multi-course tasting menu can easily take eight. Here is how the dinner party cooking timeline flexes for each.
| Format | Best For | Active Cook Time | Best Anchor Dishes |
|---|---|---|---|
| 4-hour | Casual weeknight, intimate 4 guests | 45 to 60 min | Pasta, sheet-pan dinner, store-bought appetizers |
| 6-hour | Standard dinner party, 6 to 8 guests | 90 to 120 min | Roast chicken, braised short ribs, composed salad |
| 8-hour | Holiday or special occasion, 8 to 12 guests | 2 to 3 hours total, in blocks | Turkey, standing rib roast, multi-course tasting |
How to Handle a Single Oven (and Other Common Pitfalls)
Single-oven cooking is the most common constraint our team hears about from home hosts, and it is the easiest to design around. The trick is to cook at one temperature for as many dishes as possible, then crank the heat for a final blast.
Here is the strategy in three rules. First, choose one oven temperature for the main cook (most roast proteins and vegetables happily live at 400 to 425 degrees Fahrenheit). Second, stagger dishes by cook time: the longest goes in first, the shortest joins it later. Third, anything that needs a different temperature (like a low-and-slow braise or a high-heat sear) goes on the stovetop, in a slow cooker, or under the broiler for a few minutes at the end.
Other pitfalls to plan for: hot dishes getting cold while you finish something else (hold them in a warm oven at 200 degrees), cold dishes getting warm (keep salads and starters in the fridge until the last second), and a stovetop with only two burners (use the oven as your third or fourth surface, and prep cold sauces ahead).
Rescue Plan: What to Do When the Timeline Breaks
Even with a perfect dinner party cooking timeline, something will slip. A reduction takes longer, a guest is late, a dish burns. The best hosts have a Plan B built into the schedule itself.
If a main is running 20 minutes behind, buy time by holding vegetables and sides in a warm oven at 200 degrees and serving a pre-made starter. If a dessert is still warm, move it to the freezer for 10 minutes while you serve coffee and pour digestifs. If a protein is overcooked, slice it thin and serve it over a bright sauce or salad where texture matters less than flavor.
The simplest rescue trick of all: have one dish on the menu that is intentionally forgiving. A composed salad, a cheese course, or a batch cocktail can absorb 20 minutes of delay without anyone noticing. Build that buffer in on purpose.
Pro Tips from a Restaurant Kitchen
Three concepts from professional kitchens will change the way you plan a dinner party cooking timeline forever.
Mise en place means “everything in its place.” It is the practice of measuring, chopping, and portioning every ingredient before you turn on a single burner. When the cook starts, every tool, spice, and component is already within arm’s reach. It is the single biggest difference between home and restaurant cooking.
Carryover cooking is the heat still inside a piece of meat after it leaves the oven. A roast pulled at 155 degrees Fahrenheit will coast to about 165 as it rests, so plan to pull it 5 to 10 degrees early and let it finish on the board.
Rest time is not optional. Most proteins need 10 to 20 minutes of rest to redistribute their juices. Plan rest time into the dinner party cooking timeline as an active step, even if the work is just tenting with foil and walking away.
Frequently Asked Questions
What can I cook in advance for a dinner party?
Desserts (cakes, tarts, panna cottas), vinaigrettes and marinades, stocks and braises, chopped aromatics in airtight containers, charcuterie boards, and cocktail mixers in pitchers. As a rule, anything that can be served at room temperature or rewarmed in under 10 minutes is a great choice to make 1 to 3 days ahead.
What is the average time for a dinner party?
Plan for about 3 hours total: 45 minutes for cocktails and appetizers, 60 to 75 minutes for the main meal, and 45 to 60 minutes for dessert and after-dinner drinks. Most hosts aim to start serving 30 to 45 minutes after the stated arrival time so guests can have a drink and chat first.
What are the 5 P’s of cooking?
The 5 P’s are commonly listed as Plan, Prepare (mise en place), Portion, Plate, and Present. They work as a planning framework: decide the menu, prep every ingredient, portion each dish, plate with intention, and present at the right moment. Definitions vary by chef, but the underlying idea is consistent: most of the work happens before the stove turns on.
What are the 5 rules in planning meals?
Balance (a protein, a vegetable, and a starch), variety (different textures and colors), seasonality (ingredients at their peak), make-ahead potential (at least one dish that can be done in advance), and equipment fit (menu that works with your oven, burners, and time). Following all five gives you a dinner party cooking timeline that holds together under pressure.
How far in advance should I prep for a dinner party?
About one week ahead to finalize the menu and order groceries. Two to three days ahead for desserts, marinades, and stocks. One day ahead for chopping, braising, and setting the table. Day-of should be final reheats and assembly only, not foundational cooking. The further ahead you prep, the calmer the day of the party will feel.
Final Thoughts on Your Dinner Party Cooking Timeline
A dinner party cooking timeline is not a rigid schedule to be followed to the second. It is a contract you make with your future self, written when you are calm and read when you are tired. It says: I thought this through, here is what to do, and here is when to do it.
Pick a serving time. Choose a menu that fits your kitchen and your skill. Work backwards. Build in host time and buffer. Make as much as you can the day before. And remember that the best dinner party is the one where you actually sit down with your guests and eat.
Save the timeline from this article, swap in your own menu, and run it once in your head. You will be surprised how much calmer the day feels when the plan is already written down.