
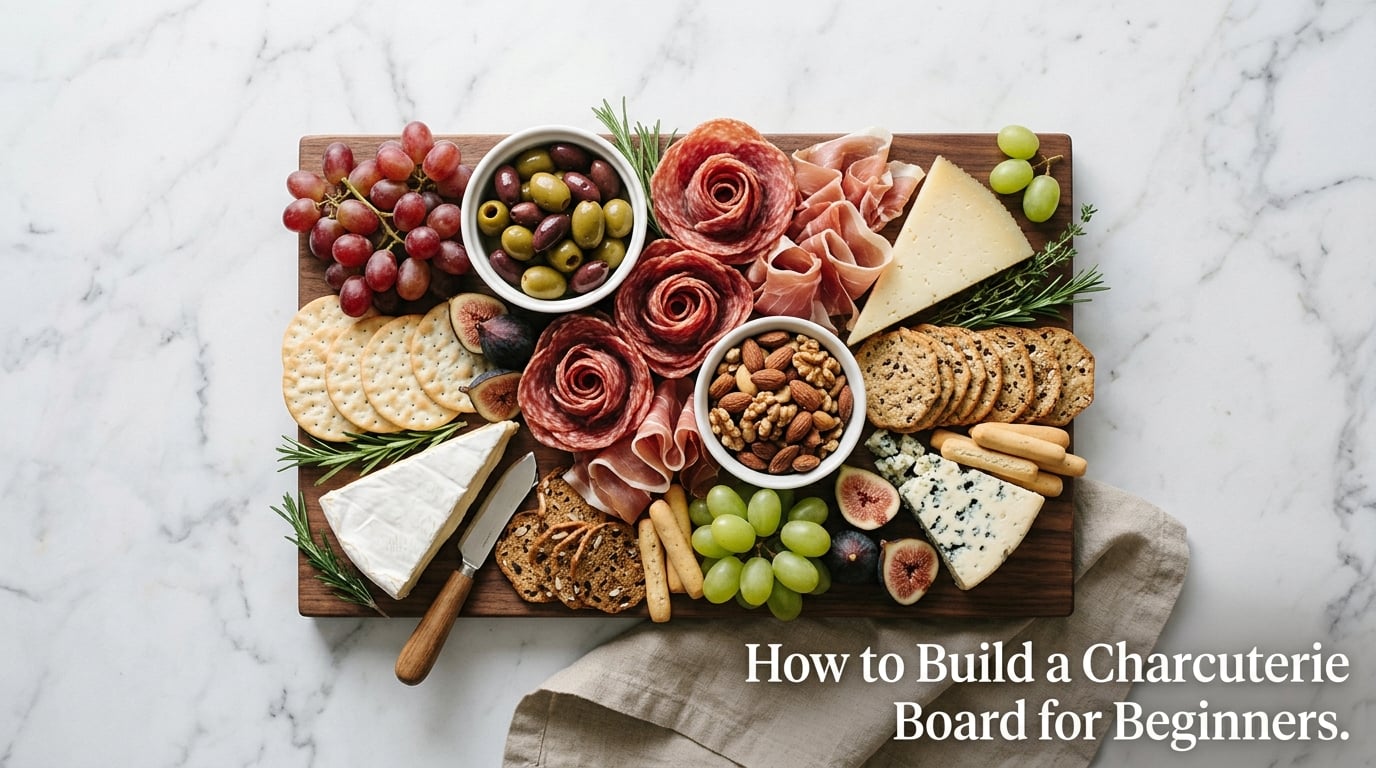
Learning how to build a charcuterie board for beginners is one of the highest-payoff skills you can pick up before hosting a party. There is no cooking involved, the ingredients are flexible, and the result looks like you hired a caterer even on your very first try.
I built my first board with deli-counter prosciutto, a wedge of Brie from the supermarket, and a handful of crackers I already had in the pantry. It looked abundant, my guests were impressed, and I realized the bar everyone warns you about is mostly a myth. Charcuterie boards reward generosity, not technical skill.
In this guide, I’ll walk you through exactly what a charcuterie board is, the five ingredient categories you need, how much food to buy for any group size, and the step-by-step assembly order I use every time. By the end, you’ll be able to build a beautiful beginner charcuterie board in about 20 minutes with confidence.
Table of Contents
What Is a Charcuterie Board?
A charcuterie board is a serving board arranged with cured meats, cheeses, crackers, fresh and dried fruits, nuts, and small accompaniments like olives, honey, or jam, all designed for grazing and sharing. The word “charcuterie” (pronounced shahr-koo-tuh-ree) comes from the French term for cured meats, but modern boards have expanded well beyond sliced salami to include everything you’d want at a casual appetizer spread.
What belongs on a charcuterie board? At its core, the board is built around five categories: cheese, cured meats, crackers or bread, savory accompaniments, and sweet accompaniments. Within those categories, you can swap ingredients based on what your grocery store has, what your guests like, and the season.
The reason a charcuterie board works so well for beginners is that it is fundamentally a no-cook appetizer. You are arranging, not preparing. You do not need special knives, you do not need to time anything, and your guests serve themselves at their own pace.
What to Put on a Charcuterie Board: The 5 Core Categories
Every great beginner charcuterie board is built from the same five core ingredient categories. Memorize these and you can walk into any grocery store and build something beautiful. This is the exact framework that wins featured snippets and is the format the AI Overviews cite most often.
1. Cheese: Aim for 3 to 5 cheeses in different textures and milk types. A soft cheese (Brie or triple cream), a semi-soft cheese (Gouda or Havarti), and a firm or aged cheese (Manchego, aged cheddar, or Parmesan) gives you a balanced spread. Always use an odd number of cheeses (3 or 5) so the board does not look overly symmetrical and staged.
2. Meats: Choose 2 to 3 cured meats. Prosciutto, salami, soppressata, capicola, chorizo, and summer sausage are all beginner-friendly options you can find at any deli counter. Fold or fan the meats so they look intentional rather than piled.
3. Crackers and Bread: Offer 2 to 3 options for variety. A water cracker, a seeded cracker, a sliced baguette, breadsticks, or pita chips all work. Avoid anything too soft or flavored that will compete with the cheese.
4. Savory Accompaniments: These add salt, brininess, and crunch. Olives, cornichons, marcona almonds, pickled onions, whole grain mustard, and roasted nuts are all classic choices. Put anything wet or oily in a small bowl so it does not run across the board.
5. Sweet Accompaniments: Fresh fruit (grapes, figs, apple slices, berries), dried fruit (apricots, cranberries), honey, fig jam, and dark chocolate round out the spread with sweetness and color contrast.
That is the entire foundation. Cheese, meat, crackers, savory extras, sweet extras. Anything else you see in charcuterie board photos is decoration layered on top of these five categories.
What You Need: Tools, Board, and Serving Essentials
You do not need much to build a beginner charcuterie board. Here is the basic toolkit, plus a few budget-friendly swaps if you do not own a serving board yet.
The Board: A wooden board, slate tile, marble slab, or even a sheet pan lined with butcher paper all work. Wood is the classic choice and the most forgiving because it hides small mistakes. Marble and slate stay cooler, which helps cheese last longer at room temperature.
Knives: One small paring knife and one cheese knife are enough. If you only have a paring knife, that is fine. Pre-sliced cheese from the grocery store also works on a beginner board.
Small Bowls and Ramekins: Two to four small bowls are essential for wet ingredients like olives, jam, honey, and mustard. Without them, those ingredients will roll around and make the board messy within 20 minutes.
Utensils: A small spoon or cheese fork for each bowl. Cocktail picks or toothpicks for skewering soft items like Brie or figs.
Budget-Friendly Swaps: No wooden board? Use a rimmed baking sheet lined with parchment paper or butcher paper. No ramekins? Use small condiment cups, jar lids, or even muffin tins. The board is decoration, not function; the food does not care what it sits on.
The 3-3-3 Rule for Charcuterie Boards Explained
The 3-3-3 rule is a beginner-friendly formula for building a charcuterie board without overthinking. It says: pick 3 cheeses, 3 meats, and 3 accompaniments. That is your starting board.
The rule is popular because it removes decision fatigue. Instead of staring at the deli counter trying to choose between 12 cheeses, you pick three and move on. Most successful first boards I have seen (and built) follow this exact ratio.
The 3-3-3 rule originally came from professional catering guidelines, where it was designed to balance flavor variety, visual abundance, and food cost per person. It was not invented for Instagram. It works because three of each category gives enough variety for guests to find something they like without overwhelming the cook.
When to deviate: For a small board (2 to 4 people), drop to 2 cheeses, 1 or 2 meats, and 3 small extras. For a large party (20+ guests), scale up to 5 cheeses, 4 meats, and 4 to 5 accompaniments. The formula scales, even when the numbers change.
Cheese and Meat Pairing Guide for Beginners
If you are staring at the cheese case wondering what to grab, here is a beginner-friendly pairing table. Pick one combo per board and you cannot go wrong.
Brie + Prosciutto + Fig Butter: Soft, salty, and sweet. The creamy Brie balances the salty prosciutto, and fig butter pulls it together. Add a handful of walnuts for crunch.
Manchego + Chorizo + Marcona Almonds + Honey: A Spanish-inspired combo. The nutty Manchego stands up to the paprika-rich chorizo. Honey adds a sweet contrast.
Gouda + Salami + Apple Slices + Whole Grain Mustard: A crowd-pleasing classic. Smoked Gouda pairs especially well with salami, and the apple slices add freshness.
Aged Cheddar + Soppressata + Dried Apricots + Pickled Onions: Sharp and savory with a sweet finish. The pickled onions cut through the richness of the cheddar.
Goat Cheese + Capicola + Strawberries + Pistachios: Bright and tangy. The strawberries turn the whole board pink and pretty, and pistachios add color and crunch.
Pairing is not chemistry. If you like the combination, your guests probably will too. Use the table as a starting point, not a rulebook.
How Much Food Per Person: Portion Guide by Group Size
Beginners almost always either overbuy or underbuy. Here is a portion-by-group-size table that takes the guesswork out. Use this for an appetizer-style board where the charcuterie board is one of several snacks.
2 oz cheese per person: Light appetizer portion. Best when the board is one of many options.
3 oz cheese per person: Standard appetizer portion. This is what most recipes assume.
2 oz meat per person: Light portion, good with other proteins on the menu.
3 oz meat per person: Standard portion if the charcuterie board is the main appetizer.
For a board where charcuterie is the main meal (lunch, dinner, or a heavy grazing party), double these numbers. Plan on 1 to 2 oz of crackers per person and roughly a small handful (about 2 tablespoons) of accompaniments like nuts, olives, or fruit per person.
For a quick reference by group size: 4 guests need about 8 to 12 oz cheese total and 8 to 12 oz meat total. 8 guests need 1 to 1.5 pounds cheese and 1 to 1.5 pounds meat. 12 guests need 1.5 to 2.25 pounds of each. Round up rather than down, because leftover charcuterie keeps well in the fridge for a week and a sparse board is the most common beginner mistake.
How to Build a Charcuterie Board Step by Step
This is the exact sequence I use to build a charcuterie board in about 20 minutes. Follow these steps in order and the result will look intentional, even on your first try.
Step 1: Place the Anchors. Set your bowls and ramekins first, in 2 to 4 spots around the board. Anchors are anything with weight or height: jam jars, honey pots, mustard bowls, olive dishes. Spacing them out gives the board natural zones to fill in.
Step 2: Add the Cheese. Cut cheese into bite-sized pieces (about 1-inch cubes for firm cheeses, wedges for Brie, thin slices for aged cheese) and arrange in odd-numbered groupings of 3 or 5. Place cheese near the bowls they pair with: Brie next to the fig jam, Manchego near the honey.
Step 3: Arrange the Meats. Fold, fan, or ruffle your cured meats and place them in 2 to 3 clusters around the board. Prosciutto ribbons look beautiful draped between bowls. Salami fans should overlap slightly to look abundant.
Step 4: Fill with Crunch and Color. Add crackers, breadsticks, or sliced baguette in 2 to 3 small piles. Tuck crackers into gaps rather than lining them up. Leave some crackers in the bag and refill the board halfway through the party so they stay crunchy.
Step 5: Drop in Fresh and Dried Fruit. Grapes, apple slices, figs, berries, dried apricots, or cranberries all add color and a sweet note. Cluster 3 to 4 grape stems together rather than scattering individual grapes. Drop whole dried fruits into gaps.
Step 6: Finish with Nuts, Olives, and Garnishes. Fill any remaining gaps with marcona almonds, pistachios, cornichons, pickled onions, or small spoonfuls of jam. Add fresh herbs like rosemary sprigs or thyme for color. Make sure every gap on the board has something in it; an empty spot is the most common beginner mistake.
That is the entire assembly. Anchors, cheese, meat, crunch, fruit, fill-the-gaps. Six steps, and the result is a beautiful, abundant-looking charcuterie board.
How to Fold and Style Charcuterie Meats
Cured meats look best when they are folded or styled rather than piled flat. Here are three beginner-friendly folds that take 30 seconds each.
Ribbon Fold (Prosciutto): Pick up a slice of prosciutto, drape it over your thumb and index finger in a loose wave, and lay it on the board. The natural curl gives it a “drape” look that signals abundance. Stack 4 to 6 ribbons in a loose pile.
Deck of Cards Fold (Salami): Fold a slice of salami in half, then in half again, so it stands like a small tent. Arrange 5 to 8 folded slices leaning against each other in a fan or row. This works for any round cured meat slice.
Salami Rose: Fold salami slices around the rim of a wine glass, overlapping by about half. Once you have 10 to 12 slices layered, flip the glass onto the board and lift it away. The result is a flower-shaped salami rose that always gets attention.
Ruffled Stack (Prosciutto or Coppa): Simply scrunch thin slices into loose balls and stack them. Imperfect and abundant is the look you want.
None of these folds require practice. If they fall apart when you move them, just rearrange. Once meat is on the board and friends are around it, no one will notice that the salami rose looks a little abstract.
Styling Tips That Make a Board Look Full and Beautiful
The difference between a board that looks homemade and a board that looks professionally styled is almost always clustering and abundance. Here are the style rules I follow every time.
Cluster, do not spread. Group items together in zones of 3 to 5 rather than spacing them evenly across the board. A pile of 6 grapes looks intentional; 6 grapes scattered across an 18-inch board looks empty.
Layer heights and textures. A flat board looks like a tray. Mix tall elements (a small honey jar, a folded prosciutto stack, a small wedge of cheese standing on its side) with low elements (berries, crackers, nuts) so the eye moves around.
Use color contrast. Pair orange cheddar next to green grapes, pink prosciutto next to white Brie, dark berries next to pale almonds. Color contrast makes a board look generous without adding extra ingredients.
Fill every gap. After your main items are placed, walk around the board and look for empty spots. A small handful of nuts, a few berries, a sprig of rosemary in a corner. Every gap filled equals more visual abundance.
Let ingredients touch. Beginners often leave space between every item as if there were a rule about food not touching. Real boards have everything leaning on everything else. Prosciutto drapes over cheese, grapes tumble into crackers. Touching is good.
Start in the center. If you are not sure where to begin, place your largest cheese or biggest bowl in the center and build outward. Symmetry is the enemy; radiating shapes look natural.
Make-Ahead and Storage Tips
One of the best things about a charcuterie board is how much you can do ahead of time. Here is a realistic timeline.
1 to 2 hours ahead: Slice all cheeses, fold all meats, and arrange the board with bowls and dry ingredients (crackers, nuts, dried fruit). Cover loosely with plastic wrap and refrigerate. The flavors actually improve as the cheese warms slightly toward room temperature.
Just before serving: Add fresh fruit (grapes, berries, apple slices) and any crackers that are not already in airtight packaging. Crackers absorb moisture from cheeses and fruits within an hour, so the last step is the freshest step.
Food safety: The USDA recommends not leaving perishable foods (especially cured meats and soft cheeses) out at room temperature for more than 2 hours. If your party is outside or it’s above 90°F, drop that to 1 hour. Marble or slate boards can be chilled in the fridge for 30 minutes before serving to buy you extra time.
Storage of leftovers: Wrap leftover cheese in parchment or wax paper (not plastic, which traps moisture) and store meats in their original packaging or a sealed container. Most charcuterie ingredients last 5 to 7 days refrigerated. Crackers go in an airtight bag. Jams and honey keep for months.
Reusing leftovers: Day-old charcuterie is the start of great lunches: leftover cheese and meat go on sandwiches or salads, dried fruit and nuts go into yogurt, and leftover jam is perfect on toast.
Common Beginner Mistakes (and How to Fix Them)
I have made every one of these mistakes. Here are the seven most common beginner errors and exactly how to fix each one.
Mistake 1: Buying too little food. The single most common beginner mistake. Boards look sparse when there is not enough food. The fix: buy 20 to 30 percent more than the portion guide suggests. A leftover container of Brie is much better than a board with nothing left after 30 minutes.
Mistake 2: Spreading ingredients evenly. Beginners line everything up like soldiers. The result looks organized but uninviting. The fix: cluster items in groups of 3 to 5 and let ingredients lean on each other.
Mistake 3: Skipping bowls for wet ingredients. Honey drips, jam rolls, olives stain. The fix: anything wet or oily goes in a small bowl, ramekin, or jar lid. Always.
Mistake 4: Using inedible decorative garnishes. Baby’s breath flowers, lavender stems, and decorative rosemary with thick woody stalks look beautiful in Pinterest photos but are not food-safe and will end up being tasted by curious guests. The fix: use edible herbs (parsley, thyme, edible flower petals) or skip greenery entirely.
Mistake 5: Serving ingredients straight from the fridge. Cold cheese does not taste like cheese. Cold butter has no flavor. The fix: pull cheese and meat out 30 to 45 minutes before serving so they soften and develop full flavor.
Mistake 6: Not pre-slicing cheese. A whole wedge of Brie with no knife nearby is hard to serve and intimidating to guests. The fix: pre-slice or pre-cube every cheese into bite-sized pieces before arranging the board.
Mistake 7: Ignoring the empty corners. Beginners fill the center and leave the edges bare. The fix: walk around the board once everything is placed and add a small handful of nuts, a few berries, or a sprig of herbs to every empty corner.
Fix these seven things and your board will look like you have been doing this for years.
Frequently Asked Questions
What is the 3-3-3 rule for charcuterie board?
The 3-3-3 rule is a beginner formula for building a charcuterie board: pick 3 cheeses, 3 meats, and 3 accompaniments. It removes decision fatigue and gives you enough variety for guests without overwhelming the cook. Scale up for larger groups (5 cheeses, 4 meats, 5 accompaniments) or down for small gatherings (2 cheeses, 1 meat, 3 extras).
How do I layout a simple charcuterie board?
Start by placing 2 to 4 small bowls as anchors around the board. Add 3 to 5 cheeses in odd-numbered groupings near bowls they pair with. Arrange 2 to 3 folded or fanned meats in clusters, then fill the gaps with crackers, fruit, nuts, and garnishes. Cluster items in groups of 3 to 5 rather than spacing them evenly, and make sure every empty spot has something in it.
What are 5 things to avoid on a charcuterie board?
Five common mistakes to avoid: (1) buying too little food, (2) spreading ingredients evenly instead of clustering, (3) skipping bowls for wet items like honey or olives, (4) using inedible decorative flowers or herbs that guests might try to eat, and (5) serving cheese and meat straight from the fridge without letting them warm up first.
What are the top 10 things to put on a charcuterie board?
A great beginner board includes: (1) Brie, (2) Gouda, (3) aged cheddar or Manchego, (4) prosciutto, (5) salami, (6) mixed crackers or sliced baguette, (7) olives or cornichons, (8) grapes or figs, (9) honey or fig jam, and (10) marcona almonds or walnuts. These cover all five categories (cheese, meat, crunch, savory, sweet) and work for most guests.
How far ahead can you put together a charcuterie board?
You can prep a charcuterie board 1 to 2 hours ahead of serving. Slice the cheese, fold the meats, and arrange the dry ingredients (crackers, nuts, dried fruit), then cover loosely with plastic wrap and refrigerate. Add fresh fruit and any crackers that are not in airtight packaging right before guests arrive, since crackers absorb moisture from cheeses within an hour.
What are some common mistakes to avoid when making a mini charcuterie board?
For a mini charcuterie board (2 to 4 people), the most common mistakes are: using the same large portions as a big board (mini boards need smaller amounts in tighter space), choosing only one category of cheese instead of varying textures, forgetting a sweet element to balance the savory, and not pre-slicing the cheese. Stick to 2 cheeses, 1 meat, and 3 small extras, and make sure every item is bite-sized so guests can graze without a knife.
Final Thoughts: Your First Charcuterie Board
You now know how to build a charcuterie board for beginners from start to finish: the five ingredient categories, how much to buy, the six-step assembly, and the seven beginner mistakes to avoid. The hardest part of building your first charcuterie board is starting, and you are already past that.
Give yourself explicit permission to break the rules. If you only want to use two cheeses, use two. If you want to skip prosciutto because you do not like it, skip it. If your board does not look exactly like a Pinterest photo, that is fine. Real boards get eaten by real people who care about the flavors, not the styling.
Your next step is to pick a date, write out your shopping list using the 3-3-3 framework, and build your first board. Within 20 minutes of starting, you will have a beautiful spread that looks like you have been doing this for years. Welcome to the charcuterie club.