
Nothing kills backyard cookout vibes faster than a burger that balloons up like a tennis ball. You press the top bun down, the cheese slides off the dome, and the bottom bun rocks like a seesaw. I have burned through more patties than I want to admit figuring out how to keep burgers from puffing up on the grill.
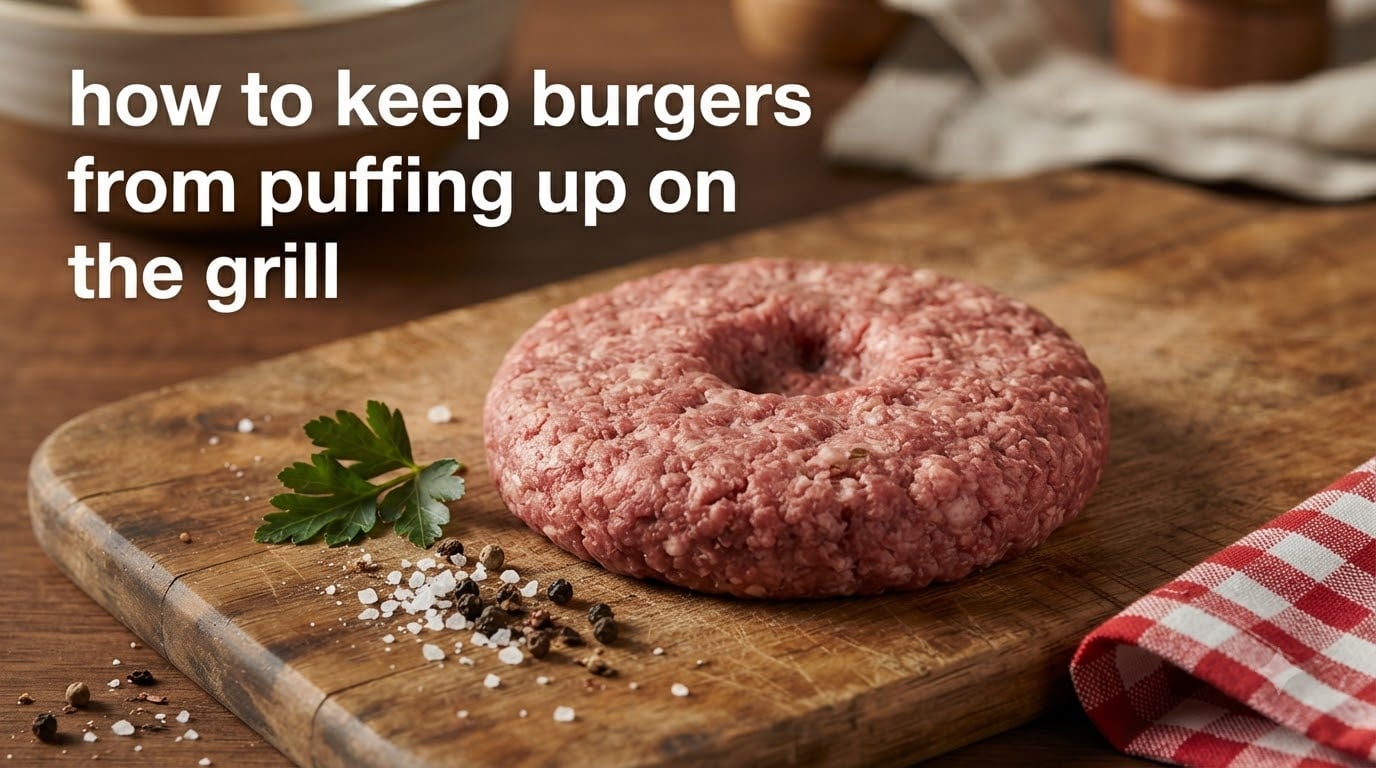
The fix takes about 10 seconds per patty and works every single time. Press a deep dimple into the center of each raw patty before it hits the grates. That little well gives the meat somewhere to go as the proteins contract, so your burger stays flat, cooks evenly, and holds every topping you stack on it.
In this guide I will walk through the food science behind the puff, the exact dimple technique step by step, a side-by-side comparison of the dimple versus the smash method, and the troubleshooting chart I wish someone had handed me years ago.
Table of Contents
Why Burgers Puff Up on the Grill (The Science)
Burger patties puff up because the proteins and connective tissue in ground beef contract when they hit heat. As those muscle fibers tighten, they squeeze the patty inward from the edges. Because the center is the thickest part of the patty, the contracting fibers push that thick zone upward, creating a dome that no one asked for.
Three things make the effect worse. First, fat content: leaner blends like 90/10 have less rendered fat to keep the meat loose, so they contract harder. Second, cooking temperature: screaming-hot grills trigger rapid protein contraction before the center has time to relax. Third, overworked meat: the more you handle ground beef, the more the proteins bind together, and the tighter they pull as they cook.
Understanding this matters because the same contraction that puffs the center is also responsible for the Maillard reaction, that gorgeous brown crust we all chase. The trick is not to fight the science. It is to give the meat a place to expand so it stays flat while the crust still forms.
The Dimple Technique: Your #1 Fix for Flat Patties
The dimple technique is a single thumb-pressed indent in the center of each raw patty that gives the meat room to expand into as the proteins tighten. Make the dimple about half an inch deep and roughly the width of your thumb. A shallow press will disappear during cooking. A deep well keeps the patty flat from edge to edge.
- Divide the meat loosely. Gently pull ground beef into equal portions. For classic burgers I go with 6-ounce balls; thicker pub-style patties run 8 ounces. Do not pack them tight.
- Form the patty edges higher than the center. Press each portion into a round patty slightly wider than your bun, then push the outer edge up a touch so the middle sits lower than the rim. Think shallow saucer, not a hockey puck.
- Press a deep dimple in the center. Wet your thumb with cold water and press straight down into the middle of the patty. Aim for a half-inch well that is roughly the width of your thumb. Do not twist; just press and lift.
- Check the depth. Hold the patty at eye level. You should see a clear depression that does not fill in when you set the patty back down. If it springs back, press a second time.
- Chill briefly. Set the finished patties on a parchment-lined tray and into the fridge for 10 to 15 minutes. Cold patties hold their shape better when they hit the grill.
- Grill over medium heat. Place dimple-side up. Flip only once near the end of cooking and resist any urge to press with the spatula.
I have used this method on hundreds of burgers across gas, charcoal, and pellet grills. Every single one came off the grates flat, with a deep brown crust and no raw center bulge. It is the single highest-leverage trick in this whole article.
Dimple vs Smash: Which Method Should You Use?
Dimple and smash are both excellent answers to puffing, but they serve different burgers. Dimple wins for thick, juicy pub-style patties. Smash wins for thin crusty-edged diner-style burgers. Picking the right one depends on what you are actually cooking.
| Factor | Dimple Technique | Smash Technique |
|---|---|---|
| Best for | Thick patties, 6 to 8 oz | Thin patties, 2 to 4 oz balls |
| Crust style | Even browning, juicy interior | Maximum crust, lacy edges |
| When to flatten | Before grilling, raw | First 30 seconds on the grill |
| Tool needed | Just your thumb | Heavy spatula or press |
| Cheese melt | Add during last minute | Stack on top in final 30 seconds |
| Risk of dry burger | Low | Higher if pressed too long |
Smash burgers never need a dimple because you intentionally flatten them right as they hit the grates. Dimple is for any burger you want to keep thick.
Other Tips That Prevent Puffing
Dimple is the headline trick, but it works best when paired with a few supporting habits. None of these alone will fix a puff, but together they make the dimple almost foolproof.
Let the meat come to room temperature
Cold meat hitting a hot grill causes rapid, uneven protein contraction, which is exactly the puff you are trying to avoid. Set the patties on the counter for 15 to 20 minutes before grilling. They will cook more evenly and the dimple will hold its shape through the flip.
Handle the meat gently
The more you squeeze, fold, and press ground beef, the more the proteins tangle. Tangled proteins contract harder and shrink more in every direction. Form patties with the lightest possible touch. If the meat is sticking to your hands, dampen them with cold water.
Use medium heat, not maximum
Screaming-hot grills crisp the outside before the center catches up, which is the same setup that drives proteins into a tight puff. Aim for medium, around 375 to 400 degrees Fahrenheit on a gas grill or a hand-test of 4 to 5 seconds on charcoal. Medium gives the center time to relax into the dimple.
Flip once and never press
Every time you press a burger with the spatula you squeeze juices out onto the coals instead of back into the meat. Flip once at the halfway point, then leave it alone. This is the easiest habit to break and the hardest one to relearn.
Mind the fat ratio
An 80/20 blend (80 percent lean, 20 percent fat) contracts less than a 90/10 because the rendered fat keeps the proteins loose and self-bastes the patty. For backyard grilling I keep 80/20 ground chuck as my default. Lean blends work, just expect a slightly puffier result and a deeper dimple.
Common Mistakes to Avoid
If your burgers are still puffing even with a dimple, one of these is usually the culprit. Here is the troubleshooting chart I walk through whenever a friend texts me a sad burger photo.
| Problem | Likely Cause | Quick Fix |
|---|---|---|
| Dimple disappears during cooking | Indent was too shallow | Press a deeper well, about half an inch |
| Edges curl upward | Grill too hot, proteins seized up | Drop to medium heat and flip once |
| Juicy but flat center raw spot | Patty too thick for heat level | Smash thinner or extend cook time |
| Patty crumbles when flipped | Overworked meat or no salt | Salt just before grilling, handle less |
| Sticks to grates and tears | Grates not clean or not oiled | Brush grates, oil with a paper towel |
| Burger shrinks dramatically | Overworked meat or lean blend | Switch to 80/20, form patties loosely |
The poke-a-hole-in-the-center myth lives in this list too. A hole does not prevent puffing. It just drains juices straight onto the coals. Skip the hole and use the dimple instead.
Pro Tips for Restaurant-Quality Burgers
Once the puff is handled, a few finishing moves are what separate a decent backyard burger from one that tastes like it came from a serious kitchen. None of them require special gear.
Season right before grilling
Salt draws moisture out of the meat. Season the patties within a couple minutes of placing them on the grill. A generous pinch of coarse salt and a crack of black pepper on each side is plenty. Anything more is just seasoning the air.
Pull at the right internal temperature
Carryover cooking is real. Burgers keep rising in temperature for a few minutes after they leave the grill, so pull them a few degrees before the target. Use an instant-read thermometer on the side of the patty for a clean reading.
| Doneness | Pull Temperature | Final Resting Temperature |
|---|---|---|
| Medium-rare | 145 F | 150 to 155 F |
| Medium | 155 F | 160 to 165 F |
| Well-done | 165 F | 170 F plus |
Rest the patties briefly
Resting 3 to 5 minutes under loose foil lets the juices redistribute. A patty that just came off a screaming hot grill with carryover heat can climb another 5 degrees inside while it rests. Skipping the rest is how burgers end up overcooked even though the thermometer looked right on the grill.
Baste with butter at the end
In the final minute, drop a tablespoon of butter on each patty and tilt the patty to soak it in. It adds richness, helps the cheese melt, and gives you that glossy steakhouses finish. This is optional, but it is the move that makes any burger feel restaurant-grade.
Frequently Asked Questions
Why do burgers puff up on the grill?
Burgers puff up because the proteins and connective tissue in ground beef contract when they hit heat. That contraction pulls the patty inward from the edges, and since the center is the thickest part, the meat bulges upward into a dome. Leaner blends, high heat, and overworked meat all make the effect worse.
How do I keep my burgers from puffing up?
Press a deep dimple, about half an inch and thumb-width, into the center of each raw patty before grilling. The well gives the contracting proteins somewhere to expand into so the patty stays flat. Pair the dimple with room-temperature meat, gentle handling, and medium heat for best results.
Should I poke a hole in burgers before grilling?
No. Poking a hole lets juices drain out onto the coals and leaves the patty dry. A pressed dimple on top of the patty prevents puffing without sacrificing moisture, which is why most cooks have moved away from the poke-hole method.
Should you flatten burgers while cooking?
Pressing burgers with the spatula while they cook squeezes juices out and dries out the meat. Skip the spatula press. Instead, dimple the raw patty before grilling and leave it alone once it is on the grates.
Does the dimple method work for smash burgers?
No, smash burgers do not need a dimple. Smash burgers are intentionally flattened with a spatula during the first 30 seconds on the grill, so the dome never has time to form. Use the dimple only for thicker patties you want to keep thick.
What temperature should I grill burgers at?
Grill burgers over medium heat, around 375 to 400 F on a gas grill or a hand-test of 4 to 5 seconds over charcoal. Medium heat lets the center cook through evenly while the Maillard reaction still browns the outside, and it keeps the dimple from springing back up.
The Bottom Line
Learning how to keep burgers from puffing up on the grill comes down to one habit: press a deep dimple into the center of every raw patty before it hits the grates. Pair that with room-temperature meat, gentle handling, medium heat, and a single flip, and you will never serve a domed burger again.
Fire up the grill this weekend, give the dimple method a real test, and see how much easier it is to stack cheese, lettuce, and tomato on a flat patty. Once the dimple becomes muscle memory, you will not go back.