
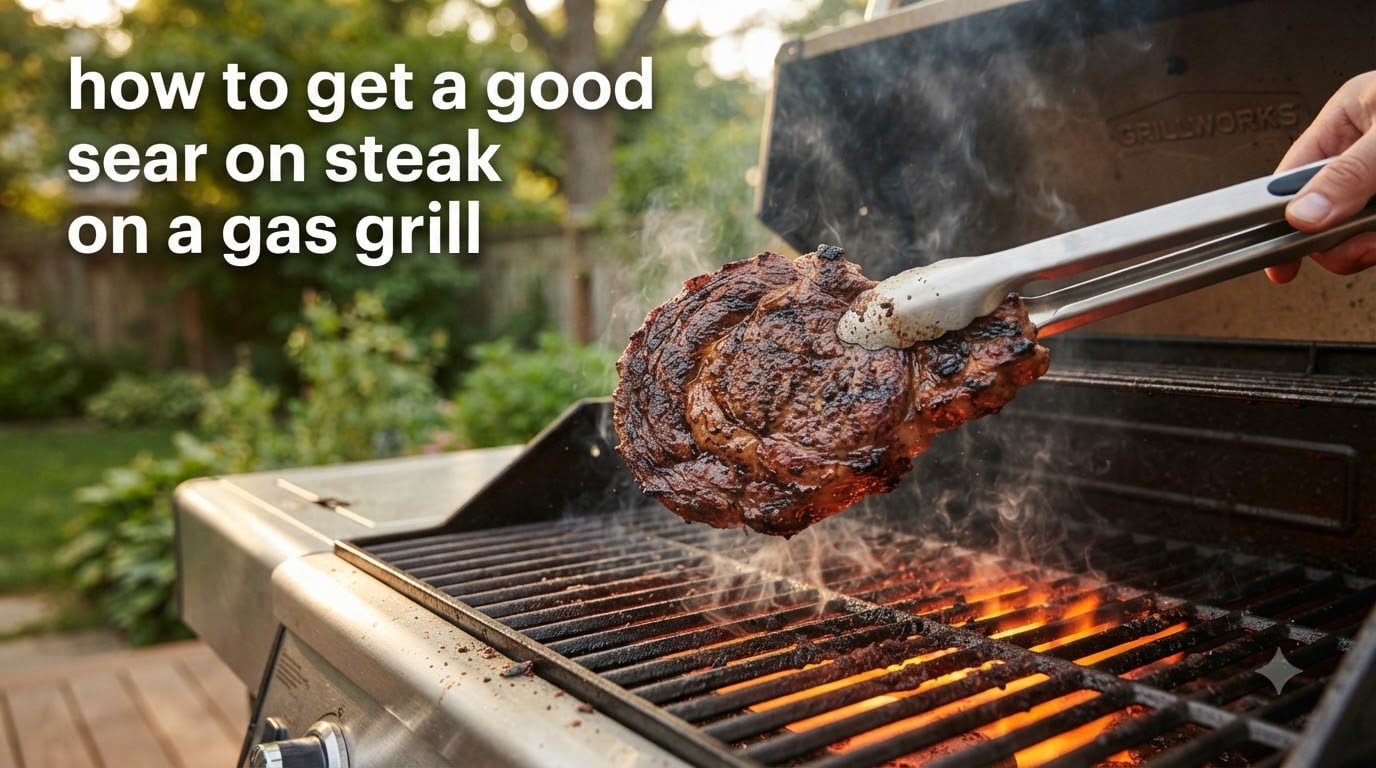
Learning how to get a good sear on steak on a gas grill is the difference between a gray, forgettable chop and a steakhouse-style crust with a juicy pink center. The good news: a gas grill can absolutely deliver that deep brown sear if you preheat it hot enough, dry the surface of the meat, and respect the timing. In this guide, I will walk you through the science, the setup, the exact steps, and the troubleshooting tips I have picked up over years of backyard grilling.
Whether you are working with a basic 2-burner propane grill or a 4-burner model with a dedicated sear station, the principles stay the same. Heat, dryness, fat, and time. Master those four variables and you will be able to sear ribeye, strip, and filet on a gas grill with confidence every single weekend of 2026.
Table of Contents
Quick Answer: How to Get a Good Sear on Steak on a Gas Grill
To get a good sear on steak on a gas grill, preheat the grill on high for 10 to 15 minutes with the lid closed, then sear a dry, oiled steak over direct heat for 45 to 90 seconds per side at 500 to 600 degrees Fahrenheit. Rest the steak for 5 minutes before slicing.
- Pat the steak completely dry with paper towels on both sides.
- Preheat your gas grill on high with the lid closed for 10 to 15 minutes until it reaches 500 to 600 degrees F.
- Brush the steak with a thin layer of high-smoke-point oil and season generously with salt.
- Place the steak on the hottest part of the grates and leave it untouched for 45 to 90 seconds.
- Flip and sear the second side for another 45 to 90 seconds.
- Move to indirect heat and continue cooking to your target internal temperature.
- Rest the steak for 5 minutes before slicing against the grain.
Why Searing Works: The Maillard Reaction Explained
Searing is not just about color. It is a chemical reaction called the Maillard reaction, where amino acids and reducing sugars in the steak react under intense heat to create hundreds of new flavor compounds. That deep brown crust you see on a properly seared steak is flavor concentrated into a thin, crispy layer.
The Maillard reaction kicks into gear around 300 degrees F on the surface of the meat, but it really ramps up above 400 degrees F. That is why a hot grill matters so much. If the surface of your steak is sitting at 250 degrees F, you will get slow cooking and gray meat. Push that surface to 500 degrees F or higher and you get fast browning before the interior overcooks.
It is worth distinguishing the Maillard reaction from caramelization. Caramelization happens when sugars alone break down, and it produces sweeter, nuttier notes. The Maillard reaction involves proteins, and it produces savory, roasted, meaty notes. Both happen during searing, but the Maillard reaction is the star of steak crust.
Three conditions have to be met for the Maillard reaction to deliver the crust you want: surface temperature above 300 degrees F, a dry surface so the meat does not steam, and enough time for the reaction to build up. Steam is the enemy here. When water sits on the surface of the steak, evaporative cooling keeps the temperature below the threshold needed for browning. That is the entire reason we pat steaks dry before they ever touch the grates.
The Best Gas Grill Setup for Searing
Gas grills have a reputation for not getting as hot as charcoal, and that reputation is partly deserved. A typical gas grill puts out 35,000 to 45,000 BTU across the whole cooking surface, while a chimney of lump charcoal can crank out 700 degrees F or more in a concentrated area. To get a gas grill to sear properly, you have to set it up with intention.
Build a Two-Zone Fire
The single most important setup trick on a gas grill is the two-zone configuration. Turn on one side of the burners for high direct heat and leave the other side off for indirect cooking. On a 2-burner grill, that means one burner on high and one burner off. On a 3 or 4-burner grill, light the middle burners on high and leave the outer burners off, or light all burners except the far left or right.
Two-zone cooking gives you a safety zone. If the steak is browning too fast on the outside but the inside is still cold, you slide it over to the cool side, close the lid, and let it finish with indirect heat. That flexibility is something charcoal purists have used for decades, and it works just as well on gas.
Use the Sear Burner If You Have One
Many modern gas grills come with a dedicated sear burner, often an infrared or ceramic-briquette burner that sits between the main burners and the grates. If your grill has one, use it. Sear burners routinely push surface temperatures to 700 degrees F or higher, which is well into the range where the Maillard reaction runs fast. Sear burners also radiate heat downward in a more concentrated pattern than tube burners, so you get a wider searing footprint.
Preheat for 10 to 15 Minutes
Preheating is where most gas grill searing fails happen. A grill that has been on high for 3 minutes is not the same as a grill that has been on high for 15 minutes. The grates, the flavorizer bars, and the lid all need to soak up heat so the surface temperature stays high when the cold steak hits it.
After 10 to 15 minutes of preheating with the lid closed, hold your hand about 4 inches above the grates. If you can hold it there for only 2 to 3 seconds, the grill is in the right zone. Less than that and you may need to back off the burner slightly to avoid burning the fat before the crust sets.
Step-by-Step: How to Sear Steak on a Gas Grill
Follow these steps in order. Each one builds on the last, and skipping any of them is usually what separates a great crust from a gray, lackluster steak.
Step 1: Choose the Right Cut and Thickness
Aim for steaks that are at least 1 to 1.5 inches thick. Anything thinner than 1 inch will overcook before you can build a real crust on a hot gas grill. Ribeye, New York strip, and filet mignon are the classic choices for searing because they have enough intramuscular fat to handle the heat without drying out.
Look for steaks with good marbling. Those white streaks of fat melt during the sear and baste the meat from within, giving you both flavor and moisture. A well-marbled ribeye can take more heat than a lean sirloin, which is why ribeye is the gold standard for steakhouse sears.
Step 2: Dry the Steak Surface Thoroughly
Pat the steak dry on both sides with paper towels. Do not skip this step. Surface moisture is the number one enemy of a good sear on a gas grill, because water has to evaporate before the surface temperature can climb above 212 degrees F, and that evaporation cools everything it touches.
For the best results, dry-brine the steak by salting it and leaving it uncovered on a wire rack in the refrigerator for 8 to 24 hours. The salt draws moisture out of the steak, and that moisture dissolves the salt and is reabsorbed. What is left on the surface is a dry pellicle that sears beautifully on contact with the hot grates.
Step 3: Oil the Steak, Not the Grates
Brush the steak with a thin coat of high-smoke-point oil. Avocado oil, refined olive oil, or grapeseed oil all work well because they can handle 500 degree F heat without smoking or breaking down. Coat both sides lightly, just enough to glisten.
Skip the spray bottle of oil on the grates. Oil on hot grates flares up and leaves you with a sooty, off-flavor crust. Oiling the steak instead gives you better contact with the grates, less smoke, and a more even sear.
Step 4: Season Right Before Grilling
Season the steak with coarse kosher salt and freshly cracked black pepper just before it goes on the grill. If you salt too early and the steak sits at room temperature, the salt will pull more moisture to the surface and you will end up steaming the steak. Salt right before the sear for the best crust.
Step 5: Place the Steak and Do Not Move It
Lay the steak on the hottest part of the grill at the angle you want for grill marks. Then walk away for 45 to 90 seconds. Do not press it, do not peek, do not wiggle it. The steak needs undisturbed contact time to build up the Maillard crust, and lifting it early will tear the crust and leave you with a patchy sear.
For a 1.5 inch thick steak at 550 degrees F, 60 seconds per side gives you a deep brown crust. Go to 90 seconds per side if you want a darker, more charred crust or if your grill runs cooler than expected.
Step 6: Flip Once and Rotate for Crosshatch Marks
Flip the steak once with a long-handled tongs or a spatula. If you want the classic crosshatch grill marks, rotate the steak 45 degrees halfway through the first side. After the second flip, you have a diamond pattern that looks like it came out of a steakhouse.
Some pitmasters flip every 30 to 60 seconds instead of leaving the steak in place for a full 60 to 90 seconds. Both methods work. The frequent-flip method gives you a more even crust and reduces the temperature gradient between the surface and the center. The single-flip method gives you more defined grill marks. Pick the one that fits the look you want.
Step 7: Move to Indirect Heat to Finish
Once both sides have a crust, move the steak to the cool side of the grill, close the lid, and continue cooking with indirect heat until you hit your target internal temperature. This is the move that prevents the most common gas grill mistake: searing the outside to a beautiful crust and then overcooking the inside while you keep searing to cook it through.
Use an instant-read thermometer. Pull the steak at 5 degrees F below your target temperature, because the internal temperature will rise another 5 to 10 degrees during the rest. For medium-rare, pull at 130 degrees F. For medium, pull at 140 degrees F.
Step 8: Rest the Steak for 5 Minutes
Transfer the steak to a warm plate or a wire rack and let it rest for 5 minutes before slicing. During the rest, the muscle fibers relax and the juices redistribute. Slice too early and you lose all that flavor onto the cutting board. Skip the rest and you lose a meaningful amount of moisture.
Loosely tent the steak with foil if you want, but do not wrap it tightly. Wrapping in foil traps steam and can soften the crust you worked so hard to build.
The Reverse Sear Method on a Gas Grill
The reverse sear method is the best way to get a good sear on steak on a gas grill when you are working with thick cuts, especially anything over 1.5 inches. Instead of searing first and cooking second, you cook low and slow first and sear at the very end.
Reverse searing gives you edge-to-edge doneness. With a traditional sear on a thick steak, the center is often cooler than the target temperature by the time the crust is set. With a reverse sear, the steak slowly comes up to temperature throughout, then gets a fast blast of high heat at the end to build the crust. The result is a steak that is uniformly pink from edge to edge, with a thin, even crust on the outside.
How to Reverse Sear on a Gas Grill
- Set up two zones on your gas grill with one burner on low and the other off.
- Place the steak on the cool side, close the lid, and bring the internal temperature up to 115 degrees F for medium-rare, or 120 degrees F for medium. This usually takes 15 to 25 minutes.
- Crank the hot burner to high and preheat for 5 more minutes until the grates are screaming hot.
- Sear the steak for 60 to 90 seconds per side directly over the high burner.
- Pull the steak, rest for 5 minutes, and slice.
The reverse sear works especially well on gas grills because the low-and-slow phase uses the gentle heat of an indirect burner, which most gas grills do very well. It also gives you a much bigger margin for error than a traditional sear, because the slow phase brings the steak close to your target temperature gradually.
Temperature and Doneness Chart for Seared Steak
Pull temperatures are 5 degrees F below your target to account for carryover cooking during the rest. Always use an instant-read thermometer inserted into the thickest part of the steak, away from bone or fat.
- Rare: 120 to 125 degrees F pull temp, 125 to 130 degrees F final temp, bright red center
- Medium-rare: 130 to 135 degrees F pull temp, 135 to 140 degrees F final temp, warm red center
- Medium: 140 to 145 degrees F pull temp, 145 to 150 degrees F final temp, pink center
- Medium-well: 150 to 155 degrees F pull temp, 155 to 160 degrees F final temp, slight hint of pink
- Well-done: 160 degrees F and above pull temp, little to no pink
Searing Times by Steak Thickness at 550 degrees F
- 1 inch thick: 45 to 60 seconds per side for the sear, then 3 to 5 minutes indirect to finish
- 1.25 inch thick: 60 to 75 seconds per side for the sear, then 5 to 7 minutes indirect to finish
- 1.5 inch thick: 75 to 90 seconds per side for the sear, then 7 to 10 minutes indirect to finish
- 2 inch thick (use reverse sear): 90 seconds per side after low-and-slow cook to 115 to 120 degrees F
These times are starting points. Your actual times will vary based on the starting temperature of the steak, the exact grill temperature, the wind, and the fat content of the cut. Always trust your thermometer over the clock.
Best Steak Cuts for Searing on a Gas Grill
Not every cut sears equally well on a gas grill. Here is how the popular cuts stack up.
Ribeye
Ribeye is the top pick for gas grill searing. The heavy marbling keeps the steak juicy even when you push the surface temperature high. Look for bone-in ribeye if you want extra flavor from the bone, or boneless for easier flipping on the grill. Aim for 1.25 to 1.5 inches thick for the best balance of crust and doneness.
New York Strip
Strip steak has less marbling than ribeye but more beefy flavor per bite. It is a great middle-of-the-road choice. Because it is leaner, watch the indirect cook time carefully. Pull at 130 degrees F for medium-rare to keep it from drying out.
Filet Mignon
Filet is the most tender cut and benefits from a hard sear on a gas grill. Bind it with a strip of butcher twine around the circumference if it is unevenly shaped, so it cooks flat against the grates. Filet is lean, so a quick sear plus a short indirect finish is the way to go.
Sirloin
Top sirloin sears well on a gas grill if you do not push it past medium. Past 145 degrees F it gets tough. Sirloin is also a great budget option that takes the same sear treatment as more expensive cuts.
Cuts to Skip for Gas Grill Searing
Thin cuts like skirt steak, flank steak, and hanger steak are better suited for very fast, very high heat cooking for 2 to 3 minutes total. Save those for a screaming-hot cast iron pan instead, where you have more control over the cook time.
Gas Grill Searing Tips: Lid, Flare-Ups, and Cast Iron
Lid Open vs Lid Closed During the Sear
Keep the lid open during the active sear phase. You need to watch the crust develop, you want airflow over the steak to keep the surface dry, and you do not want the radiant heat from the lid contributing extra indirect cooking during what should be a fast, direct sear.
Close the lid only during the indirect finishing phase after the sear, when you want the ambient heat inside the grill to gently bring the steak up to its final internal temperature.
Managing Flare-Ups
Flare-ups happen when fat drips onto hot burner covers or flavorizer bars. They are common with marbled cuts like ribeye, and they are not necessarily bad in small doses. A quick flare-up can add char and flavor.
Large flare-ups are a problem. They will scorch the crust before the steak is cooked, and they can leave a sooty, acrid taste. If you see flames licking up around the steak, move it to the cool side of the grill for 30 seconds until the flare-up subsides, then return it to the hot side.
Trim excess surface fat from the steak before grilling to reduce flare-ups. Leave the intramuscular fat for flavor, but cut away any thick external fat caps that are likely to ignite.
Cast Iron on a Gas Grill
One of the best-kept secrets of gas grill searing is dropping a cast iron skillet directly onto the grates and preheating it for 5 to 10 minutes until it is smoking hot. Then sear the steak in the pan for 45 to 90 seconds per side. The cast iron holds heat far better than thin grill grates, which gives you a more aggressive sear and a more even crust.
Cast iron on a gas grill is a great workaround if your grill struggles to hold 500 degrees F with the lid open. The pan does the heavy lifting. Just be careful when handling the pan. Use long-handled tools and a thick grill glove, because the handle will be at searing temperature too.
Troubleshooting Common Gas Grill Searing Problems
Even experienced grillers hit snags. Here are the most common gas grill searing failures and how to fix them.
The Steak Is Gray, Not Brown
If your steak comes off the grill looking gray with no crust, the grill was not hot enough or the surface of the steak was too wet. Preheat for a full 15 minutes, dry the steak with paper towels, and check that your grill is hitting at least 500 degrees F with an infrared thermometer.
The Steak Sticks to the Grates
If the steak sticks and tears when you try to flip it, the crust has not finished forming yet. Leave it for another 30 seconds. A properly seared steak will release itself from the grates when the Maillard crust is complete. If the grates are dirty or unseasoned, scrub them with a wire brush and oil them lightly between sessions.
The Outside Is Done but the Inside Is Cold
This is the classic too-hot, too-long mistake. You are searing on direct high heat for the entire cook and the outside is charring before the heat has time to penetrate to the center. Switch to a two-zone setup, sear for 60 to 90 seconds per side, then move to indirect heat to finish. Better yet, use the reverse sear method for cuts over 1.5 inches.
The Crust Burns Before Forming
Burning before a real crust forms usually means too much oil on the steak, flare-ups, or sugar in the rub. Brush the steak with a thin, even layer of oil instead of a heavy coat, trim excess surface fat, and skip sugary rubs until after the sear is set.
No Grill Marks
Grill marks come from undisturbed contact with the hot grates. Place the steak at a 45-degree angle to the grates, leave it for 45 seconds, then rotate 90 degrees and sear another 45 seconds on the same side before flipping. If you want pronounced marks, make sure your grates are clean and hot enough to sear on contact.
Flare-Ups Are Out of Control
Move the steak to the cool zone, let the flames die down, then return it. Trim external fat before grilling, keep the grill clean of old grease, and consider lowering the burner slightly so the fat does not ignite as quickly.
Essential Tools for Gas Grill Searing
You do not need a lot of gear to get a good sear on a gas grill, but a few tools make a real difference.
- Instant-read thermometer: the only reliable way to hit your target doneness without overcooking
- Long-handled tongs: for flipping without piercing the steak and losing juices
- Paper towels: for drying the steak surface before seasoning
- Wire rack and sheet pan: for dry-brining in the refrigerator
- Infrared surface thermometer: optional but extremely helpful for verifying grill temperature
- Cast iron skillet: optional upgrade for the most aggressive crust on a cooler grill
Frequently Asked Questions
How hot should a gas grill be for searing steak?
Preheat your gas grill to 500 to 600 degrees F for searing steak. Hold your hand about 4 inches above the grates. If you can only keep it there for 2 to 3 seconds, the grill is in the right zone. Most gas grills reach this temperature after 10 to 15 minutes of preheating on high with the lid closed.
Should you sear steak on direct or indirect heat?
Sear on direct high heat for 45 to 90 seconds per side, then move the steak to indirect heat to finish cooking to your target internal temperature. This two-zone setup prevents the outside from overcooking before the center reaches the right doneness.
How long do you sear a steak on a gas grill?
Sear for 45 to 90 seconds per side at 500 to 600 degrees F. Thinner steaks (1 inch) need closer to 45 seconds, while thicker steaks (1.5 inches) need up to 90 seconds. After the sear, finish cooking over indirect heat using an instant-read thermometer to hit your target doneness.
Do you close the grill when searing steak?
Keep the lid open during the active sear so you can watch the crust develop and airflow keeps the surface dry. Close the lid during the indirect finishing phase to let the ambient heat bring the steak up to its target internal temperature.
How do you get a good crust on a gas grill?
Pat the steak completely dry, oil it lightly, preheat the grill to 500 degrees F or higher, and sear undisturbed for 60 to 90 seconds per side. The dry surface and high heat together create the Maillard browning that produces the crust.
Why is my steak not getting a sear on the grill?
The most common causes are a wet steak surface, a grill that is not hot enough, or short preheating time. Pat the steak dry with paper towels, preheat the grill on high for 10 to 15 minutes with the lid closed, and check that the grates are reaching 500 degrees F or higher.
Should I oil the steak or the grill before searing?
Oil the steak, not the grill. Brushing oil on the grates causes flare-ups and leaves a sooty off-flavor. A thin coat of avocado oil or another high-smoke-point oil on the steak gives you better contact with the grates and a cleaner sear.
How do you reverse sear a steak on a gas grill?
Set up a two-zone grill with one burner on low. Place the steak on the cool side, close the lid, and bring the internal temperature to 115 to 120 degrees F. Then crank the hot burner to high and sear the steak for 60 to 90 seconds per side. Rest for 5 minutes before slicing.
Final Thoughts on Getting a Great Sear on a Gas Grill
Knowing how to get a good sear on steak on a gas grill comes down to four things: heat, dryness, timing, and rest. Push the grill above 500 degrees F, dry the surface of the steak, leave it undisturbed for 60 to 90 seconds per side, and give it a proper 5-minute rest before slicing. Use the two-zone setup, pull at 5 degrees F below your target temperature, and trust your thermometer over the clock.
Fire up your gas grill this weekend, dry-brined ribeye in hand, and put the steps to work. The first sear you nail with a deep brown Maillard crust and a juicy pink center will be the moment you stop thinking of your gas grill as the lesser cousin of charcoal. With the right setup, it absolutely belongs in steakhouse territory in 2026 and beyond.