
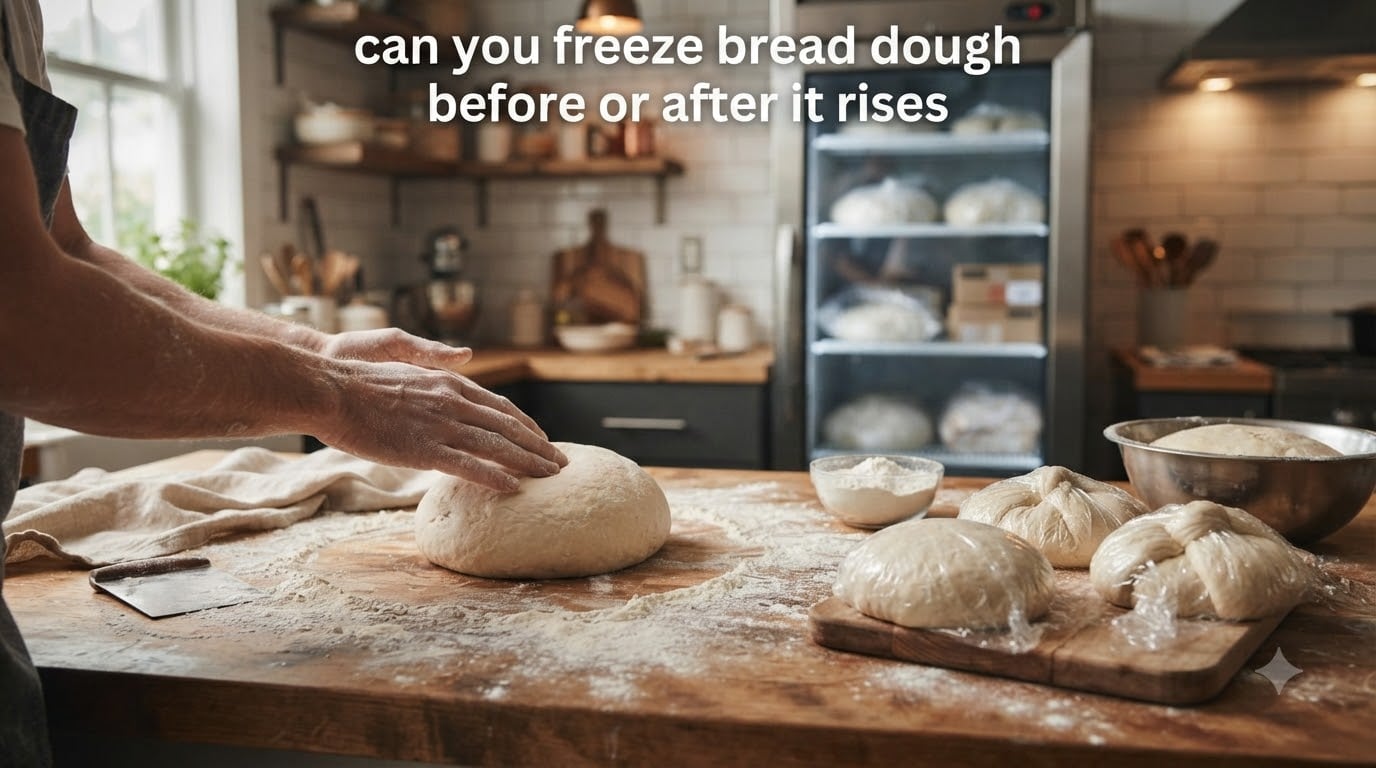
You pull a bag of frozen dough from the freezer at 5 PM, and by dinner, there’s a warm loaf of homemade bread on the table. That’s the magic of freezing bread dough — and yes, you absolutely can freeze it. The real question isn’t whether you can freeze bread dough before or after it rises, but which approach works best for your schedule and your recipe.
I’ve been freezing bread dough for years, and after testing both methods side by side with sandwich loaves, dinner rolls, and pizza dough, I can tell you the answer depends on how much time you have on baking day. Some weeks I freeze a big batch after the first rise so I can pull out portions whenever I need them. Other times I freeze right after kneading because I ran out of time to wait. In this guide, I’ll walk you through exactly when to freeze, how to do it right, and what to expect when you thaw and bake.
Freezing bread dough is a game plan for busy home bakers. You do the work once and eat fresh bread all week. Whether you’re meal prepping for the week, planning ahead for holiday dinners, or just want to stop buying plastic-wrapped bread at the store, learning how to freeze bread dough is one of the most practical skills you can pick up.
Table of Contents
Can You Freeze Bread Dough Before or After It Rises?
Yes, you can freeze bread dough both before and after it rises. Most bakers recommend freezing dough after the first rise — also called bulk fermentation — because the yeast has already done its initial work and the gluten structure is well developed. However, freezing before the first rise works too, though you’ll need to add a bit more yeast to compensate for some die-off during freezing.
Here’s what happens on a microscopic level: when yeast gets cold, it doesn’t die. It goes dormant, essentially hibernating until conditions warm back up. Once thawed, the yeast wakes up and gets back to fermenting, producing the carbon dioxide that makes your bread rise. The catch is that freezing kills a small percentage of yeast cells — some research suggests around 10-20% — so the rise may not be quite as vigorous as with fresh dough.
This is why the timing of your freeze matters so much. If you freeze after the first rise, the yeast has already produced a strong network of gas bubbles and developed the gluten. The dough just needs to wake up, proof one more time, and head into the oven. If you freeze before the first rise, you’re asking weakened yeast to do all the heavy lifting from scratch, which takes longer and produces slightly less rise.
Both methods work. The best one depends on your situation — and I’ll break down the tradeoffs below.
Freezing Before Rising vs After Rising: Which Is Better?
The short answer: freeze after the first rise for the best results. But each method has its place depending on your schedule and the type of bread you’re making.
Freezing After the First Rise (Recommended)
This is the method most professional bakers and home bakers swear by. After your dough has completed its first rise, you punch it down, shape it into portions, and freeze. The yeast has already established itself, the gluten network is built, and you’re essentially pausing the process at a stable checkpoint.
When you thaw dough frozen after the first rise, you only need a single rise before baking. The dough springs back quickly, and the results taste almost identical to never-frozen dough. Forum bakers report that this method works reliably even after months in the freezer, though quality is best within the first four weeks.
The yeast in this dough is in a strong position. It’s already multiplied during the first rise, and the gluten strands are well-organized. Freezing essentially hits pause. When the dough thaws, the remaining active yeast gets back to work, and you’re only waiting for one proofing cycle instead of two.
Freezing Before the First Rise
If you’re in a rush and need to get dough into the freezer immediately after mixing and kneading, this method works — but with a tradeoff. You’ll lose more yeast cells during freezing, which means the dough needs extra time to thaw and rise. Plan on adding 1/4 to 1/2 teaspoon more yeast per 3 cups of flour if you know you’re freezing before any rise.
Some bakers prefer this method for pizza dough and dinner rolls because it’s faster to prep. You mix, knead, portion, freeze, and deal with the rising later. It’s a trade-off of convenience now versus convenience later. I use this method when I’m making a big batch of pizza dough on Sunday and don’t want to wait around for the rise — I just portion it into balls and toss them in the freezer.
The downside is that on baking day, you need a lot more patience. The dough has to thaw completely, then complete its full first rise, and then proof again before baking. That can easily take 4-5 hours total, which doesn’t help much if you’re trying to save time.
Quick Comparison: Before Rise vs After Rise
Yeast activity: After rise — strong (yeast already established); Before rise — reduced (add extra yeast to compensate).
Time on baking day: After rise — 1-2 hours (single rise + bake); Before rise — 3-4 hours (thaw + full rise + bake).
Best for: After rise — loaves, rolls, most bread types; Before rise — pizza dough, quick prep days.
Result quality: After rise — excellent (close to fresh); Before rise — good (slightly less rise).
Freezer storage: Up to 4 weeks recommended for both methods.
Prep time before freeze: After rise — longer (wait for first rise); Before rise — shorter (mix and freeze immediately).
How to Freeze Bread Dough: Step-by-Step Guide
Method 1: Freezing After the First Rise
This is my go-to method, and it’s what most baking experts recommend. Here’s exactly how I do it.
Step 1: Make your dough recipe as normal. Knead until smooth and elastic — this takes about 8-10 minutes by hand or 5-7 minutes in a stand mixer with a dough hook. The dough should pass the windowpane test: you can stretch a small piece thin enough to see light through it without it tearing.
Step 2: Let the dough complete its first rise. It should roughly double in size, which typically takes 1-2 hours depending on your kitchen temperature and the recipe. A warm kitchen speeds things up; a cool one slows it down. I usually put mine in the oven with just the light on — that creates a perfect 75-80°F environment.
Step 3: Punch down the dough. Press your fist into the center of the risen dough to release the gas. This is important — you don’t want large air pockets freezing into the dough, as they create uneven texture when thawed.
Step 4: Divide and shape. For loaves, form into tight balls or logs that fit your loaf pan. For rolls, portion into individual pieces about 2-3 ounces each. For pizza dough, form into individual balls (about 6-8 ounces for a personal pizza). Uniform sizing helps everything freeze and thaw at the same rate.
Step 5: Flash freeze. Place the shaped dough pieces on a parchment-lined baking sheet, leaving at least 2 inches of space between each one. Put the sheet in the freezer for 1-2 hours until the dough is firm to the touch but not rock hard. This step is critical — it keeps the portions separate so you can grab exactly what you need later.
Step 6: Transfer to freezer bags. Remove the flash-frozen dough from the baking sheet and place in labeled freezer bags. Squeeze out as much air as possible before sealing. I double-bag mine — one bag inside another — to prevent freezer burn, which is the enemy of good frozen dough.
Step 7: Label and freeze. Write the date, dough type, portion size, and any notes on the bag. I also write “thaw overnight in fridge” on the label so I don’t forget the step when I’m rushing on a busy weeknight. Use within 4 weeks for best quality.
Method 2: Freezing Before the First Rise
Use this method when you want to get dough into the freezer fast, without waiting for the rise.
Step 1: Make your dough with extra yeast. Increase the yeast by 1/4 to 1/2 teaspoon per 3 cups of flour. Knead until smooth and elastic. This extra yeast compensates for the cells that won’t survive the freeze.
Step 2: Skip the rise. Go straight to dividing and shaping — same as Step 4 in Method 1. Don’t let the dough sit at room temperature; the sooner it gets into the freezer, the better.
Step 3: Flash freeze on a parchment-lined baking sheet for 1-2 hours. Same as Method 1 — get the dough firm but not frozen solid.
Step 4: Transfer to labeled freezer bags and remove air. Double-bag if possible. Freeze for up to 4 weeks.
When you’re ready to bake from this method, plan on a longer thawing and rising time — the dough needs to complete its full first rise after thawing, which adds 2-3 hours to the process.
Which Types of Bread Dough Freeze Best?
Not all doughs freeze equally well. Here’s what to expect from different types of bread dough.
Yeasted White and Whole Wheat Dough
These are the champions of freezer dough. Simple lean doughs — flour, water, yeast, salt — freeze beautifully and produce reliable results every time. Whether you’re making sandwich loaves, dinner rolls, or burger buns, lean yeast dough is your safest bet for freezing. The straightforward ingredients and strong gluten development make these doughs resilient through the freeze-thaw cycle.
Pizza Dough
Pizza dough freezes exceptionally well, and many home bakers keep a stash in the freezer at all times. Portion into individual balls before freezing — I use about 6-8 ounces per ball for a personal-sized pizza. When you’re ready, thaw overnight in the fridge, then let it come to room temperature for 30 minutes before stretching and topping. One Reddit user shared that they freeze pizza dough for months without problems, and I’ve had the same experience. The dough stretches just as easily as fresh.
Enriched Dough (Brioche, Challah, Cinnamon Rolls)
Enriched doughs with butter, eggs, and sugar freeze well but require a bit more patience during thawing. The fat in the dough can solidify and slow down the thawing process. Give these doughs extra time — I recommend thawing in the refrigerator overnight rather than on the counter. The results are excellent, especially for cinnamon rolls and sweet breakfast breads. The butter and sugar in enriched dough actually help protect the yeast cells during freezing.
Sourdough Dough
Sourdough is the trickiest. The wild yeast in sourdough starter is more sensitive to freezing than commercial yeast, and the long fermentation process means you’re interrupting a more complex system. King Arthur Baking recommends baking sourdough first, then freezing the baked bread rather than freezing the dough. If you do freeze sourdough dough, expect a less vigorous rise and plan on a longer second rise after thawing — sometimes 4-6 hours at room temperature. The flavor will still be good, but the open, airy crumb structure sourdough is known for may be slightly tighter.
Whole Grain and Seeded Dough
Whole wheat and multi-grain doughs freeze just as well as white dough. The bran and germ in whole wheat flour don’t affect the freezing process. Seeds and grains on the crust may get a bit soggy during thawing, but a quick egg wash before baking refreshes them nicely. I often freeze whole wheat dinner rolls and they come out of the oven looking and tasting great.
Dough Types to Avoid Freezing
Very wet, high-hydration doughs (above 80% hydration) don’t freeze as well. The excess water forms large ice crystals that damage the gluten network. If you’re working with a ciabatta or focaccia dough, consider baking first and freezing the baked bread instead. Similarly, doughs with delicate mix-ins like fresh herbs or cheese can get watery during thawing.
How to Thaw and Bake Frozen Bread Dough
Thawing in the Refrigerator (Recommended)
This is the gentlest method and gives the yeast the best chance to wake up gradually. Transfer frozen dough from the freezer to the refrigerator the night before you plan to bake. Most dough portions thaw fully in 8-12 hours overnight. In the morning, remove from the fridge, shape if needed, and let rise at room temperature until doubled — usually 1-2 hours for dough frozen after the first rise, or 2-4 hours for dough frozen before the first rise.
I set an alarm on my phone to move the dough from freezer to fridge before bed. It’s become part of my evening routine on nights when I know I want fresh bread the next day. By morning, the dough is soft and ready for its final proof.
Thawing at Room Temperature
When you’re short on time, thaw dough on the counter at room temperature. Small portions like dinner rolls thaw in 2-3 hours. A full loaf portion takes 4-6 hours. Keep the dough covered with a damp towel or plastic wrap to prevent the surface from drying out. This method works but requires more attention — the dough can over-proof if you’re not watching it.
The risk with counter thawing is uneven results. The outside of the dough warms up faster than the center, which means the outer layer might start rising while the inside is still cold and firm. For best results, flip the dough halfway through the thawing process.
Thawing in a Warm Spot
To speed things up, place the covered dough in a slightly warm oven (turn it to the lowest setting, then turn it off) or near (not on) a warm appliance. This can cut thawing time in half. Check frequently — dough can go from under-proofed to over-proofed quickly in warm conditions. I’ve ruined more than one batch by walking away and forgetting about dough proofing in a warm oven.
Baking After Thawing
Once your dough has thawed and completed its final rise, shape it (if you haven’t already), place it in the appropriate pan or on a baking sheet, and bake according to your original recipe’s instructions. The temperature and time should be the same as for never-frozen dough. You might notice the bread is slightly denser than fresh-made, but most people can’t tell the difference in a blind taste test.
One tip: score the top of your loaf with a sharp knife or razor blade before baking. This gives the bread room to expand in the oven and creates that beautiful crackled crust you see on bakery loaves.
Air Fryer Option
A growing number of home bakers are using air fryers to bake individual rolls and small loaves from frozen dough. Thaw the dough, shape into a ball that fits your air fryer basket, let it rise, and bake at 325-350°F for 15-20 minutes. The results are crusty on the outside and soft inside — perfect for dinner rolls or small boules. I’ve made single-serving rolls this way when I didn’t want to heat up the whole oven.
The key with air fryer baking is size. The dough needs room to expand without touching the heating element above. Keep portions small — about 3-4 ounces — and flatten them slightly so they don’t dome into the element.
Tips for Freezing Bread Dough Successfully
Yeast Adjustments
When freezing before the first rise, increase your yeast by 1/4 to 1/2 teaspoon per 3 cups of flour. If you’re freezing after the first rise, no adjustment is needed — the yeast has already done its heavy lifting. Use instant yeast rather than active dry yeast when possible; instant yeast has smaller granules and responds faster after thawing. Active dry yeast works too, but you might want to add an extra 1/4 teaspoon as insurance.
Flash Freezing Is Essential
Never skip the flash freeze step. Placing soft dough directly into a freezer bag creates one solid block that’s nearly impossible to separate later. Flash freezing individual portions on a baking sheet keeps them separate, so you can grab exactly what you need from the freezer without thawing the whole batch. I learned this the hard way after trying to pry apart a bag of frozen dinner roll dough that had fused into one giant lump.
Remove as Much Air as Possible
Air is the enemy of frozen dough. Oxygen causes freezer burn, which dries out the surface and creates tough, leathery patches. Use a vacuum sealer if you have one. If not, press the air out of zip-top bags by submerging the bag in water up to the seal (water pressure pushes air out), then seal it shut. This water displacement method works surprisingly well and costs nothing.
Use Bread Flour When Possible
Bread flour has a higher protein content than all-purpose flour, which means more gluten development. Stronger gluten networks hold up better during freezing and thawing, resulting in better rise and texture. If your recipe calls for all-purpose flour, you can substitute bread flour 1:1 with good results — just add a tiny splash more water, since bread flour absorbs slightly more liquid.
Don’t Freeze Dough with Raw Eggs on Top
If your recipe calls for an egg wash before baking, apply it after thawing, not before freezing. Raw egg doesn’t freeze well on dough surfaces and can create an unappealing texture. Save the egg wash for right before the dough goes into the oven.
Portion for Your Needs
Think about how you’ll use the dough before you freeze it. A full loaf is great for sandwiches, but if you only need a few dinner rolls on a weeknight, smaller individual portions are more practical. I freeze a mix: some full loaf portions, some dinner roll portions, and some pizza dough balls. That way I have options no matter what I’m cooking.
Troubleshooting: What to Do When Frozen Dough Doesn’t Turn Out
Dough Won’t Rise After Thawing
This is the most common problem with frozen dough. If your dough sits at room temperature for 2 hours and hasn’t budged, the yeast may have died during freezing or storage. Give it more time — up to 4 hours — especially if the dough was frozen before the first rise. If there’s still no movement after 4 hours, the yeast is likely dead, and you’ll need to start over. To avoid this, make sure your dough was well-kneaded before freezing, that you’re using fresh yeast (check the expiration date), and that you didn’t store the dough for longer than 4 weeks.
Sometimes the dough looks flat but actually has some life left. Try poking it gently — if the indent springs back slowly, there’s still active yeast in there. Give it another hour in a warm spot and check again.
Bread Is Too Dense
Slightly denser bread is normal with frozen dough, but if it’s significantly heavier than usual, the dough may have been under-proofed before freezing or not thawed long enough. Next time, ensure the dough has fully doubled during its first rise before freezing, and give it ample time to rise again after thawing. A slightly longer rise — even 30 extra minutes — can make a big difference. Adding a tablespoon of vital wheat gluten to your flour before mixing can also help, as it strengthens the gluten network that freezing weakens.
Dough Has Freezer Burn
Gray, dry patches on frozen dough are freezer burn. It’s not dangerous, but it affects texture and taste. Trim off the affected areas before thawing the rest. To prevent this in the future, double-bag your dough, remove all air, and don’t store it for longer than 4 weeks. The longer dough sits in the freezer, the more moisture it loses to sublimation — that’s the scientific term for water turning directly from ice to vapor in the freezer.
Surface Cracks When Thawing
If the dough develops cracks or a dry skin during thawing, it wasn’t wrapped tightly enough. Keep dough covered with plastic wrap or in a sealed bag during the entire thawing process. A damp towel draped over the dough also helps maintain moisture. The cracks themselves aren’t fatal — you can usually knead the dough briefly and reshape it — but they do indicate moisture loss that can affect the final texture.
Dough Thawed Too Fast and Over-Proofed
Dough that thaws too quickly — say, in a very warm spot — can over-proof before you’re ready to bake. Over-proofed dough smells strongly of alcohol and feels loose and sticky. You can punch it down and reshape it for one more rise, but the bread may have a slightly yeasty flavor. Next time, thaw in the refrigerator where the process is slower and more controlled. The fridge method takes longer but produces more consistent results.
Uneven Texture After Baking
If your baked bread has large holes in some spots and dense patches in others, the dough likely thawed unevenly. The outside warmed up and started rising while the center was still frozen. This happens most often with larger portions. To fix it, thaw large loaves in the refrigerator where the temperature is consistent, and give the dough a gentle knead and reshape before the final rise to redistribute the yeast evenly.
Freezing Dough vs Freezing Baked Bread
Both methods have their advantages, and I use both depending on the situation.
Freezing dough means you get the aroma and experience of fresh-baked bread. The crust comes out of the oven hot and crispy, and your kitchen smells amazing. The downside is that you need to plan ahead — thawing and rising takes hours. This method is best for weekends, holidays, or any time you know you’ll be home for a few hours before dinner.
Freezing baked bread is more convenient for immediate use. Slice the bread before freezing so you can grab individual slices and toast them directly from the freezer. The texture is slightly different from fresh-baked — the crust softens during freezing and reheating — but it’s still far superior to store-bought bread that’s been sitting on a shelf. I keep a loaf of sliced frozen bread in the freezer at all times for toast and sandwiches.
My approach: I freeze dough for planned meals where I want the full fresh-baked experience, and I freeze baked bread for quick everyday use like toast and sandwiches. Both methods have saved me countless trips to the bakery and grocery store.
Frequently Asked Questions
Can I freeze bread dough before it rises?
Yes, you can freeze bread dough before the first rise. Increase the yeast by 1/4 to 1/2 teaspoon per 3 cups of flour to compensate for yeast die-off during freezing. Flash freeze portions on a baking sheet for 1-2 hours, then transfer to freezer bags. Use within 4 weeks. When ready to bake, thaw in the refrigerator overnight and allow extra time for the dough to rise — usually 3-4 hours at room temperature.
What are common mistakes when freezing bread dough?
The most common mistakes include: not flash freezing individual portions (creating one solid block), not removing enough air from freezer bags (causing freezer burn), skipping the yeast adjustment when freezing before the first rise, thawing too quickly in a warm spot (leading to over-proofing), and storing dough for longer than 4 weeks in the freezer. Wrapping dough tightly and labeling with dates prevents most issues.
Can I refrigerate bread dough before it rises?
Yes, you can refrigerate bread dough instead of freezing it. Refrigeration slows yeast activity without stopping it completely. Dough can stay in the refrigerator for 1-3 days, developing more flavor during the slow rise. This method works especially well for pizza dough and artisan bread. The cold fermentation creates a more complex flavor than a fast room-temperature rise.
How long can you keep bread dough in the freezer?
Bread dough keeps best in the freezer for up to 4 weeks. After that, yeast viability drops significantly and freezer burn becomes more likely, even with good wrapping. Some bakers report success after 2-3 months, but the rise quality declines noticeably. For the best results, label your dough with the freeze date and use it within a month.
Can you freeze sourdough bread dough?
You can, but it’s not ideal. Wild yeast in sourdough starter is more sensitive to freezing than commercial yeast. The long fermentation process also makes it harder to pause and restart. King Arthur Baking recommends baking sourdough first, then freezing the baked bread. If you do freeze sourdough dough, expect a longer rise after thawing — sometimes 4-6 hours at room temperature — and a slightly less open crumb structure.
Should you put a paper towel in bread before freezing?
A paper towel isn’t necessary for freezing bread dough, but some bakers use one when thawing to absorb condensation. As the dough thaws, moisture forms on the surface, and a paper towel can help keep the dough from getting soggy. Wrap the dough in plastic wrap first, then place a paper towel between the dough and the outer bag during thawing for best results.
Conclusion
Freezing bread dough is one of the best time-saving tricks in home baking. Whether you freeze before or after it rises, the key is proper preparation — flash freeze individual portions, remove air from your storage bags, and give the dough enough time to thaw and rise before baking. Once you’ve done it a few times, you’ll wonder how you ever baked bread without a freezer stash. The next time you find yourself with an hour to spare and a bag of flour, make a double batch and freeze half. Your future self will thank you when there’s fresh bread on the table with almost no effort.