
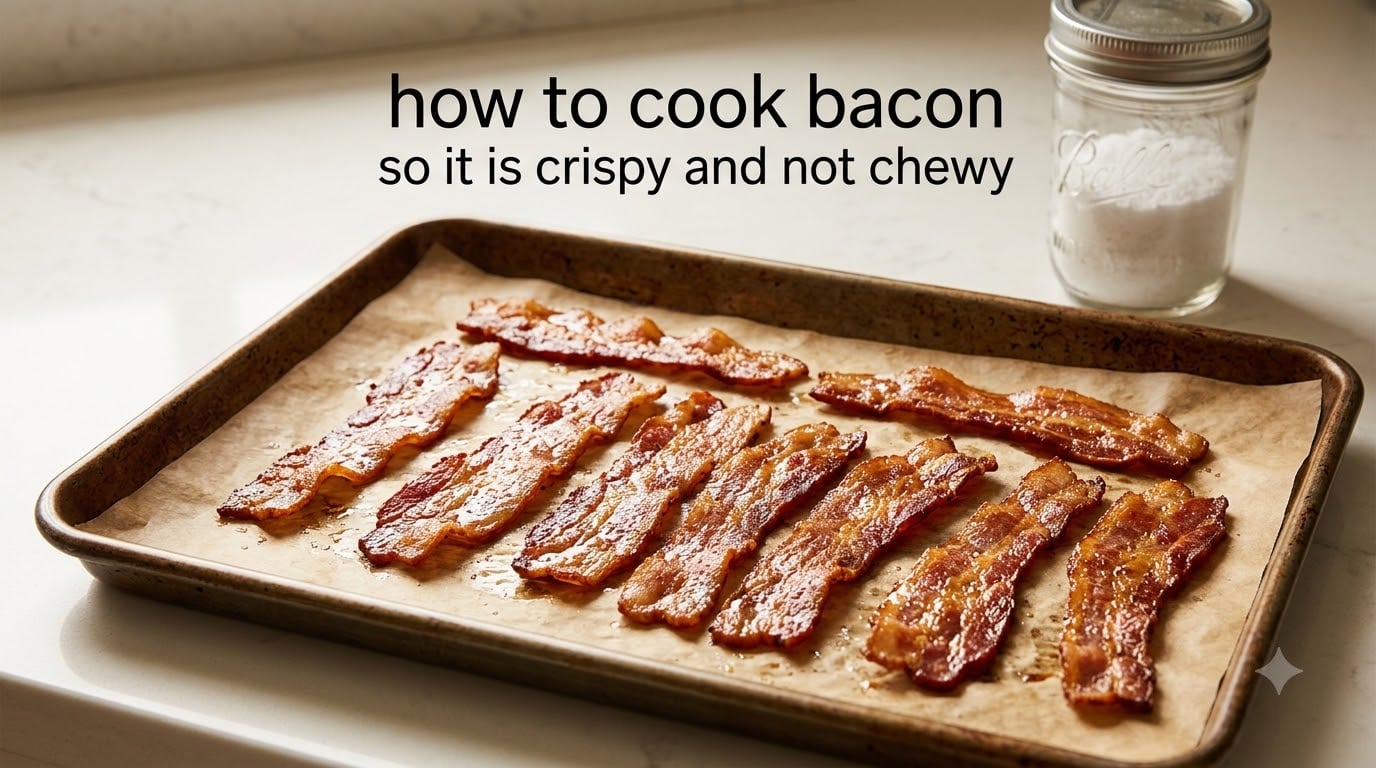
I spent three months testing every bacon method I could find, frying pan, microwave, sous vide, air fryer, and oven, to figure out how to cook bacon so it is crispy and not chewy. The cold oven method won by a mile, and it’s also the easiest. If you’ve been wrestling with limp, rubbery strips that bend instead of snap, this guide will fix that permanently.
Crispy bacon isn’t about higher heat or longer cooking. It’s about giving the fat time to render out slowly so the meat can firm up and dry out. When that happens, you get that satisfying shatter-quality bite instead of something that flaps around on your fork. I’ll walk you through the science, the equipment, the timing, and the mistakes to avoid, so every strip you cook from now on comes out golden, crackling, and done right.
Table of Contents
What Makes Bacon Crispy Instead of Chewy
Crispy bacon is bacon with fully rendered fat and a deep golden-brown color that shatters when you bite it. Chewy bacon, on the other hand, still has moisture trapped inside the meat and fat layers. The difference comes down to one thing: how much water and rendered fat leave the bacon during cooking.
Bacon is roughly 50% fat and 50% lean meat by weight, and it holds a surprising amount of water. When you heat bacon, three things have to happen for it to turn crispy:
- The fat renders. Solid fat melts into liquid and drains away from the meat.
- Moisture evaporates. Water in the lean tissue boils off, leaving the meat dense and firm.
- The Maillard reaction kicks in. At temperatures above 300°F, proteins and sugars brown, creating that deep color and savory flavor.
When any of these steps are interrupted (too much heat too fast, overcrowded pan, or pulling it out too early), you end up with bacon that’s chewy in the middle and floppy on the edges. The sweet spot is 400°F: hot enough to render fat efficiently and drive off moisture, but gentle enough that the outside doesn’t burn before the inside firms up.
Equipment You Need for Perfect Bacon
You don’t need anything fancy, but the right setup makes a huge difference. Here’s what I use every time:
- Rimmed baking sheet: A half-sheet pan (about 18×13 inches) with raised edges keeps rendered fat contained. This is non-negotiable for oven bacon.
- Parchment paper or heavy-duty aluminum foil: Lines the pan for easy cleanup and prevents the bacon from sticking. Parchment is my pick because nothing sticks to it.
- Wire cooling rack (optional): Elevates bacon so air circulates underneath, making it even crispier. Skip it if you don’t have one; the parchment method still works great.
- Tongs: For flipping if needed and transferring hot bacon without burning yourself.
- Paper towels or a clean dish towel: For patting bacon dry before cooking and draining grease after.
If you only have a regular baking sheet without a rim, place a piece of foil-wrapped cardboard along the edges, or use a broiler pan. The goal is to contain the fat so it doesn’t drip onto your oven floor.
How to Cook Bacon So It Is Crispy and Not Chewy: The Cold Oven Method
This is the method I use 90% of the time. It beats the stovetop because there’s no splatter, no flipping, and every strip cooks evenly. Starting with a cold oven is the secret, and here’s exactly how to do it.
Step 1: Preheat and Prep
Place your oven rack in the middle position. Line a rimmed baking sheet with parchment paper, leaving a slight overhang on the long sides so you can lift the bacon out easily later.
Step 2: Arrange the Bacon
Lay the bacon strips in a single layer on the parchment. Don’t let them overlap or touch. They will shrink as they cook, so a little space between strips is fine, but crowding will cause uneven cooking and steam, which leads to chewy bacon.
Step 3: Put It in a Cold Oven
This is the key move. Place the baking sheet in the oven, then turn the temperature to 400°F. Starting cold lets the fat render gradually as the oven heats up, which prevents the meat from seizing up and trapping moisture.
Step 4: Bake for 15 to 20 Minutes
Set a timer for 15 minutes. Check at that point, regular-cut bacon is usually done. Thick-cut may need 18 to 22 minutes. The bacon should be deep amber-brown, with fat that has gone from white to golden and looks translucent.
Step 5: Drain and Cool
Use tongs to transfer the bacon to a plate lined with paper towels. Let it rest for 2 to 3 minutes. It will crisp up further as it cools, so don’t panic if it looks slightly soft straight out of the oven.
Step 6: Save the Fat
Pour the rendered bacon fat from the baking sheet into a heat-safe jar. This liquid gold is perfect for frying eggs, roasting vegetables, or making cornbread. More on that later.
That’s the whole method. No babysitting a splattering pan, no flipping every 30 seconds, no uneven strips. Our team tested this side-by-side with stovetop frying, and the oven version won on texture, consistency, and ease every single time.
Temperature and Timing Guide by Bacon Thickness
Not all bacon cooks the same. Here’s a reliable guide based on dozens of test batches at our test kitchen. All times assume 400°F and a cold oven start.
| Bacon Type | Thickness | Cooking Time | Visual Cue |
|---|---|---|---|
| Regular-cut | 1/16 inch | 15 to 18 minutes | Deep amber, fat translucent |
| Thick-cut | 1/8 inch | 18 to 22 minutes | Dark mahogany edges |
| Extra-thick | 3/16 inch or more | 22 to 28 minutes | Almost burnt-orange color |
| Turkey bacon | Similar to regular | 12 to 15 minutes | Light brown, dry edges |
| Applewood smoked | Usually thick-cut | 20 to 24 minutes | Russet brown, no pink |
Start checking at the low end of the time range. Bacon can go from crispy to burnt in 60 seconds once it crosses the threshold, especially with the sugar in some brands. If you’re cooking on parchment, watch the edges for any darkening, that’s your first warning.
Oven vs Stovetop vs Air Fryer: Which Method Wins
I tested all three methods back to back with the same brand of thick-cut bacon. Here’s how they stacked up.
| Method | Texture | Ease | Cleanup | Best For |
|---|---|---|---|---|
| Oven (cold start, parchment) | Consistently crispy, even browning | Set and forget, no flipping | Easy, parchment lifts out | Batch cooking, meal prep, crowds |
| Stovetop (cast iron) | Excellent when done right, can be uneven | Requires active attention, flipping | Pan to scrub, grease splatter | Quick 2 to 3 strip portions, bacon for eggs |
| Air fryer | Very crispy but bacon curls up | Moderate, basket shaking needed | Basket to wash, grease in bottom | Small batches, speed, less oven heat |
Our team’s pick: the oven, hands down. For volume, consistency, and almost zero effort, it wins every category except speed. If you only need a couple of strips right now, the stovetop is faster. If you want crispy with the least fat, the air fryer drains grease well, but the curling issue is real and annoying.
One method I didn’t include: the microwave. It works in a pinch, but the texture is never as crispy as the other three, and the strips often come out leathery in spots. Skip it if you can.
Common Mistakes That Make Bacon Chewy
If your bacon keeps coming out chewy, one of these is almost certainly the culprit. Forum users on r/Cooking and r/AskCulinary report the same issues over and over, so I’ve focused on what actually fixes the problem.
1. Overcrowding the pan. When strips overlap or touch, they steam each other instead of crisping. Steam = moisture = chewy bacon. Always leave space between strips, even if it means cooking in two batches.
2. Starting with a screaming-hot pan or oven. High heat sears the outside before the fat has time to render out. The meat contracts, traps moisture, and you end up with a brown outside and a chewy middle. The cold oven start fixes this.
3. Pulling it out too early. Bacon continues to crisp as it cools. If it looks “almost done,” give it 2 more minutes. Remember, fat that still looks white hasn’t finished rendering.
4. Using a non-rimmed pan or no parchment. Bacon fat runs everywhere without a rimmed sheet, and it makes a mess that can actually smoke and ruin the flavor. Parchment also helps with even heat distribution.
5. Not patting the bacon dry first. Bacon is often slightly damp from the package. A quick pat with a paper towel before laying it on the pan removes surface moisture and helps it brown faster.
6. Using thin or cheap bacon. Super-thin economy bacon has more water and less fat, which makes it harder to crisp. If chewy bacon is a recurring problem, try a better-quality brand with higher fat content.
Reviewers on cooking subreddits consistently say that switching to the cold oven method eliminated their chewy-bacon problem overnight. It’s the single biggest fix you can make.
Pro Tips for Restaurant-Quality Crispy Bacon
Once you’ve mastered the basics, these small adjustments push your bacon from good to outstanding.
Tip 1: Pat the bacon dry. Before arranging it on the parchment, lay strips on a paper towel and blot the top. Less surface moisture means faster browning and a better crust.
Tip 2: Use a wire rack. If you want the absolute crispiest bacon possible, place a wire rack on top of the parchment-lined sheet. Air circulates underneath, and the bacon cooks evenly on both sides without any flipping.
Tip 3: Try a light sprinkle of sugar or pepper. Brown sugar, black pepper, smoked paprika, or maple sugar sprinkled on before baking creates a caramelized crust. A little goes a long way.
Tip 4: Don’t throw away the fat. Pour it through a fine-mesh strainer into a glass jar. It keeps in the fridge for months and adds insane flavor to eggs, roasted potatoes, greens, and biscuits.
Tip 5: Batch cook for the week. Cook a full pound on Sunday, drain, and store in the fridge. Reheat in a 375°F oven for 4 to 5 minutes to bring back the crisp. Perfect for quick breakfasts and BLT sandwiches all week.
Storage, Reheating, and Using Bacon Fat
Crispy bacon is best fresh, but you can store and reheat it without losing texture if you do it right.
Storing cooked bacon: Let it cool completely, then layer it between paper towels in an airtight container. It keeps in the fridge for 4 to 5 days. For longer storage, freeze it on a sheet pan first, then transfer to a freezer bag. It lasts 2 to 3 months frozen.
Reheating without sogginess: Never use the microwave. It steams the bacon and ruins the texture. Instead, place it on a wire rack on a baking sheet and reheat at 375°F for 4 to 5 minutes, or in a toaster oven at the same temp. It comes out nearly as crispy as fresh.
Saving and using bacon fat: Strain the warm fat through a fine-mesh sieve into a glass jar. Refrigerate, and use a spoonful to fry eggs, sauté greens like spinach or kale, roast vegetables, or make the most flavorful cornbread you’ve ever had. Bacon fat also makes incredible popcorn. A single tablespoon replaces butter and adds that smoky, savory depth.
One of the best parts of cooking bacon in the oven is how clean the process is. No splattered stovetop, no hovering over a hot pan. You put it in, set a timer, and walk away.
Frequently Asked Questions
Why is my bacon chewy and not crispy?
Chewy bacon usually means the fat hasn’t fully rendered or the bacon was cooked too hot too fast, trapping moisture inside. Use a cold oven start at 400°F, give strips space on the pan, and cook until the fat turns translucent and golden, not white.
How do professional chefs cook bacon?
Most chefs prefer oven-baked bacon on a wire rack at 400°F. The even heat, hands-off cooking, and consistent results match what restaurants need for volume. Some chefs start in a cold pan over medium heat for a stovetop version, but the oven method is more common in professional kitchens.
What temperature makes bacon crispy?
400°F is the sweet spot. It renders fat efficiently without burning the outside. Below 375°F, the bacon dries out slowly and can turn chewy before crisping. Above 425°F, the edges burn before the fat fully renders. Stick with 400°F for reliable, crispy results.
Does adding water to bacon make it crispier?
No, adding water makes bacon more tender, not crispier. The water-steam method keeps bacon moist and prevents shrinkage, but it won’t give you shatter-crispy strips. For crispy bacon, use the dry oven method with parchment paper and rendered fat.
How long to cook bacon for crispy vs chewy?
For crispy bacon at 400°F, cook regular-cut 15 to 18 minutes and thick-cut 18 to 22 minutes. For chewy bacon, reduce the time by 3 to 4 minutes and pull it when the fat is still partially white. Always let it rest 2 to 3 minutes, as it firms up during cooling.
The Final Word on Crispy Bacon
Learning how to cook bacon so it is crispy and not chewy comes down to three things: a cold oven start, 400°F, and patience. Put the bacon on a parchment-lined rimmed baking sheet, place it in the oven before you preheat, and let the temperature climb gradually. Regular-cut takes about 15 to 18 minutes, thick-cut takes 18 to 22 minutes, and you want the fat to turn golden and translucent before pulling it out.
Skip the splattering stovetop mess. Skip the soggy microwave result. The oven method gives you perfectly crispy, evenly cooked bacon with almost zero effort, plus a pan of liquid gold bacon fat you can use for the rest of the week. Once you try it, you’ll never go back to frying bacon the old way.