
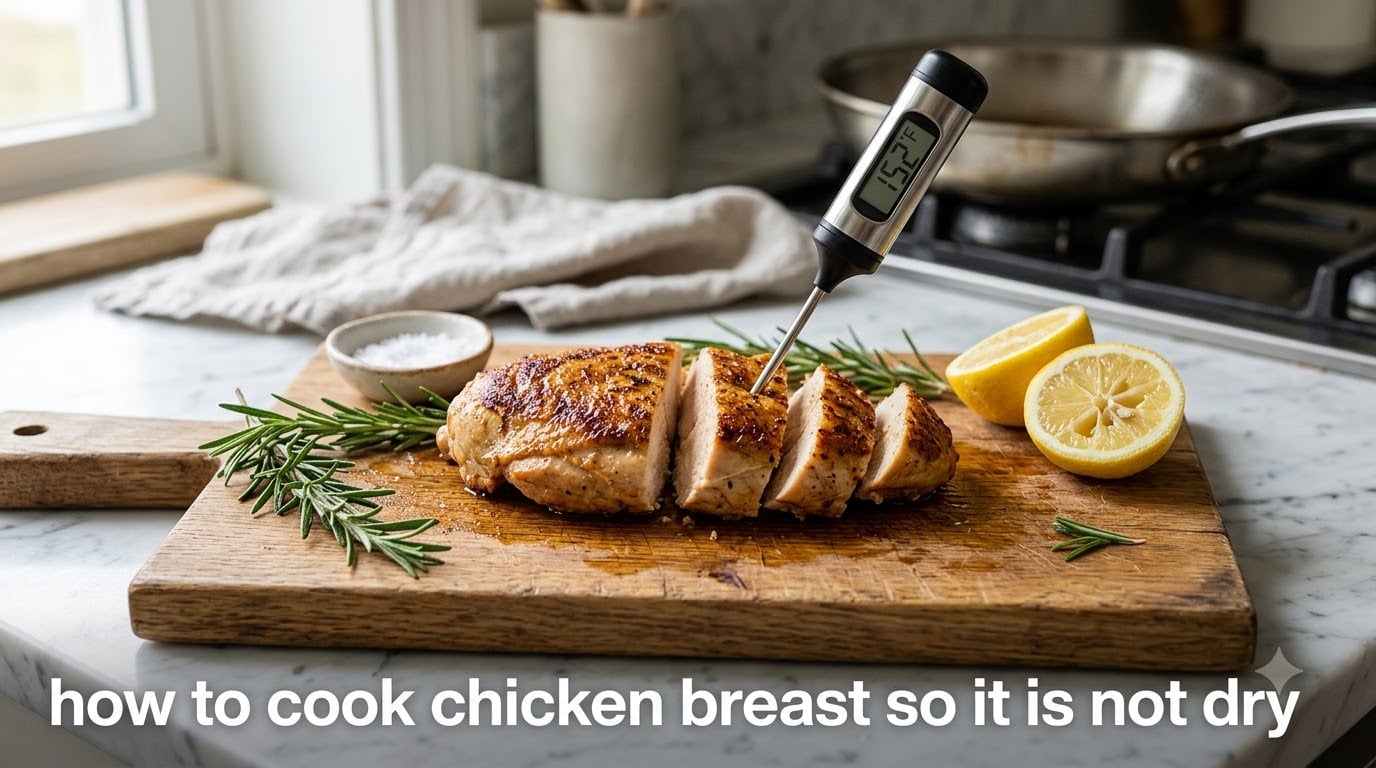
I used to think dry chicken breast was just how chicken breast tasted. Then I watched my friend pull a thermometer out of hers at 152°F, rest it under foil for eight minutes, and slice into something so juicy I actually went quiet at the dinner table. That was the day I stopped cooking by the clock and started cooking by temperature. If you’re wondering how to cook chicken breast so it is not dry, the answer is not a secret ingredient or a fancy pan. It is three small habits that change everything: pounding, temperature-checking, and resting.
Chicken breast is the leanest cut on the bird. That makes it healthy, but it also makes it unforgiving. Go five minutes past the safe point and you have chalk. Go two minutes under and you’re worried about food safety. The window is narrow, but it is completely manageable once you understand what is happening inside the meat. In this guide, I will walk you through the exact method I use at home, plus what to do when you do not want to stand over a skillet (hello, oven and air fryer), and how to rescue leftovers so they do not taste like rubber the next day.
Table of Contents
Why Chicken Breast Dries Out (and What Changes Everything)
Chicken breast dries out for one simple reason: the proteins squeeze out their moisture when they contract, and they keep contracting as long as heat is on. White meat like chicken breast starts tightening around 140°F and keeps going past 170°F, squeezing liquid out with every degree. By the time most home cooks hit 180°F (because they cooked “ten minutes per side like the recipe said”), the breast has lost a third of its weight in juice.
The fix is not cooking less. It is cooking smarter. Three things change the math: even thickness so the thin edge and the thick center finish at the same time, an accurate pull temperature so you stop the moment the breast hits its window, and a proper rest so the juices reabsorb instead of spilling onto the cutting board.
Forget timers. The single biggest predictor of juicy chicken is whether you own an instant-read thermometer and actually use it. Everything else in this article builds on that one habit.
Essential Tool: Why a Meat Thermometer Is Non-Negotiable
If you take only one thing from this guide, take this: buy an instant-read thermometer. A leave-in probe thermometer also works for oven cooking. Either one costs less than a single dinner out and will pay you back in better chicken forever.
The USDA says chicken is safe at 165°F internal. That is correct, and you should remember it for food safety. But here is the part most guides skip: 165°F is the temperature at which dangerous bacteria are killed almost instantly. The meat continues to rise in temperature after you pull it from the heat, a phenomenon called carryover cooking. If you pull a thick breast at 155°F and rest it for 8 to 10 minutes, the center climbs to a safe 163 to 165°F on its own, and the juices stay inside the muscle fibers instead of being squeezed onto your plate.
Insert the thermometer horizontally into the thickest part of the breast, going in from the side, not the top. That way you skip the pan-hot surface and read the actual center. A reading of 150 to 155°F is your cue to pull. If you hit 160°F, the breast is still going to be tender, but if you climb past 165°F in the pan, you have crossed into dry territory and no amount of resting will save it.
Key Technique 1: Pound to Even Thickness
A chicken breast is shaped like a teardrop. The thin tapered end can be done in three minutes while the fat teardrop end is still raw. Pounding solves this in about 30 seconds.
Place the breast between two pieces of plastic wrap (or inside a zip-top bag with the air pressed out). Use the flat side of a meat mallet, a rolling pin, or even a heavy skillet to press it out to an even 3/4 inch thickness across the whole piece. Some cooks like it closer to 1/2 inch for very fast cooking, but 3/4 inch is the sweet spot for juiciness with a good sear.
You will notice the breast looks bigger after pounding. That is normal, and it is good: more surface area for the sear, and a thickness that lets the whole piece finish at the same moment. This is the step that home cooks skip most often, and it is the step that Reddit’s r/Cooking community calls “life-changing” more than almost any other.
If you hate pounding, butterflying works too. Slice horizontally through the side of the breast, stopping just before you cut all the way through, then open it like a book. You get the same even-thickness result, just a wider and thinner piece.
Key Technique 2: Brining for Moisture Insurance
Brining sounds fancy but takes 15 minutes of hands-on time. Soaking chicken in salt water allows the muscle fibers to absorb extra moisture and hold onto it during cooking, which acts as insurance against overcooking.
The simplest wet brine is 4 cups of water plus 1/4 cup of kosher salt, stirred until dissolved. Submerge the pounded breasts for 30 minutes at room temperature, or up to 2 hours in the fridge. Rinse briefly, pat very dry, then season. The dry surface is important: moisture on the outside will steam the chicken instead of searing it, and you will miss out on that golden crust.
If you want a hands-off option, try a dry brine. Salt the breasts generously (about 1/2 teaspoon kosher salt per breast), place them on a rack over a plate, and refrigerate uncovered for 30 to 60 minutes. The salt draws out a little moisture, dissolves into it, and gets reabsorbed. You also get a drier surface for better browning.
Beginners often skip brining because the difference is subtle. Once you have cooked a brined breast and an unbrined breast side by side, you will never go back. The brined one is noticeably juicier, especially if your thermometer guess was off by a few degrees.
Key Technique 3: Pan-Searing Step-by-Step
Pan-searing is the fastest, most forgiving method for a single breast, and the one most home cooks should master first. Here is the exact sequence I use.
Heat a stainless steel or cast iron skillet over medium-high heat for 2 to 3 minutes. Add 1 tablespoon of a neutral oil with a high smoke point (avocado, canola, or grapeseed). When the oil shimmers and just begins to ripple, it is ready. A drop of water should sizzle and skate across the surface, not sit and boil.
Lay the breast in the pan away from you so any splatter goes the other direction. Do not move it for 4 to 5 minutes. You will know it is ready to flip when the edges look opaque and the underside releases easily when you lift a corner with tongs. If it sticks, give it another 30 to 60 seconds. Once it releases, flip.
Cook the second side for another 3 to 4 minutes. Start checking the internal temperature at 3 minutes. Insert the thermometer horizontally into the thickest part. Pull the breast at 150 to 155°F. It will look slightly underdone in the center, and that is exactly right.
Transfer to a plate or board, tent loosely with foil, and rest for 5 to 10 minutes. Slice against the grain or serve whole. The juice you see when you cut into it should be a clear, very pale pink, not red. If it is red, the breast needs more time; return it to a low oven for a few minutes.
Key Technique 4: Pull at 150-155°F and Let Carryover Cooking Finish the Job
Carryover cooking is the most underused concept in home kitchens. A thick chicken breast pulled at 150°F will climb to 158 to 162°F during a 10-minute rest, all on its own, with no heat source at all. A thin one pulled at 155°F will land right around 163°F. Either way, you hit safe temperatures without overshooting into dry territory.
The rest is not optional. Cutting into a breast the moment it comes out of the pan sends all the juice pooling on the cutting board. Resting gives the muscle fibers time to relax and reabsorb that juice. Five minutes is the minimum for a thin breast, 8 to 10 minutes for a thick one. Tent loosely so steam can escape, otherwise the bottom will get soggy.
This is also why slicing matters. Always cut across the grain (perpendicular to the lines you see running through the meat). Slicing with the grain leaves long muscle fibers intact and each bite feels chewy. Slicing across shortens the fibers, so the same tender breast feels tender on the fork.
Alternative Methods: Oven, Air Fryer, and Grill Compared
Pan-searing is not the only option. Here is how the three most common alternatives stack up.
Oven (best for hands-off cooking): Preheat to 425°F. Pat the pounded breast dry, season, and place on a rimmed sheet pan lined with parchment. Roast for 16 to 22 minutes, depending on thickness, until the thermometer reads 150 to 155°F. Rest 5 to 8 minutes. This method is great when you are cooking four breasts at once, and you can finish with 2 minutes under the broiler for color.
Air fryer (best for a weeknight single breast): Preheat to 380°F. Brush or spray the breast lightly with oil and season. Cook for 8 to 12 minutes, flipping halfway, until 150 to 155°F. The circulating hot air gives you browning without the oil of a skillet, and the small basket means fast preheat. Pound the breast to 3/4 inch so it cooks evenly in this short window.
Grill (best for smoky flavor): Set up two-zone heat: hot coals on one side, none on the other. Sear the breast over the hot side for 3 minutes per side with the lid closed, then move to the cool side to finish to temperature. This prevents the flare-up char outside / raw inside problem that plagues beginners.
Across all three methods, the rule is the same: dry surface, even thickness, pull at 150 to 155°F, rest before slicing. The method is just the vehicle. Temperature and rest are what determine juiciness.
Troubleshooting: What Went Wrong and How to Fix It
Even with the right method, things go wrong. Here is a quick guide to the most common problems and the fix for each.
Chicken is dry and chalky. You overshot the temperature. Check your thermometer accuracy by placing it in ice water (should read 32°F) and boiling water (should read 212°F at sea level). Next time, start checking at 4 minutes and pull earlier.
Outside is burnt, inside is pink. Your pan was too hot, or the breast was too thick. Pound to 3/4 inch next time, and drop the heat to medium-high instead of high. Searing is about contact time, not temperature extremes.
Chicken sticks to the pan and tears. The pan was not hot enough when you added the breast, or you tried to flip too early. Wait until the breast releases on its own. If nothing sticks but you want fond for a sauce, a splash of chicken stock at the end deglazes beautifully.
Juices run clear but meat tastes rubbery. You probably overcooked slightly, but more likely you sliced with the grain. Slice perpendicular to the visible fibers next time and the same piece will feel tender.
Brined chicken tastes too salty. Your brine was too concentrated or you brined too long. Cut salt to 2 tablespoons per 4 cups of water and limit to 1 hour for thin breasts, 2 hours for thick ones.
Reheated leftovers are dry. Slice before reheating, add a splash of chicken stock, and warm gently in a covered pan over low heat. Microwave in 30-second bursts at half power with a damp paper towel on top.
Make-Ahead and Reheating Without Drying Out
Cooked chicken keeps in the fridge for 3 to 4 days and in the freezer for up to 4 months. Slice it cold from the fridge for the cleanest pieces, especially for salads and grain bowls. Store it with a few tablespoons of chicken stock in the container so the meat does not dry out from the inside.
For freezing, lay sliced chicken on a parchment-lined sheet pan, freeze until firm, then transfer to a freezer bag. The flash-freeze step keeps the slices from sticking together so you can pull out exactly what you want.
Reheating is where most people ruin good chicken. The microwave is the worst tool for this: it heats unevenly and toughens protein quickly. Instead, slice the chicken, add it to a skillet with a splash of stock or sauce, cover, and warm over low heat for 3 to 4 minutes. The steam gently brings the breast back to temperature without squeezing out more moisture.
For meal prep, cook four breasts at once on a Sunday, slice, and portion into containers with different sauces (pesto, salsa verde, teriyaki, lemon-tahini). A 5-minute reheat with sauce is a complete lunch, and the chicken stays juicy because the sauce replaces what little moisture was lost.
Frequently Asked Questions
What is the secret to juicy chicken breast?
The three secrets are even thickness, accurate temperature, and resting. Pound the breast to 3/4 inch, pull it from the heat at 150 to 155°F, and rest it 5 to 10 minutes so the juices redistribute.
Why is my chicken breast always dry?
Most dry chicken is overcooked. A breast cooked past 165°F loses moisture rapidly because muscle fibers contract and squeeze out liquid. Cooking by temperature with a thermometer, instead of by time, prevents this.
How do restaurants keep chicken breast so moist?
Restaurants brine, pound to even thickness, use calibrated thermometers, and pull at lower temperatures than home cooks do. Many also let chicken rest longer than you would expect.
Can I reheat chicken breast without it drying out?
Yes. Slice first, add a splash of chicken stock, and warm gently in a covered pan over low heat. Microwave in short bursts at half power with a damp paper towel.
How long should I cook chicken breast in a pan?
About 4 to 5 minutes per side over medium-high heat for a pounded 3/4 inch breast, but always cook to temperature not to time. Pull at 150 to 155°F and let carryover cooking finish it.
Do I really need a meat thermometer?
Yes. An instant-read thermometer is the single best investment for juicy chicken. It removes guesswork and lets you pull the breast at exactly the right moment every time.
How do I keep chicken breast moist in the oven?
Pound to even thickness, pat dry, roast at 425°F for 16 to 22 minutes until 150 to 155°F, then rest 5 to 8 minutes. A short broil at the end adds color without drying.
Final Thoughts
Learning how to cook chicken breast so it is not dry comes down to three habits: pound for even thickness, cook to temperature instead of time, and rest before slicing. Add a quick brine if you want extra insurance, and you have a method that produces restaurant-quality results in any home kitchen.
Buy the thermometer if you do not already have one. It is the difference between hoping and knowing. Once you pull your first breast at 152°F and slice it after an 8-minute rest, you will not go back to the timer method. That is when chicken breast stops being the dry protein you tolerate and starts being the easy weeknight protein you actually look forward to.