
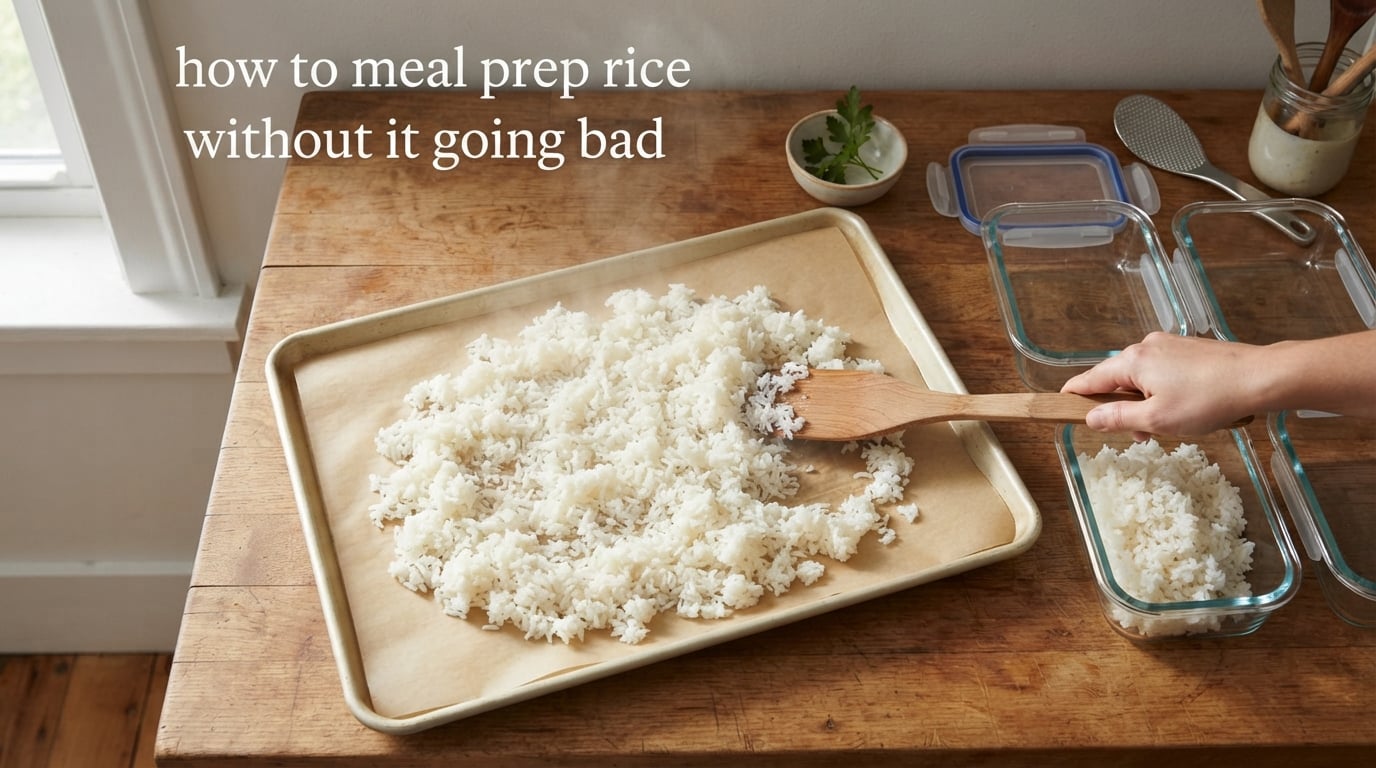
To meal prep rice without it going bad, cook a large batch, spread it on a baking sheet to cool within 1 to 2 hours, portion it into airtight containers, and refrigerate for up to 5 days or freeze for up to 3 months. Always reheat rice to 165°F with a splash of water to restore moisture.
I’ve tested every method out there, and the cooling step is where most home cooks slip up. If you follow the four-phase system below — cook right, cool fast, store airtight, reheat with moisture — your rice will taste as good on day five as it did fresh out of the pot. Let’s walk through it.
Table of Contents
Quick Answer: How to Meal Prep Rice Without It Going Bad
The fastest answer for anyone scanning the page: spread hot rice on a sheet pan in a thin layer, let it cool to room temperature within 1 to 2 hours, then transfer to airtight containers and refrigerate for up to 5 days. For longer storage, freeze flat in zip-lock bags for up to 3 months.
The reason this works is timing and temperature control. Bacteria multiply fastest between 40°F and 140°F (the “danger zone”). Cutting your cooling window down to under 2 hours keeps cooked rice out of that range long enough that spoilage and the Bacillus cereus risk stay low. Everything else in this guide builds on those two rules.
Why Rice Goes Bad (And the Bacillus cereus Risk)
Cooked rice spoils faster than most people expect, and the culprit is a spore-forming bacterium called Bacillus cereus. Bacillus cereus lives on uncooked rice and survives the cooking process. Once rice starts cooling, the spores wake up and produce toxins that ordinary reheating cannot destroy.
Reviews on r/MealPrepSunday confirm this is the most common worry home cooks have about prepping rice. The risk is real but manageable. Once rice drops below 40°F, bacterial activity slows almost to a stop. The window that matters is the 1 to 2 hours between cooking and refrigeration.
Symptoms of Bacillus cereus food poisoning typically appear within 1 to 6 hours after eating and include nausea, vomiting, and cramps. Most healthy adults recover within 24 hours. The point isn’t to scare you, but to put the risk in perspective: with proper cooling and storage, meal prep rice is one of the safest weekly staples you can make.
The danger zone (40°F to 140°F) is where most bacterial growth happens. Rice left on the counter for 3 to 4 hours can cross into unsafe territory, especially in a warm kitchen. Treat the first 90 minutes after cooking as the most important window of the entire week.
Best Rice Types for Meal Prep
Not every rice variety holds up the same way in the fridge. Some turn hard by day three, others stay fluffy for a full week. Here’s how the most popular options compare for meal prep.
| Rice Type | Texture After Reheating | Fridge Life | Best For |
|---|---|---|---|
| White long-grain | Light, separate grains | 4 to 5 days | Grain bowls, stir-fries |
| Brown rice | Chewy, nutty | 3 to 4 days | High-fiber meal prep, gym meals |
| Jasmine | Soft, aromatic | 4 days | Curries, Asian-style bowls |
| Basmati | Dry, fluffy | 5 days | Indian dishes, biryani |
| Wild rice | Firm, chewy | 5 to 6 days | Salads, hearty bowls |
| Short-grain sushi | Sticky, soft | 3 days | Bento boxes, onigiri |
| Instant / minute | Mushy if reused | Not ideal | Single-serve, same-day use |
Long-grain white rice is the easiest for beginners because the grains stay separate after reheating. Brown rice has the most fiber and a low glycemic index, but its higher oil content means it turns rancid faster. If you’re new to meal prep, start with basmati or jasmine and branch out once the cooling routine feels automatic.
Rinsing the rice before cooking removes excess surface starch and prevents clumping in storage. Skip the rinse only for risotto-style or sticky rice dishes where the starch is part of the texture.
Step-by-Step Guide: Cook, Cool, Store, Reheat
Here’s the exact workflow our team uses every Sunday for a week’s worth of lunches. Total active time is about 30 minutes and the hands-off stretch gives you time to prep proteins and vegetables.
Step 1 — Cook a Big Batch
Measure rice by volume, not weight, for consistency. For long-grain white rice, use a 1:1.5 rice-to-water ratio (1 cup rice to 1.5 cups water). Brown rice needs more liquid — 1:2 with a 30-minute soak first. Bring water to a boil, add rice, stir once, cover, then drop to the lowest heat for 15 to 18 minutes. Remove from heat and let it rest covered for 10 minutes.
My family of four uses 4 cups of dry rice, which makes about 12 cups of cooked rice — enough for five lunches with a small dinner portion. Plan on 1 cup of cooked rice per serving when you’re building bowls.
Step 2 — Cool It Quickly
This is the most skipped step and where most food safety failures happen. Spread the cooked rice on a rimmed baking sheet lined with parchment paper, no more than 1 inch thick. The thin layer lets steam escape fast and drops the temperature 3 to 4 times faster than leaving it in the pot.
You can fan the rice gently or set the baking sheet on a wire rack to boost airflow. Don’t put hot rice directly into the fridge — it raises the ambient temperature inside and can push other food into the danger zone. Aim to cool rice below 70°F within 2 hours.
Step 3 — Portion and Store
Once the rice is cool, divide into single-serving portions in airtight glass containers. Leave the lid off for 5 minutes to release any remaining steam, then seal. Label each container with the date so you use the oldest portion first.
Refrigerate immediately. Rice kept below 40°F will stay safe for 4 to 5 days. For longer storage, portion into freezer bags, flatten, and freeze — flat bags stack neatly and thaw in half the time.
Step 4 — Reheat With Moisture
Add 1 teaspoon of water per cup of rice before reheating. Cover loosely with a damp paper towel in the microwave, or add the splash directly to the pan on the stovetop. Heat to 165°F internal temperature, which means steaming hot all the way through. The moisture trick is what separates dried-out, crumbly reheated rice from the stuff that tastes fresh.
How to Cool Cooked Rice Quickly and Safely
The cooling step deserves its own section because it’s the foundation of safe meal prep rice. A Reddit thread on r/MealPrepSunday that has thousands of upvotes recommends exactly this baking sheet trick, and it lines up with USDA food safety guidelines.
Here’s why the spread-out method beats alternatives:
- Speed: A thin rice layer on a baking sheet reaches room temperature in 25 to 40 minutes vs. 90+ minutes in a covered pot.
- Texture: Less trapped steam means individual grains stay fluffy and don’t fuse into a gummy mass.
- Safety: Faster cooling means less time in the danger zone, which directly reduces Bacillus cereus growth.
In summer or in a warm kitchen, place the baking sheet on a wire rack near a window or a fan. If your kitchen is over 80°F, consider an ice bath — transfer the rice to a metal bowl set over a larger bowl filled with ice water and stir occasionally until cool. This brings the temperature down in about 10 minutes.
Never leave cooked rice on the counter overnight. Reviewers who tried this report off smells and texture changes by morning, and the safety risk grows exponentially between 2 and 8 hours.
Fridge vs Freezer: How Long Does Meal Prep Rice Last?
The two storage methods serve different purposes. Fridge storage wins for short-term convenience, freezer storage wins for batch prepping more than a week of meals.
| Storage Method | Duration | Quality After Thaw | Best For |
|---|---|---|---|
| Fridge (airtight) | 4 to 5 days | Nearly identical to fresh | Weekly meal prep |
| Freezer (flat bags) | Up to 3 months | Slightly drier, fix with water | Bulk batch cooking |
| Room temperature | Max 2 hours | Unsafe beyond window | Cooling only, never storage |
The 5-day fridge window is backed by USDA cold storage guidelines and matches what reviewers report from their own weekly experiments. Brown rice is the exception — its higher oil content means it keeps quality for only 3 to 4 days before going rancid.
Freezing extends the window dramatically, but rice can absorb freezer odors if containers aren’t sealed well. Vacuum-sealed bags work best, and pressed-flat bags thaw in 10 to 15 minutes under cold running water — way faster than rolling portions into balls.
I’ve found that freezing in 1-cup portions gives the most flexibility. You can pull exactly what you need for one bowl without thawing the whole batch.
Best Containers for Storing Meal Prep Rice
The container you choose matters more than most recipes let on. Airtight is non-negotiable, but material affects reheat convenience.
Glass containers are the gold standard for fridge storage. They don’t absorb odors, reheat safely in the microwave, and last for years. Borosilicate glass handles freezer-to-fridge-to-microwave transitions without cracking.
BPA-free plastic containers are lighter and cheaper but can stain and absorb smells over time. Only use food-grade plastic labeled microwave- and freezer-safe.
Freezer bags (zip-lock or vacuum-sealed) beat rigid containers for freezing because they freeze flat and thaw fast. Squeeze out as much air as possible to prevent freezer burn.
Avoid loosely covered bowls, aluminum containers that react with acidic sauces, or any container with a cracked seal. The air gap you leave is exactly the space where bacteria flourish.
How to Reheat Rice Without Drying It Out
Dry, crumbly rice is the number-one complaint on Reddit meal prep forums. The fix is always the same: add moisture before heating. Here are three methods that work.
Microwave Method (Fastest)
Splash 1 teaspoon of water per cup of rice directly onto the rice. Cover with a damp paper towel and microwave on high for 90 seconds. Stir, check the temperature, then continue in 30-second intervals until it steams. The paper towel traps the steam so the moisture recycles back into the grains.
Stovetop Method (Best Texture)
Add rice to a nonstick pan with 1 tablespoon of water per cup. Cover and heat on low for 3 to 4 minutes. Fluff with a fork and serve. This brings back the just-cooked texture better than the microwave does.
Fried Rice Method (Most Flavor)
Heat 1 tablespoon of oil in a hot pan, add cold rice straight from the fridge, and stir-fry for 3 to 4 minutes. Splash with soy sauce or stock at the end. Cold rice actually fries better than fresh because the grains stay separate.
Internal temperature should reach 165°F (74°C) regardless of method. Use an instant-read thermometer if you want extra confidence, especially when reheating for kids, older adults, or anyone with a compromised immune system.
The 123 Rice Rule and the 3-3-3 Rule Explained
Two popular “rules” float around meal prep forums, and they get confused with each other. Here’s what each one actually means.
What is the 123 rice rule?
The 123 rice rule is a cooking ratio shortcut: 1 part rice to 2 parts water, then bring to a boil and simmer for 3 minutes. After that, you drop the heat to lowest, cover, and continue cooking for 15 to 18 minutes depending on rice type. It’s a quick mental math trick for new cooks who want a reliable ratio without measuring.
For white rice specifically, the rule of thumb is 1 cup rice : 2 cups water : 3 minutes at a rolling boil before reducing to a low simmer. Brown rice needs closer to 1:2.5 plus a longer simmer.
What is the 3-3-3 rule for meal prep?
The 3-3-3 rule is a storage and quality guideline: rice stays at peak quality for 3 days in the fridge, is still good (but slightly drier) for 3 more days, and should be frozen beyond 3 days after that. So days 1–3 are prime, days 4–6 are fine with the moisture trick, and anything past 6 days belongs in the freezer.
Some versions of the rule are stricter (3 days max in the fridge, period). The USDA allows up to 5 days at proper fridge temperatures. Our team lands at 4 days as the practical sweet spot — long enough for a full work week, short enough that quality never slips.
Signs Your Cooked Rice Has Gone Bad
If you’ve stored rice for a few days, run through this quick checklist before eating. Spoiled rice is rare when stored properly, but it’s worth knowing what to look for.
- Sour or yeasty smell: Fresh cooked rice is mild or slightly starchy. A tangy, beer-like, or sharp odor means bacteria have started working.
- Slimy or sticky texture: Rice that feels gummy or coated even after rinsing has broken down starches and bacterial byproducts.
- Visible mold: White, green, or black spots are an obvious sign. Discard the entire container, not just the spotted portion.
- Hard crust on top: A dried outer layer is normal if the container was uncovered. An off smell from the crust means the rice should be tossed.
- Off color: Yellow or grey rice has oxidized. Plain white or pale brown is normal.
When in doubt, throw it out. The cost of replacing a container of rice is far less than a bout of food poisoning.
Troubleshooting Common Meal Prep Rice Problems
Three issues come up over and over in meal prep communities. Here’s how to fix each.
Rice Goes Hard or Dry in the Fridge
Cause: starch retrogradation (the same process that makes stale bread hard). Fix: store rice with a slightly damp paper towel inside the container, or add 1 teaspoon of water per cup before each reheat. Steaming rice in a small steamer basket for 5 minutes restores moisture better than the microwave for very dry rice.
Rice Turns Mushy or Sticky
Cause: too much water during cooking, or storing while still warm. Fix: rinse the rice before cooking to remove surface starch, and confirm your water ratio is right (1:1.5 for long-grain white, 1:2 for brown). Cool the rice fully before sealing the container so residual steam doesn’t condense into extra moisture.
Rice Clumps Together in Storage
Cause: starch on the surface of grains bonds when compressed. Fix: spread the rice on the baking sheet (already part of the cooling step) and fluff with a fork before transferring to containers. A teaspoon of neutral oil tossed with the warm rice right after cooking also prevents clumping.
Most texture problems trace back to the first two steps. Get cooling right and storage right, and the rest of the week takes care of itself.
Frequently Asked Questions
How long can rice last for meal prep?
Cooked rice lasts 4 to 5 days in the fridge when stored in airtight containers below 40°F. Properly frozen rice stays safe for up to 3 months, though texture is best within 6 weeks. For peak quality, our team uses fridge-stored rice within 4 days and freezes anything held longer.
Is it safe to meal prep rice for a week?
It is safe to meal prep rice for 5 days under proper conditions. Cook the rice, spread it on a baking sheet to cool within 2 hours, then refrigerate in airtight containers. Brown rice is the exception and only stays at peak quality for 3 to 4 days because of its higher oil content. For a full week of safe meal prep, freeze some portions on day one.
Is rice still good after 7 days in the fridge?
Rice kept continuously below 40°F is technically safe for up to 7 days, but quality drops sharply after day 5. Texture, aroma, and flavor all decline. Our team treats day 6 as the cutoff and freezes any portion you won’t eat before then. The 3-3-3 rule (peak for 3 days, good for 3 more, then freeze) is a practical way to remember this.
What is the 123 rice rule?
The 123 rice rule is a quick ratio shorthand: 1 part rice, 2 parts water, bring to a boil for 3 minutes, then reduce heat and simmer until tender. It works well for white long-grain rice. Brown rice needs more water and a longer simmer, so the 123 rule does not apply directly to whole-grain varieties.
What is the 3-3-3 rule for meal prep?
The 3-3-3 rule describes how long meal prep rice stays at its best: 3 days at peak quality, 3 more days at good quality with the moisture trick, then freeze anything beyond that. It is more conservative than the USDA 5-day window but matches what reviewers report about flavor and texture.
What is the best way to cook rice for meal prep?
Cook rice in bulk using a 1:1.5 rice-to-water ratio for white rice or 1:2 for brown rice. Bring to a boil, cover, simmer on low for 15 to 18 minutes, then rest covered for 10 minutes. The Instant Pot works well for hands-off cooking — use 1:1 water for white rice and cook on high pressure for 3 to 4 minutes with a 10-minute natural release.
Can you freeze meal-prepped rice?
Yes. Freezing is the best way to extend meal prep rice beyond 5 days. Spread cooled rice in flat zip-lock bags, squeeze out the air, and freeze for up to 3 months. Flat bags thaw in 10 to 15 minutes under cold water and reheat quickly. Vacuum-sealed portions stay fresh even longer.
How do you keep rice from getting hard when meal prepping?
Add 1 teaspoon of water per cup of rice before reheating, then cover loosely with a damp paper towel in the microwave. For very dry rice, steam it in a basket for 5 minutes instead. Storing rice with a slightly damp paper towel inside the container also slows down hardening during the fridge stretch.
Final Thoughts on Meal Prepping Rice Safely
Learning how to meal prep rice without it going bad really comes down to three habits: cool it fast, seal it airtight, and reheat it with moisture. Once those three habits are automatic, weekly rice meal prep becomes one of the lowest-effort, highest-return parts of your routine.
Start with one rice variety and one container type, then expand as the routine feels natural. The first Sunday I tried this workflow, I cooked 4 cups of dry rice and had lunches ready for the entire work week — total hands-on time was about 25 minutes. By week three, I had built a rhythm that I now run almost unconsciously.
If you stick to the 4-day fridge window, freeze anything longer, and never skip the baking sheet cooling step, your meal prep rice will reward you all week long.