
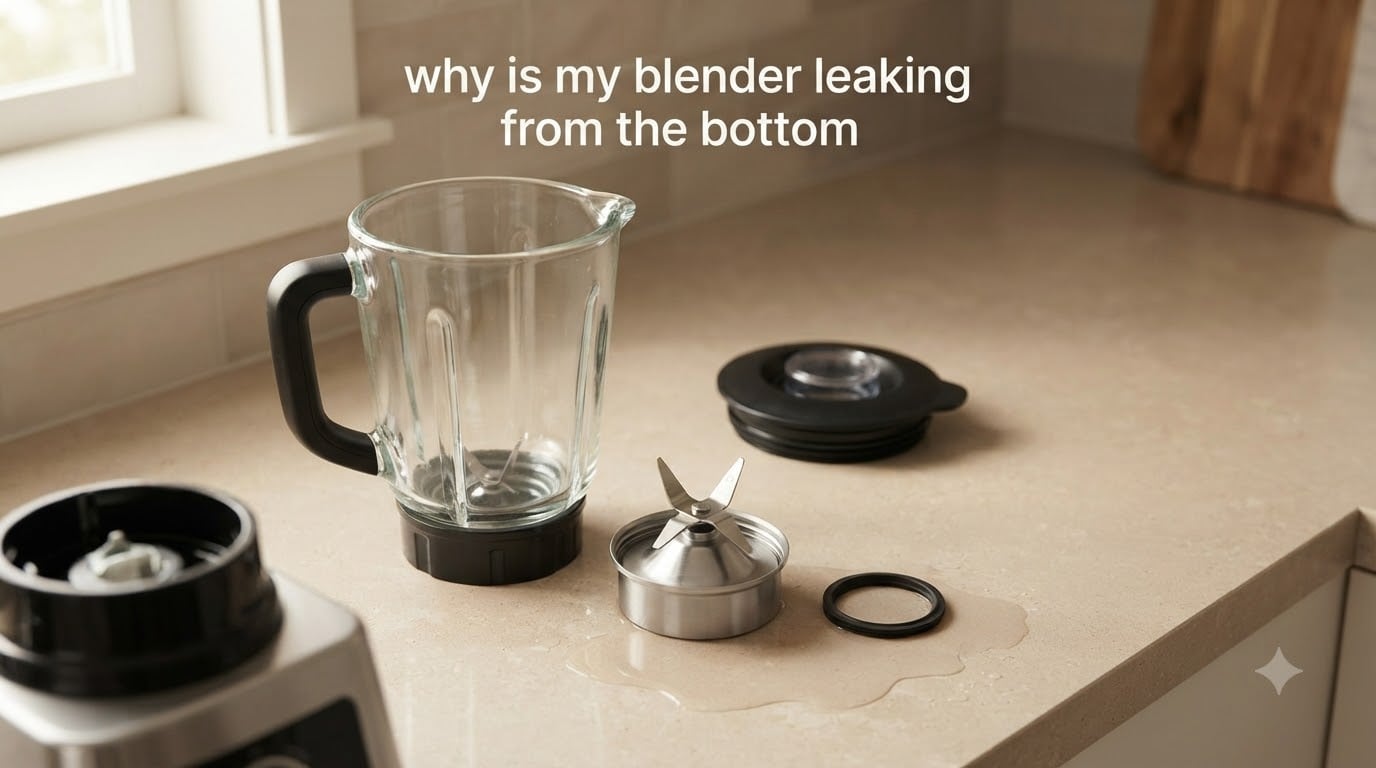
Most often, a blender leaks from the bottom because the rubber gasket between the blade assembly and the jar has worn out, shifted out of place, or hardened with age. That tiny rubber ring is the only thing keeping liquid from seeping past the blade base and onto your counter, and once it fails, the leak shows up exactly where most owners first notice it: pooling under the base or dripping from the blade collar.
I have rebuilt more blender bases than I care to admit in our test kitchen, and the same handful of causes account for nearly every leak we have ever seen. In this guide, I will walk you through the seven most common reasons a blender leaks from the bottom, how to tell whether the leak is a simple seal problem or a serious mechanical failure, and exactly what to do next.
Table of Contents
Common Reasons Your Blender Leaks From the Bottom
- Worn or hardened rubber gasket – the most common cause, especially after 6 to 12 months of regular use.
- Loose or improperly tightened blade assembly – the threads were not seated correctly after cleaning.
- Cracked or damaged jar or pitcher – hairline cracks in the plastic or glass let liquid escape.
- Overfilling above the max line – liquid pressure forces its way past the seal during blending.
- Hot liquid damage – steaming-hot soup softens or warps the gasket seal.
- Improper reassembly after washing – the gasket shifted, folded, or was left out entirely.
- Motor or gearbox oil leak – reddish or dark fluid means internal failure, not a seal problem.
Worn or Damaged Rubber Gasket
The rubber gasket – sometimes called an O-ring or blade base seal – is a small flexible ring that sits between the metal blade assembly and the bottom of the pitcher. Its only job is to create a watertight barrier where those two hard surfaces meet. When it is new, it compresses just enough to seal. When it ages, it stops doing that job.
Three things happen to a gasket over time. The rubber hardens and loses flexibility, so it can no longer conform to the blade seat. It develops micro-cracks that let liquid seep through. And it can permanently deform if it spends time in a hot dishwasher or sits compressed under a tightened blade assembly. I have pulled out gaskets that looked perfectly fine on top but had a hairline split running through the inner edge – that was the entire leak.
How long should a blender gasket last? For most home users, expect 6 to 12 months of regular use before replacement. Heavy daily use, hot blending, and dishwasher cleaning all shorten that window. Vitamix owners on forums report replacing theirs every 1 to 2 years and noticing far fewer leaks once they make it routine maintenance.
The fix is simple: order the correct replacement gasket for your model, drop the old one out, seat the new one flat in the groove, and reassemble. Genuine manufacturer gaskets are worth the small premium over generic third-party rings – fit matters more than people expect, and a slightly undersized gasket will leak from day one.
Loose or Improperly Tightened Blade Assembly
If the gasket is fine but liquid still pools under the blender, the blade assembly itself is almost certainly loose. The blade unit threads onto the bottom of the pitcher (or, on some models, the base threads up into the pitcher), and the entire watertight seal depends on that connection being snug.
After washing, it is easy to reassemble the blade slightly off-thread or just hand-tight. That is enough to create a slow leak during blending, especially when the motor spins up and vibration works liquid through any gap. Dishwasher cleaning makes this worse because the threads come out completely dry and the gasket can shift during the cycle.
To check, turn the pitcher upside down and try to wiggle the blade assembly by hand. There should be no play at all. If it spins, rocks, or lifts even slightly, that is your leak. Tighten it – by hand only, never with pliers – until it seats firmly. Overtightening is its own problem: stripped threads or a cracked pitcher. Snug is enough.
For Nutribullet-style models, the blade base locks onto the cup with a simple twist-and-click mechanism. If yours leaks at the gear-base connection after several months of use, reviewers on Reddit report that a fresh blade base unit (not just a gasket swap) is often the real fix because the gear teeth wear down at the same time as the seal.
Cracked or Damaged Jar or Pitcher
Sometimes the pitcher itself is the problem. Hairline cracks in the plastic or glass develop from thermal shock (cold pitcher, hot contents), impact (dropping it in the sink), or age. Liquid escapes through these cracks before it ever reaches the gasket, which is why a cracked jar can leak even with a brand-new gasket installed.
Inspect your pitcher carefully. Run your fingertip along the seams, the bottom corners, and around the handle attachment – those are the highest-stress points. Hold it up to a light and look for any line that catches the light differently than the surrounding surface. Even a tiny crack can leak under blending pressure.
Cracked plastic jars are not repairable – the material cannot be safely bonded back to food-grade standards. Glass jars occasionally survive a minor crack if you stop using them immediately, but replacement is the safe call. Order the exact OEM pitcher for your model so the threads and gasket seat match correctly.
Overfilling or Hot Liquid Damage
Most blenders have a clearly marked max-fill line for a reason. When you load the pitcher above that line, liquid has nowhere to go during a blend cycle except up the sides and down through any weak point in the seal. A gasket that was perfectly fine at the correct fill level will leak the moment you go an inch over.
Hot liquids make this worse. Steam expands inside the pitcher, pressure builds, and the same gasket that holds cold smoothies without a drip can blow past a hot soup. Manufacturers generally warn against blending anything above about 120 degrees Fahrenheit in a standard countertop blender, and going well over that line softens the gasket rubber on contact.
The fix is straightforward: respect the max-fill line, vent the lid (remove the center cap) when blending anything warm, and let hot liquids cool for a few minutes before pouring them in. If your blender is dedicated to soups, look for a model with a vented lid and a high-temperature-rated gasket.
Oil Leak vs Food Leak: How to Tell the Difference
This is the diagnostic that almost nobody talks about, and it matters more than any other. Not every liquid pooling under your blender is coming from the pitcher.
A food leak looks like what you were blending – green from a smoothie, red from a tomato sauce, clear from water. It starts during or right after a blend cycle, and it drips from the blade area where the jar meets the base. That is a seal problem and it is user-repairable.
An oil leak looks completely different. It is usually a reddish, brown, or black oily fluid. It may appear even when the blender has not been used recently. It often smells like machine oil or hot grease. And it tends to spread across the motor housing rather than dripping straight down from the blade collar.
Oil leaking from a blender means the gearbox or motor seal has failed internally. This is not a gasket you can replace yourself – the motor has to be opened and resealed by a service technician, or the unit needs to be replaced. Continuing to run a blender with an oil leak can burn out the motor and, in rare cases, create a fire hazard.
If you see oily residue: stop using the blender, unplug it, and check whether it is still under warranty. Most manufacturer warranties cover motor and gearbox failures for at least one year.
Step-by-Step Diagnostic: Find Where the Leak Is Coming From
- Unplug the blender and remove the pitcher. Look at the bottom of the base for any wet spots or oily residue. Wipe it clean.
- Fill the pitcher halfway with water and reattach it to the base. Do not run the blender yet – just observe for 30 seconds. If water appears under the base, the leak is from the seal or jar, not the motor.
- Run the blender on high for 15 seconds. Watch the blade base area closely. A slow drip tells you the gasket is failing or the blade is loose. A steady stream tells you the jar is cracked or the threads are badly misaligned.
- Remove the pitcher and inspect the gasket. Look for hardening, cracking, deformation, or any sign that it has shifted out of its groove.
- Try tightening the blade assembly by hand. If it was loose, run the blender again to confirm the leak has stopped.
- If the leak continues, remove the blade assembly and check the pitcher threads. Look for cracks, stripped plastic, or food residue preventing a clean seat.
- Reassemble with a fresh gasket if you have not already replaced it. Test again. If the leak persists with a new gasket and a tight blade, the pitcher itself is the problem.
Brand-Specific Leak Issues: Nutribullet, Vitamix, and Ninja
Most blender leaks follow the same pattern regardless of brand, but a few models have known weak points worth knowing about.
Nutribullet leaks almost always come from the blade base connection where the cup twists onto the extractor blade. After 6 to 12 months of regular use, the rubber seal inside the blade base hardens and the gear teeth that grip the cup begin to wear. Forum users frequently report that replacing the entire blade base assembly (not just the gasket inside it) is what finally stops the leak. The cups themselves rarely crack, but the blade bases are a known wear item.
Vitamix leaks are usually gasket-related, and Vitamix actively encourages customers to replace the gasket preventively every 1 to 2 years. The containers are built to last – what fails is almost always the rubber seal at the bottom. Vitamix sells official replacement gaskets by container size (32 oz, 48 oz, 64 oz), and installation takes about 60 seconds with no tools.
Ninja blender leaks typically show up at the blade assembly after dishwasher cleaning. The combination of high heat and aggressive detergent degrades the gasket rubber faster than hand-washing, and the threads can loosen slightly when reassembled. Owners who switch to hand-washing the blade assembly report far fewer leaks over time.
How to Prevent Your Blender From Leaking in the Future
A few simple habits extend the life of every seal and gasket in your blender.
Hand-wash the blade assembly rather than running it through the dishwasher. The high heat and harsh detergent shorten gasket life significantly – this single change prevents a huge share of the leaks our team has seen over the years.
Respect the max-fill line every time. The extra half-cup you squeeze in is the difference between a dry counter and a puddle under the base.
Tighten the blade assembly snugly by hand after every wash. Check it once a month even if you have not washed it, because vibration during blending can slowly loosen the threads.
Replace the gasket preventively. Mark your calendar for every 6 to 12 months, or sooner if you blend daily or run hot liquids.
Never blend steaming-hot liquids in a standard countertop blender. Let soup cool for several minutes first, or invest in a model rated for high-temperature blending.
Frequently Asked Questions
Why is my blender leaking from the bottom?
A blender leaks from the bottom because the rubber gasket that seals the blade assembly to the pitcher has worn out, hardened, or shifted out of place. A loose blade assembly, cracked pitcher, or overfilling can also cause leaks. The most common cause is a degraded gasket, which typically needs replacement after 6 to 12 months of regular use.
How do I stop my blender from leaking?
To stop a blender leak, first tighten the blade assembly by hand and inspect the rubber gasket for wear or damage. If the gasket looks hardened or cracked, replace it with the correct OEM part for your model. Check the pitcher for cracks and never fill above the max-fill line. If an oily fluid is leaking from the motor housing, stop using the blender and contact the manufacturer – that indicates an internal gearbox failure.
Why is my blender leaking oil?
Oil leaking from a blender (red, brown, or black fluid with a machine-oil smell) means the internal motor or gearbox seal has failed. This is not a user-repairable problem and continuing to use the blender can burn out the motor. Stop using it, check your warranty, and contact the manufacturer for service or replacement.
Why is my Nutribullet leaking from the bottom?
A Nutribullet leaks from the bottom when the rubber seal inside the blade base hardens after 6 to 12 months of regular use. The gear teeth that grip the cup can also wear down at the same time. Replacing the entire blade base assembly – not just the gasket – is the most reliable fix according to long-term Nutribullet owners.
How do I replace the gasket on my blender?
To replace a blender gasket, unplug the unit and remove the blade assembly from the pitcher. Pop out the old gasket from its groove in the blade base. Seat the new gasket flat in the same groove, making sure it is not folded or twisted. Reattach the blade assembly hand-tight and test with water before using the blender for food.
Can a leaking blender be repaired?
Most blender leaks can be repaired by replacing the rubber gasket, tightening the blade assembly, or swapping a cracked pitcher. These are inexpensive fixes that take a few minutes. However, if the leak is oil coming from the motor housing, the unit usually needs professional service or replacement – that signals an internal mechanical failure the user cannot safely fix.
When to Replace vs Repair Your Leaking Blender
If your blender is leaking from the bottom, you can almost always fix it yourself in under ten minutes with a new gasket – that is the right starting point for every blender under five years old. If a fresh gasket and a hand-tightened blade assembly do not stop the leak, the pitcher is probably cracked and worth replacing before you replace the whole unit.
The exception is an oil leak. Any reddish, brown, or dark oily fluid from the motor housing means an internal failure you cannot safely repair at home. Stop using the blender, check your warranty, and decide between a paid service repair and a replacement unit. For older blenders that are out of warranty, replacement is usually the smarter call.
That is the short version of why a blender leaks from the bottom: nine times out of ten it is a $5 gasket and ten minutes of your time. Take care of the seal, respect the fill line, and your blender will run leak-free for years.