
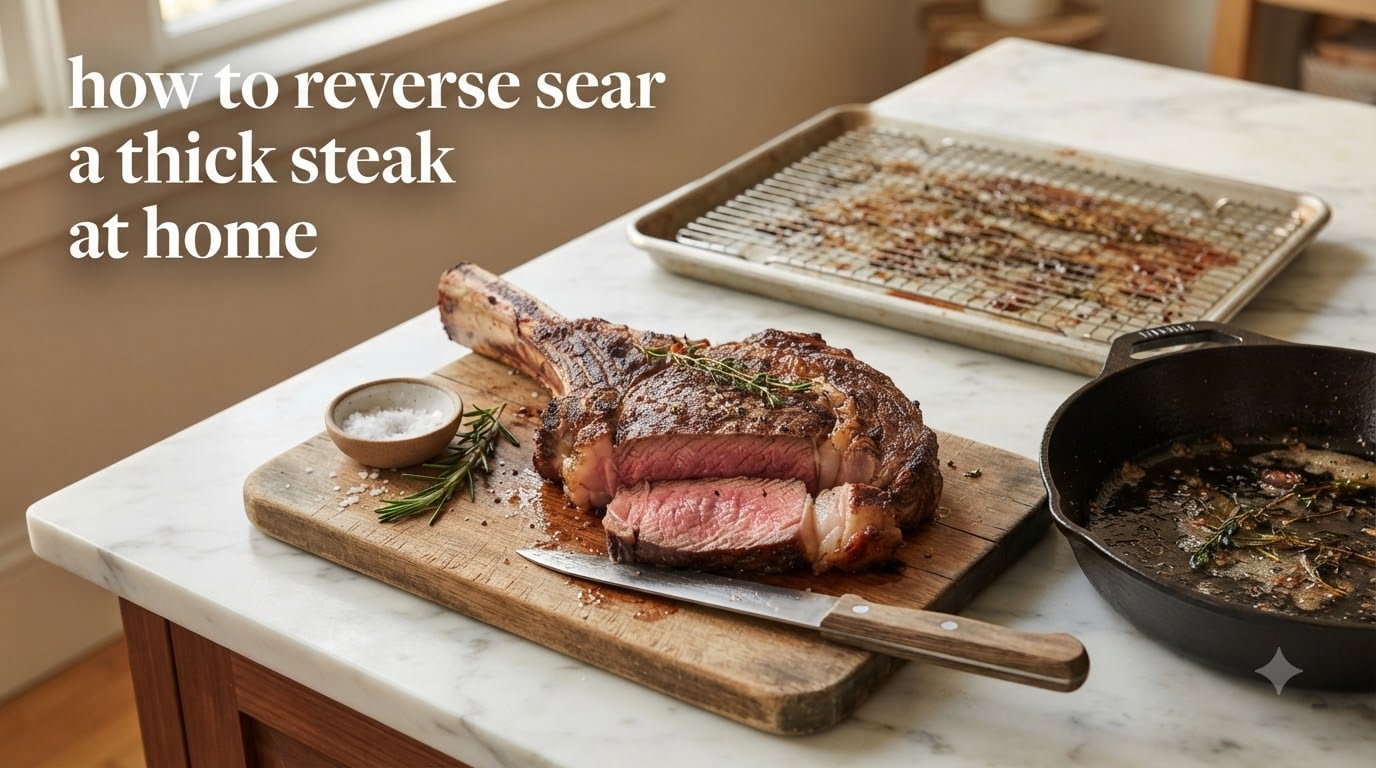
To reverse sear a thick steak at home, you cook it slowly in a low oven (225 to 275 degrees F) until it is about 10 to 15 degrees F below your target doneness, then finish it with a 60 to 90 second sear in a screaming-hot cast iron skillet. This gives you edge-to-edge even doneness and a deeply browned crust that traditional sear-first methods cannot match on cuts thicker than 1.5 inches.
Our team has tested reverse sear on more than 40 thick ribeyes, NY strips, and porterhouses over the past two years. The method below is the one we keep coming back to. It is forgiving enough for a Tuesday night, impressive enough for company, and it works with nothing more than an oven, a rimmed sheet, a wire rack, a skillet, and a good instant-read thermometer.
Table of Contents
What Is Reverse Sear and Why It Works for Thick Steaks
Reverse sear is a steak-cooking method where you slowly bring the steak up to temperature in a low oven first, then finish it with a quick, high-heat sear in a skillet or on a grill. It is the opposite of the traditional sear-first approach most home cooks learned, and the difference shows up in every slice.
The low, even heat of the oven does two things at once. First, it raises the interior of the steak gently, so a 2-inch ribeye ends up the same rosy color from edge to edge with no gray, overcooked band around the perimeter. Second, the dry oven air wicks surface moisture off the steak, creating a thin, dry layer called a pellicle. That dry surface is what browns so quickly when it finally hits the hot pan.
The browning itself is the Maillard reaction, a chemical process where amino acids and sugars react at temperatures above 285 degrees F to produce hundreds of new flavor and aroma compounds. Traditional searing tries to drive that reaction from the outside in, which means the surface hits 500+ degrees F before the center is anywhere near done. On a thick cut, that timing gap leaves you with either a perfect crust and a raw middle, or a perfect middle and a burned crust. Reverse sear splits the work: the oven handles even cooking, and the pan only has time to brown.
Why Reverse Sear Beats Traditional Sear for Thick Cuts
On steaks thicker than about 1.5 inches, the reverse sear method wins on five counts. Here is what changes when you flip the order.
- Edge-to-edge doneness. The oven warms the whole steak uniformly, so the center and the edge finish within a degree or two of each other. Traditional sear-first leaves a noticeable gray ring on the outside of any steak over 1.25 inches.
- A thicker, more even crust. Because the surface is bone-dry from the oven, the Maillard reaction runs longer and more aggressively in the pan. You get a deep, even brown across the entire face, not just the spots that touched the skillet longest.
- A more forgiving timing window. The low oven phase is gentle enough that pulling the steak 5 minutes early or 5 minutes late rarely ruins the result. The sear is only 60 to 90 seconds per side, so it cannot overshoot doneness the way a 4-minute traditional sear can.
- No constant flipping or basting. The steak sits on a rack in the oven untouched. You are not managing fond, butter, or moving it around a hot pan for 8 minutes straight.
- Less smoke in the kitchen. The reverse sear version spends only about 2 minutes in a hot pan total. Your hood fan and your smoke alarm both thank you.
Equipment and Ingredients You Need
You do not need anything exotic for a reverse seared steak at home. Here is the full kit and the substitutions we have tested when something is missing.
Equipment:
- Sheet pan with a wire rack set inside (rimmed baking sheet works fine; the rack keeps air under the steak)
- Cast iron skillet or carbon steel skillet, 10 to 12 inches
- Instant-read thermometer (a ThermoPro or Thermapen-style probe is the gold standard)
- Tongs, paper towels, and a foil tent
- Stainless steel skillet works as a backup if cast iron is not available
No wire rack? Set the steak directly on the rimmed sheet and flip it halfway through the oven phase. The bottom will not brown in the oven, so it does not matter much.
Ingredients:
- 1 thick-cut steak, 1.5 to 2 inches thick (ribeye, NY strip, porterhouse, or filet)
- Kosher salt, about 1/2 teaspoon per side for a 16 oz steak
- Coarse black pepper, to taste
- 1 to 2 tablespoons of high-smoke-point oil (avocado, grapeseed, or canola)
- 1 tablespoon of butter, optional, for basting the crust
Optional dry brine: Salt the steak and leave it uncovered on a plate in the fridge for 12 to 24 hours. This deepens the seasoning, pulls moisture to the surface, and dries the exterior for an even better crust.
How to Reverse Sear a Thick Steak: Step-by-Step
Below is the 5-step oven and skillet method we use on every thick steak at home. Total time is about 50 to 70 minutes for a 1.5-inch steak at 250 degrees F, mostly hands-off.
Step 1: Salt the steak and preheat the oven to 250 degrees F. Pat the steak dry with paper towels, season generously on both sides with kosher salt, and set it on a wire rack over a rimmed sheet. Slide it into the oven on the middle rack.
Step 2: Slow-cook to about 10 to 15 degrees F below your target. For a 1.5-inch steak, this takes roughly 30 to 45 minutes at 250 degrees F. Use your instant-read thermometer to check; pull the steak when it reads 115 degrees F for medium-rare, 125 degrees F for medium, or 130 degrees F for medium-well.
Step 3: Rest the steak while you preheat the skillet. Move the steak to a plate and tent loosely with foil. Place a dry cast iron skillet over high heat for 5 to 7 minutes until it just starts to smoke. Do not add oil yet.
Step 4: Sear 60 to 90 seconds per side in a smoking-hot pan. Add the oil, swirl to coat, then lay the steak away from you into the pan. Press gently for the first 10 seconds for full contact. Flip once at 60 seconds, then 60 to 90 seconds on the second side. For a bonus crust, sear the fat cap on edge for 30 seconds.
Step 5: Rest 5 minutes, then slice and serve. Move the steak to a cutting board, spoon any pan butter over the top, and rest for 5 minutes. Slice across the grain and serve immediately.
What temperature do you reverse sear steak in the oven? 250 degrees F is the sweet spot for most home cooks. It cooks a 1.5 to 2-inch steak in 30 to 50 minutes without drying the surface or overcooking the edges. 225 degrees F works if you want even more margin; 275 degrees F works if you are in a hurry.
Reverse Sear Temperature and Timing Chart
The table below shows when to pull the steak from the oven for each doneness level, what the final serving temperature will be after the sear and rest, and approximate cook times for a 1.5-inch steak at 250 degrees F. The sear adds about 5 degrees F and the rest adds another 5 degrees F, so plan accordingly.
| Doneness | Pull from oven | Final temp after rest | Oven time at 250F |
|---|---|---|---|
| Rare | 105F | 115 to 120F | 25 to 35 min |
| Medium-rare | 115F | 125 to 130F | 30 to 45 min |
| Medium | 125F | 135 to 140F | 40 to 55 min |
| Medium-well | 135F | 145 to 150F | 50 to 65 min |
| Well-done | 145F | 155F and up | 60 to 75 min |
Thickness matters more than cook time. A 2-inch steak at the same temperature will run 15 to 25 minutes longer than a 1.5-inch steak for the same doneness. Always trust your thermometer over the clock.
How to Reverse Sear on a Grill (Two-Zone Setup)
Yes, you can absolutely reverse sear a thick steak on a gas or charcoal grill. The setup is called a two-zone fire: one side hot for the sear, one side cool for the slow cook. It adds a faint smoke flavor that you cannot get from an oven.
Step 1: Light only half the burners (or pile charcoal on one side). Aim for 250 degrees F on the cool side, measured with the lid closed. On a gas grill, leave the burner on the sear side off; on charcoal, bank the coals to one side.
Step 2: Put the steak on the cool side, lid closed. Cook until the steak hits the pull temperature from the chart above, usually 30 to 45 minutes for a 1.5-inch steak. Leave the lid closed the entire time to hold the oven-like temperature.
Step 3: Move the steak to the hot side for the sear. Flip every 30 to 45 seconds for 2 to 3 minutes total, rotating to get crosshatch grill marks. Pull at the same internal temperature you used in the oven method.
Step 4: Rest 5 minutes and serve. The grill adds a kiss of smoke and a more pronounced char. Both are bonuses, not required, so do not feel like you have to fire up the grill to call it reverse sear.
Best Cuts of Steak for Reverse Sear
Reverse sear shines on thick cuts that contain enough interior mass to benefit from gentle, even cooking. Here are the cuts our team reaches for most often.
- Bone-in ribeye, 1.5 to 2 inches thick. Fat and marbling handle the long oven phase beautifully. Pull at 115F for medium-rare.
- NY strip, 1.5 to 2 inches thick. Leaner than ribeye but still enough marbling to stay juicy. Pull at 115F for medium-rare.
- Porterhouse, 2 inches thick. The strip side and the filet side cook at slightly different rates; reverse sear evens them out.
- Filet mignon, 1.5 to 2 inches thick. Lean cuts like filet are easy to overcook. The reverse sear method gives you a generous timing window to hit medium-rare without drying it out.
How thick should a steak be to reverse sear? We recommend a minimum of 1.5 inches for a meaningful difference over a traditional sear. Anything thinner than 1.25 inches cooks too quickly in the oven and there is no real advantage. For thinner steaks, drop the oven temperature to 225F and pull 5 degrees F earlier than the chart shows.
Common Mistakes and How to Fix Them
Every cook we know has botched a reverse sear at least once. Here are the five most common issues we have seen in our own kitchen and on cooking forums, with the fix for each.
Crust will not form or looks gray. The pan was not hot enough, or the steak surface was still wet. Fix: heat the dry skillet for a full 5 to 7 minutes over high heat until you see the first wisp of smoke. Pat the steak dry with paper towels right before it goes into the pan.
Steak is overcooked even though you followed the chart. You skipped the thermometer or used an oven thermometer that reads 25 degrees F low. Fix: always verify with an instant-read thermometer in the thickest part of the steak. Calibrate your oven once with a separate oven thermometer.
Steak stuck to the pan and tore when flipped. The pan was not hot enough or you tried to flip too early. Fix: let the steak release on its own after about 60 seconds. If it resists, give it another 15 seconds.
Gray band on the outside edges. Your oven was too hot, or the steak was thinner than 1.25 inches. Fix: drop the oven to 225F and pull 5 degrees F earlier than the chart, or buy thicker cuts next time.
Pan is smoking uncontrollably. Wrong oil. Butter burns at 350F and most pans during the sear exceed that. Fix: use avocado, grapeseed, or canola oil in the pan, and add butter only at the very end if you want the flavor.
Reverse Sear vs. Sous Vide: Which Is Better?
Both methods deliver edge-to-edge even doneness, but they feel very different at the stove. Here is a quick comparison based on dozens of side-by-side tests in our kitchen.
- Equipment. Reverse sear needs an oven, a sheet, a rack, and a skillet. Sous vide needs an immersion circulator, a water container, and a bag. Reverse sear wins for anyone without a circulator.
- Crust. Sous vide produces a damp surface that needs a separate dry step before it will brown. Reverse sear dries the steak in the oven, so the sear does the browning in one go. Reverse sear wins on crust quality.
- Texture. The long, low oven phase lets enzymes called cathepsins gently tenderize the meat over 30 to 60 minutes, similar to a dry-aged effect. Sous vide can also tenderize but in a different way. Most tasters we have run prefer the reverse sear texture for fattier cuts like ribeye.
- Timing window. Reverse sear is forgiving by about 10 minutes. Sous vide is forgiving by about 1 hour. Sous vide wins if you need to hold the steak for a dinner party.
- Cleanup. Reverse sear leaves one sheet and one skillet. Sous vide leaves a water bath, a bag, and a skillet. Reverse sear wins on cleanup.
For thick cuts at home, reverse sear is our default. We reach for sous vide only when we are cooking multiple steaks to different doneness levels at the same time.
Frequently Asked Questions
What is the reverse sear method?
Reverse sear is a cooking method where you slowly bring a thick steak up to temperature in a low oven (225 to 275 degrees F), then finish it with a quick, high-heat sear in a hot skillet or on a grill. It reverses the traditional sear-first order to produce edge-to-edge even doneness and a deeply browned crust.
Why is reverse sear better for thick steaks?
On cuts thicker than 1.5 inches, traditional sear-first leaves a gray, overcooked band on the outside because the surface must reach 500+ degrees F before the center cooks through. Reverse sear gently warms the steak in the oven first, then only needs a 60 to 90 second pan sear for browning, which eliminates the gray band and gives a thicker, more even crust.
What temperature do you reverse sear steak in the oven?
Set your oven to 250 degrees F for the most reliable results. 225 degrees F works if you want extra margin against overcooking, and 275 degrees F works if you are in a hurry, but 250 degrees F is the sweet spot most home cooks should use.
How long does reverse sear take in the oven?
A 1.5-inch steak at 250 degrees F takes 30 to 45 minutes to reach medium-rare pull temperature. A 2-inch steak takes 45 to 60 minutes. Always cook to internal temperature with an instant-read thermometer rather than the clock, since oven accuracy and steak thickness vary.
Do you need to rest a reverse seared steak?
Yes, rest the steak for about 5 minutes after the sear before slicing. The reverse sear method carries over only about 5 degrees F during the rest, which is much less carryover than traditional sear-first methods, so a short rest is enough to redistribute juices without overshooting your target doneness.
What is the best cut of steak for reverse sear?
Bone-in ribeye, NY strip, porterhouse, and thick filet mignon are all excellent choices. Look for cuts 1.5 to 2 inches thick with good marbling. Leaner cuts like filet benefit most from the gentle oven phase because there is less margin for error with traditional high-heat methods.
Can you reverse sear with a gas grill?
Yes, set up a two-zone fire with one burner on low for indirect cooking at 250 degrees F and the other burner off or on high for the final sear. Cook the steak on the cool side with the lid closed until it reaches your pull temperature, then move it to the hot side for 2 to 3 minutes to sear.
Is reverse sear better than sous vide?
For most home cooks, yes. Reverse sear produces a better crust, requires less specialty equipment, and is easier to clean up. Sous vide has a longer holding window, which is useful for dinner parties when you need to hold multiple steaks at once, but the crust and flavor of reverse sear are hard to beat on thick cuts.
Final Thoughts
Once you learn how to reverse sear a thick steak at home, it is hard to go back to the sear-first method. The oven does the patient work of cooking the steak evenly, and the pan only has to worry about flavor. Pull the steak 10 to 15 degrees F below your target, sear for 60 to 90 seconds per side, rest for 5 minutes, and slice against the grain. That is the entire reverse sear method in five lines, and it is the only steak technique our team reaches for any more.
If you are cooking for the first time tonight, pick up a thick-cut ribeye or NY strip, an instant-read thermometer, and a cast iron skillet. Salt the steak, preheat the oven to 250 degrees F, and trust the chart. You will have a steakhouse-quality thick steak on the table in under an hour, and you will never overcook one again.