
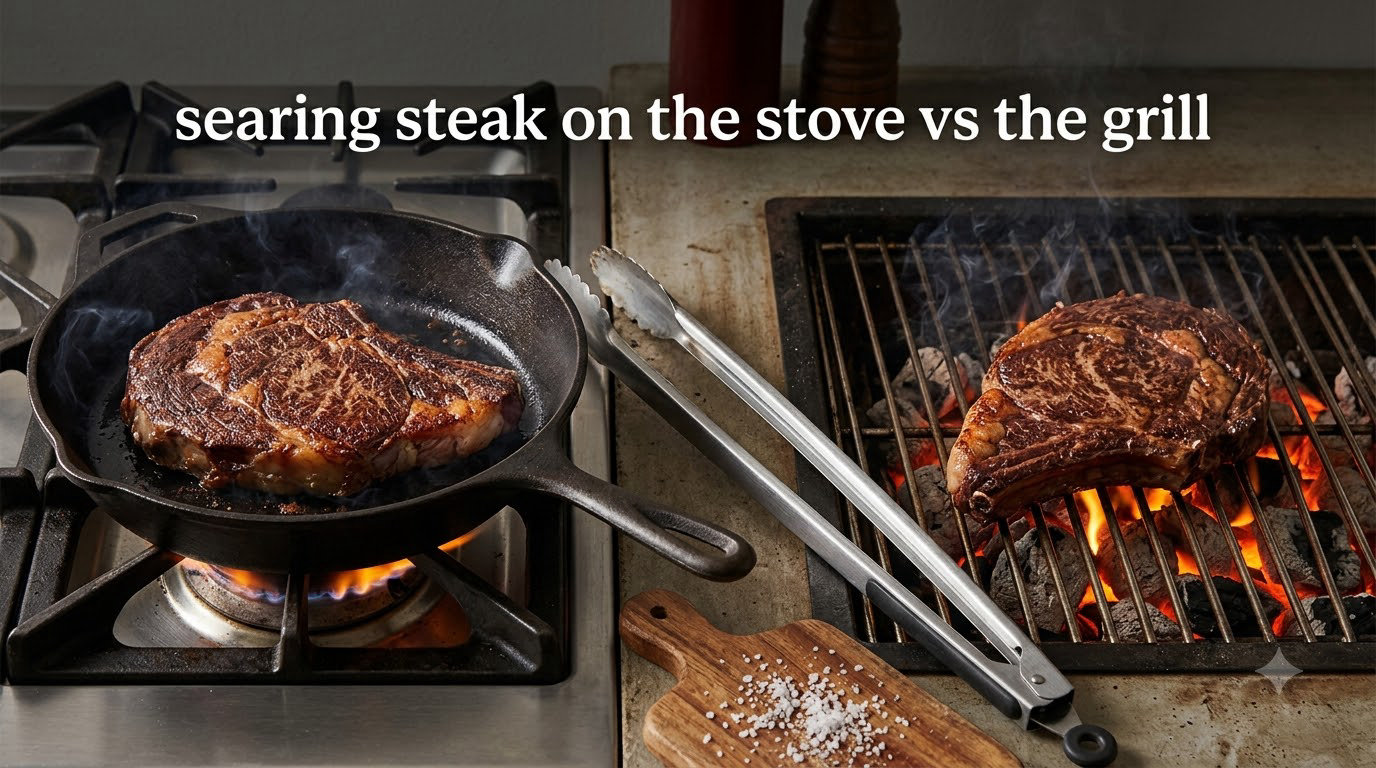
Searing steak on the stove vs the grill comes down to two high-heat dry-cooking methods with different tradeoffs. A screaming-hot cast iron pan delivers an even, deeply browned Maillard crust via direct metal contact and gives you total control over timing. A grill adds open-flame char, smoky flavor, and a fat-draining grate, but it is harder to master and weather-dependent. Pick the stove for crust consistency and indoor cooking, the grill for smoky flavor and outdoor entertaining.
I have been cooking steaks both ways for years, and our team has tested both methods side by side on ribeye, strip, and filet. This guide breaks down the science, the flavor, the timing, and the equipment so you can pick the right method for the steak in front of you.
Table of Contents
What Searing Actually Does to a Steak
Searing is not about “locking in juices.” That myth has been debunked by food scientists for decades. Searing is the Maillard reaction, a chemical browning between amino acids and sugars that happens once surface temperatures climb above roughly 285°F to 300°F (140°C to 150°C).
The Maillard reaction is what creates the brown crust, the roasted-nut aroma, and the deeper savory notes on a well-cooked steak. Below that temperature window, you get gray, steamed meat. Above it, you get color, complexity, and the crust people chase.
Caramelization is a related but different process. It happens in sugars, not proteins, and it kicks in at a slightly higher temperature. On a steak, both reactions run at the same time, but most of the flavor and color come from Maillard browning of the proteins and reducing sugars on the meat surface.
For the Maillard reaction to fire properly, three things have to be true: the surface must be dry, the heat must be high, and the contact must be direct. That is why the choice between stove and grill matters so much; each method delivers those three conditions very differently.
Why Pan-Searing on the Stove Works So Well
A cast iron skillet on a gas or induction burner can hit and hold 500°F+ at the cooking surface, well into the Maillard window. That direct metal-to-meat contact is the single biggest advantage of stove-searing.
- Even, wall-to-wall crust: The flat pan contacts 100 percent of the steak’s surface. You get an unbroken Maillard crust with no gaps, unlike grill grates that only touch the lines beneath the bars.
- Pinpoint heat control: You can drop or raise the burner in seconds. A grill reacts much more slowly to vents and lid adjustments.
- Butter basting and fond: The pan collects rendered fat, browned bits (the fond), and any aromatics you add. A spoon of foaming butter with thyme and garlic at the end is a finish that a grill simply cannot deliver.
- Fat stays in the pan: All the rendered fat remains for basting or for a quick pan sauce. Nothing drips into a fire.
- Indoor and weather-proof: Stove-searing works in winter, in apartments, and on weeknights when firing up a grill feels like overkill.
In our testing, pan-seared ribeyes consistently produced a deeper, more uniform brown crust than the same steaks cooked on a standard home gas grill at the same internal temperature.
The Downsides of Stove-Seared Steak
The stove is not perfect. There are real costs to putting a 500°F pan in your kitchen.
- Smoke: A screaming-hot cast iron with high smoke-point oil will set off smoke alarms and can fill a small kitchen in under a minute. Ventilation is non-negotiable.
- No open-flame flavor: Pan-seared steak tastes caramelized and beefy. It does not taste smoky in the way grilled steak does, because there are no wood gases or combustion byproducts in contact with the meat.
- Cast iron is almost required: A thin stainless steel or nonstick pan cannot hold enough heat to sear a thick steak without the surface temperature crashing the moment cold meat touches it.
- Thickness ceiling: Beyond about 1.5 inches, a pure stovetop sear will overcook the exterior before the center reaches your target doneness. You will need to finish in the oven.
Why Grilling a Steak Delivers Real Flavor
A hot grill adds three things a pan cannot: radiant heat from below, ambient convection inside a closed lid, and smoke from rendered fat hitting hot coals or bars.
- Smoky, charred flavor: Combustion of dripping fat, wood, and charcoal creates flavor compounds (guaiacol, syringol, and other smoke phenolics) that simply do not exist in pan-seared meat.
- Fat drips away: For people who want to watch their saturated fat intake, the grill is the lower-fat method by default. The fat falls through the grates.
- Big social payoff: Grilling is part of the meal experience, especially on a summer weekend. People gather around a grill in a way they do not around a stove.
- Handles thick cuts with a two-zone setup: With an indirect-heat side available, you can sear a 2-inch ribeye over high heat, then slide it to the cool side to coast up to temperature without burning the crust.
- No indoor smoke: All that smoke, flare-up drama, and venting problem simply moves outside.
The Downsides of Grilling Steak
The grill trades control for flavor, and that tradeoff bites a lot of home cooks.
- Flare-ups and uneven heat: Fat drips, fire flares, and parts of the steak scorch while other parts stay gray. This is the most common complaint in r/steak and r/grilling.
- Drier final product: Fat that drips through the grates is flavor and moisture you do not get back. Lean cuts like sirloin can come out noticeably drier on a grill than in a pan.
- Weather and season: Snow, rain, freezing temperatures, and apartment living all push you back indoors.
- No fond or basting surface: All the browned bits fall into the fire, so you cannot build a pan sauce from them.
- Longer total cook time: Preheating coals, managing vents, and recovering from flare-ups take longer than turning on a burner.
How to Sear a Steak on the Stove (Step by Step)
This is the method our team uses for a 1.25 to 1.5 inch thick boneless steak, cooked to medium-rare in a 12 inch cast iron skillet.
- Salt 45 minutes ahead. Dry-brine the steak with kosher salt (about 1/2 teaspoon per side per pound) and leave it uncovered on a rack in the fridge. The salt draws moisture out, then that moisture reabsorbs, seasoning the steak all the way through and drying the surface for a better crust.
- Bring to room temperature. Take the steak out 30 to 45 minutes before cooking. A cold steak will not sear evenly.
- Pat the surface bone dry. Use paper towels. Surface moisture is the enemy of Maillard browning; it steams instead of sears.
- Preheat cast iron until it just starts to smoke. Place the dry pan over high heat for 3 to 5 minutes. Add a tablespoon of high smoke-point oil (avocado or grapeseed). The oil should shimmer and just begin to ripple.
- Lay the steak away from you and do not move it. Drop it in, then leave it alone for 2 to 3 minutes. Resist the urge to peek. A proper crust releases itself when it is ready.
- Flip, sear the second side, and baste. After another 2 to 3 minutes, flip the steak. Add 2 tablespoons of butter, a few smashed garlic cloves, and a sprig of thyme. Tilt the pan and spoon the foaming butter over the steak for 30 to 60 seconds.
- Check internal temperature and rest. Pull at 125°F for medium-rare (it will rise 5 to 10°F while resting). Tent loosely with foil and rest 5 to 7 minutes before slicing against the grain.
How to Grill a Steak Step by Step (4-4-4 Rule)
The 4-4-4 rule is a simple memory aid for grilling a 1-inch thick steak over high direct heat.
- Set up a two-zone fire. Pile all the hot coals on one side (or turn on half the gas burners). The hot side sears; the cool side finishes.
- Season and temper. Same 45-minute dry-brine and room-temp temper as the stove method. Oil the steak, not the grates.
- Sear 4 minutes on the first side. Place the steak over the hot zone, close the lid, and do not touch it. You are building a crust.
- Rotate 45 degrees at the 2 minute mark (optional). This gives you crosshatch grill marks if that matters to you. Skip it if flavor is all you care about.
- Flip and cook 4 minutes on the second side. Lid down, same hot zone. After flipping, insert an instant-read thermometer into the side.
- Pull and rest 4 minutes. Pull at 125°F for medium-rare. Move to a clean plate or cutting board, tent loosely, and rest 4 to 5 minutes before slicing.
For a 2-inch thick steak, the rule stretches to roughly 5 minutes per side over direct heat, then a finish on the cool side until the center climbs to 120°F to 125°F. Expect 12 to 18 minutes total.
Flavor and Texture: How the Methods Differ
Stove-seared and grilled steaks taste different in three specific ways: crust, smoke, and moisture.
Crust. Pan-seared steak has a continuous, even brown crust covering the entire seared face. Grilled steak has a patterned crust with darker char lines where the grates contacted the meat, and lighter browning in between. The total area of Maillard browning is higher on the pan-seared steak in our side-by-side tests.
Smoke. Grilled steak carries volatile phenols from the combustion of fat, wood, and charcoal. These compounds (guaiacol, syringol, and others) smell and taste like summer cookouts. Pan-seared steak carries no smoke flavor unless you add smoked salt or paprika. It does, however, carry butter and herb flavors if you baste.
Moisture and fat. Pan-seared steak keeps nearly all its rendered fat in the pan. Grilled steak loses 10 to 20 percent of its fat through the grates. That fat carries flavor, so grilled steak can come out slightly leaner-tasting, especially on already-lean cuts.
The Hybrid Method: Best of Both Worlds
You do not actually have to choose. The hybrid method uses both the stove and the grill (or the oven) to combine the strengths of each.
- Reverse sear (oven then grill): Cook a thick steak low and slow in a 250°F oven until it is 115°F internal. Then sear it hard on a ripping-hot grill for 90 seconds per side. You get edge-to-edge pink with a charred, smoky crust. This is the most forgiving method for 2-inch-plus cuts.
- Stove sear, oven finish: Sear in cast iron for 2 minutes per side, then transfer the whole pan to a 400°F oven until the steak hits your target temp. Best when you want a butter-basted finish with no grill.
- Grill sear, stove baste: Get the grill marks and smoke outside, then move the steak into a hot cast iron with butter and aromatics for the final minute. This is the move if you want both char and a basted finish.
For most home cooks, the reverse sear is the single highest-success-rate method for thick steaks. It is harder to overcook, easier to schedule, and produces restaurant-quality results with a basic setup.
Apartment and No-Grill Alternatives
No outdoor space? You can still get close to grilled flavor indoors.
- Cast iron grill pan: A ridged grill pan on a high-heat burner delivers sear marks and a partial char. It will not smoke like an outdoor grill, but it gets surprisingly close on a well-ventilated stovetop.
- Stovetop to broiler: Sear the steak in cast iron for 2 minutes per side, then slide the pan under a preheated broiler 3 to 4 inches from the element for 2 to 3 minutes. The broiler mimics the radiant heat of a grill lid.
- Camping or portable grills: A small charcoal chimney starter on a balcony or a portable gas grill can replicate most of the outdoor experience in tight spaces (check local fire ordinances first).
Health and Nutrition: Grilling vs Pan-Searing
Both methods are healthy in moderation. The differences come down to two compounds formed at high heat: heterocyclic amines (HCAs) and polycyclic aromatic hydrocarbons (PAHs).
HCAs form when amino acids and creatine react at high temperatures, more on the surface of well-done meat. PAHs form when fat drips onto hot coals or heating elements and smoke carries them back up onto the food. Grilling produces more PAHs; long, hot pan-searing produces more HCAs.
To reduce both: avoid flame flare-ups, trim excess fat, marinate briefly (even 30 minutes helps), do not overcook, and flip often. Both methods are still safer than deep-frying or charring over open wood.
On fat retention, grilling wins for calorie-conscious cooks since fat drips away. Pan-searing retains the fat, which adds flavor but also adds calories back into the steak.
Decision Framework: Which Method Should You Use
Match the method to the moment, the cut, and your equipment.
- Weeknight dinner, 1-inch steak, indoor: Cast iron on the stove. Fast, controlled, no grill to fire up.
- Weekend BBQ, social cooking, 1.5 to 2 inch steak: Grill with a two-zone setup. Flavor and atmosphere pay off.
- Thick cut (2 inches or more), doneness precision matters: Reverse sear (oven then grill or cast iron). Most forgiving.
- Lean cut like sirloin or flank: Pan-sear to retain moisture and baste with butter. Grilling dries lean cuts fast.
- Well-marbled ribeye or strip: Either method works beautifully. Pick by occasion.
- Bone-in cowboy or tomahawk: Grill with indirect finishing. The bone insulates, so the stove is harder to manage.
- Winter or apartment: Stove or broiler. Skip the outdoor grill entirely.
- Filet mignon: Cast iron with a butter baste. The cut is mild; the baste carries the flavor.
The simple version: cast iron for crust and control, grill for smoke and atmosphere, reverse sear for thick steaks and precision.
Frequently Asked Questions
How long do you sear a 2 inch thick steak?
For a 2 inch thick steak on the stove, sear 2 to 3 minutes per side in a smoking-hot cast iron pan, then transfer the whole pan to a 400°F oven and cook until the internal temperature reaches 120°F to 125°F for medium-rare. Expect 10 to 14 minutes total. On a grill, sear 4 to 5 minutes per side over direct high heat, then move the steak to the cool side and cook until it hits the same internal temperature.
What is the 4-4-4 rule for grilling steak?
The 4-4-4 rule is shorthand for grilling a 1 inch thick steak: 4 minutes on the first side over direct high heat, flip, 4 minutes on the second side with the lid closed, then rest the steak off the heat for 4 minutes before slicing. Pull the steak when the internal temperature hits 125°F for medium-rare. For thicker cuts, extend each side to 5 to 6 minutes and finish on the cool side of a two-zone fire.
Is it better to sear a steak before or after grilling?
For thick steaks (1.5 inches or more), the reverse sear works best: cook low and slow first (in an oven or on the cool side of the grill) until the steak is 10 to 15°F below your target, then sear hard over high heat for 60 to 90 seconds per side. This produces even doneness from edge to edge plus a charred crust. For thin steaks (under 1 inch), a single direct-heat sear on the grill is faster and gives better results.
Should I sear steak in oil or butter?
Use a high smoke-point oil for the initial sear (avocado, grapeseed, or refined olive oil all work), then add butter only in the final minute. Butter burns at 350°F, well below the 450°F+ surface temperature needed for a proper Maillard crust. Adding butter too early creates a bitter, acrid smoke. The classic move: grapeseed oil to sear, butter plus thyme and garlic to baste at the end.
Does grilled steak taste different from pan-seared steak?
Yes, and the difference is mostly smoke. Grilled steak picks up volatile phenolic compounds from the combustion of fat, wood, and charcoal, giving it a smoky, summer-cookout flavor. Pan-seared steak tastes more caramelized and beefy, with optional butter and herb notes from basting. The crust on pan-seared steak is also more uniform, while grilled steak has a patterned char from the grates.
How hot should the grill or pan be for searing steak?
The cooking surface should be at least 450°F for a proper sear, with 500°F being ideal for a cast iron skillet. On a gas grill, preheat with the lid closed for 10 to 15 minutes on high. On charcoal, wait until the coals are mostly white and you can hold your hand 4 inches above the grates for only 2 to 3 seconds. If the pan or grill is not hot enough, the steak will steam and turn gray instead of browning.
Which method gives a better crust: grill or cast iron pan?
A cast iron pan gives a better, more uniform crust because the flat metal contacts 100 percent of the meat surface, producing continuous Maillard browning. A grill only touches the steak where the grates meet the meat, leaving lighter bands between the sear lines. For pure crust quality, cast iron wins. For smoky flavor layered onto the crust, the grill wins. The reverse sear method (oven then grill) combines both advantages.
Final Verdict: Stove vs Grill for Steak
When it comes to searing steak on the stove vs the grill, there is no universal winner. The stove wins on crust consistency, control, and indoor accessibility. The grill wins on smoky flavor, fat reduction, and the social experience of outdoor cooking.
If you have to pick one method for most situations, buy a 12 inch cast iron skillet and master pan-searing with a butter baste. Then, when the weather cooperates and you have thick steaks or a crowd, fire up the grill for the smoky flavor and the experience. For thick cuts where edge-to-edge doneness matters, the reverse sear is the move that makes everyone at the table happy.
Pull out an instant-read thermometer, dry-brine your steak 45 minutes ahead, and pick the method that fits the moment. That is the entire game.